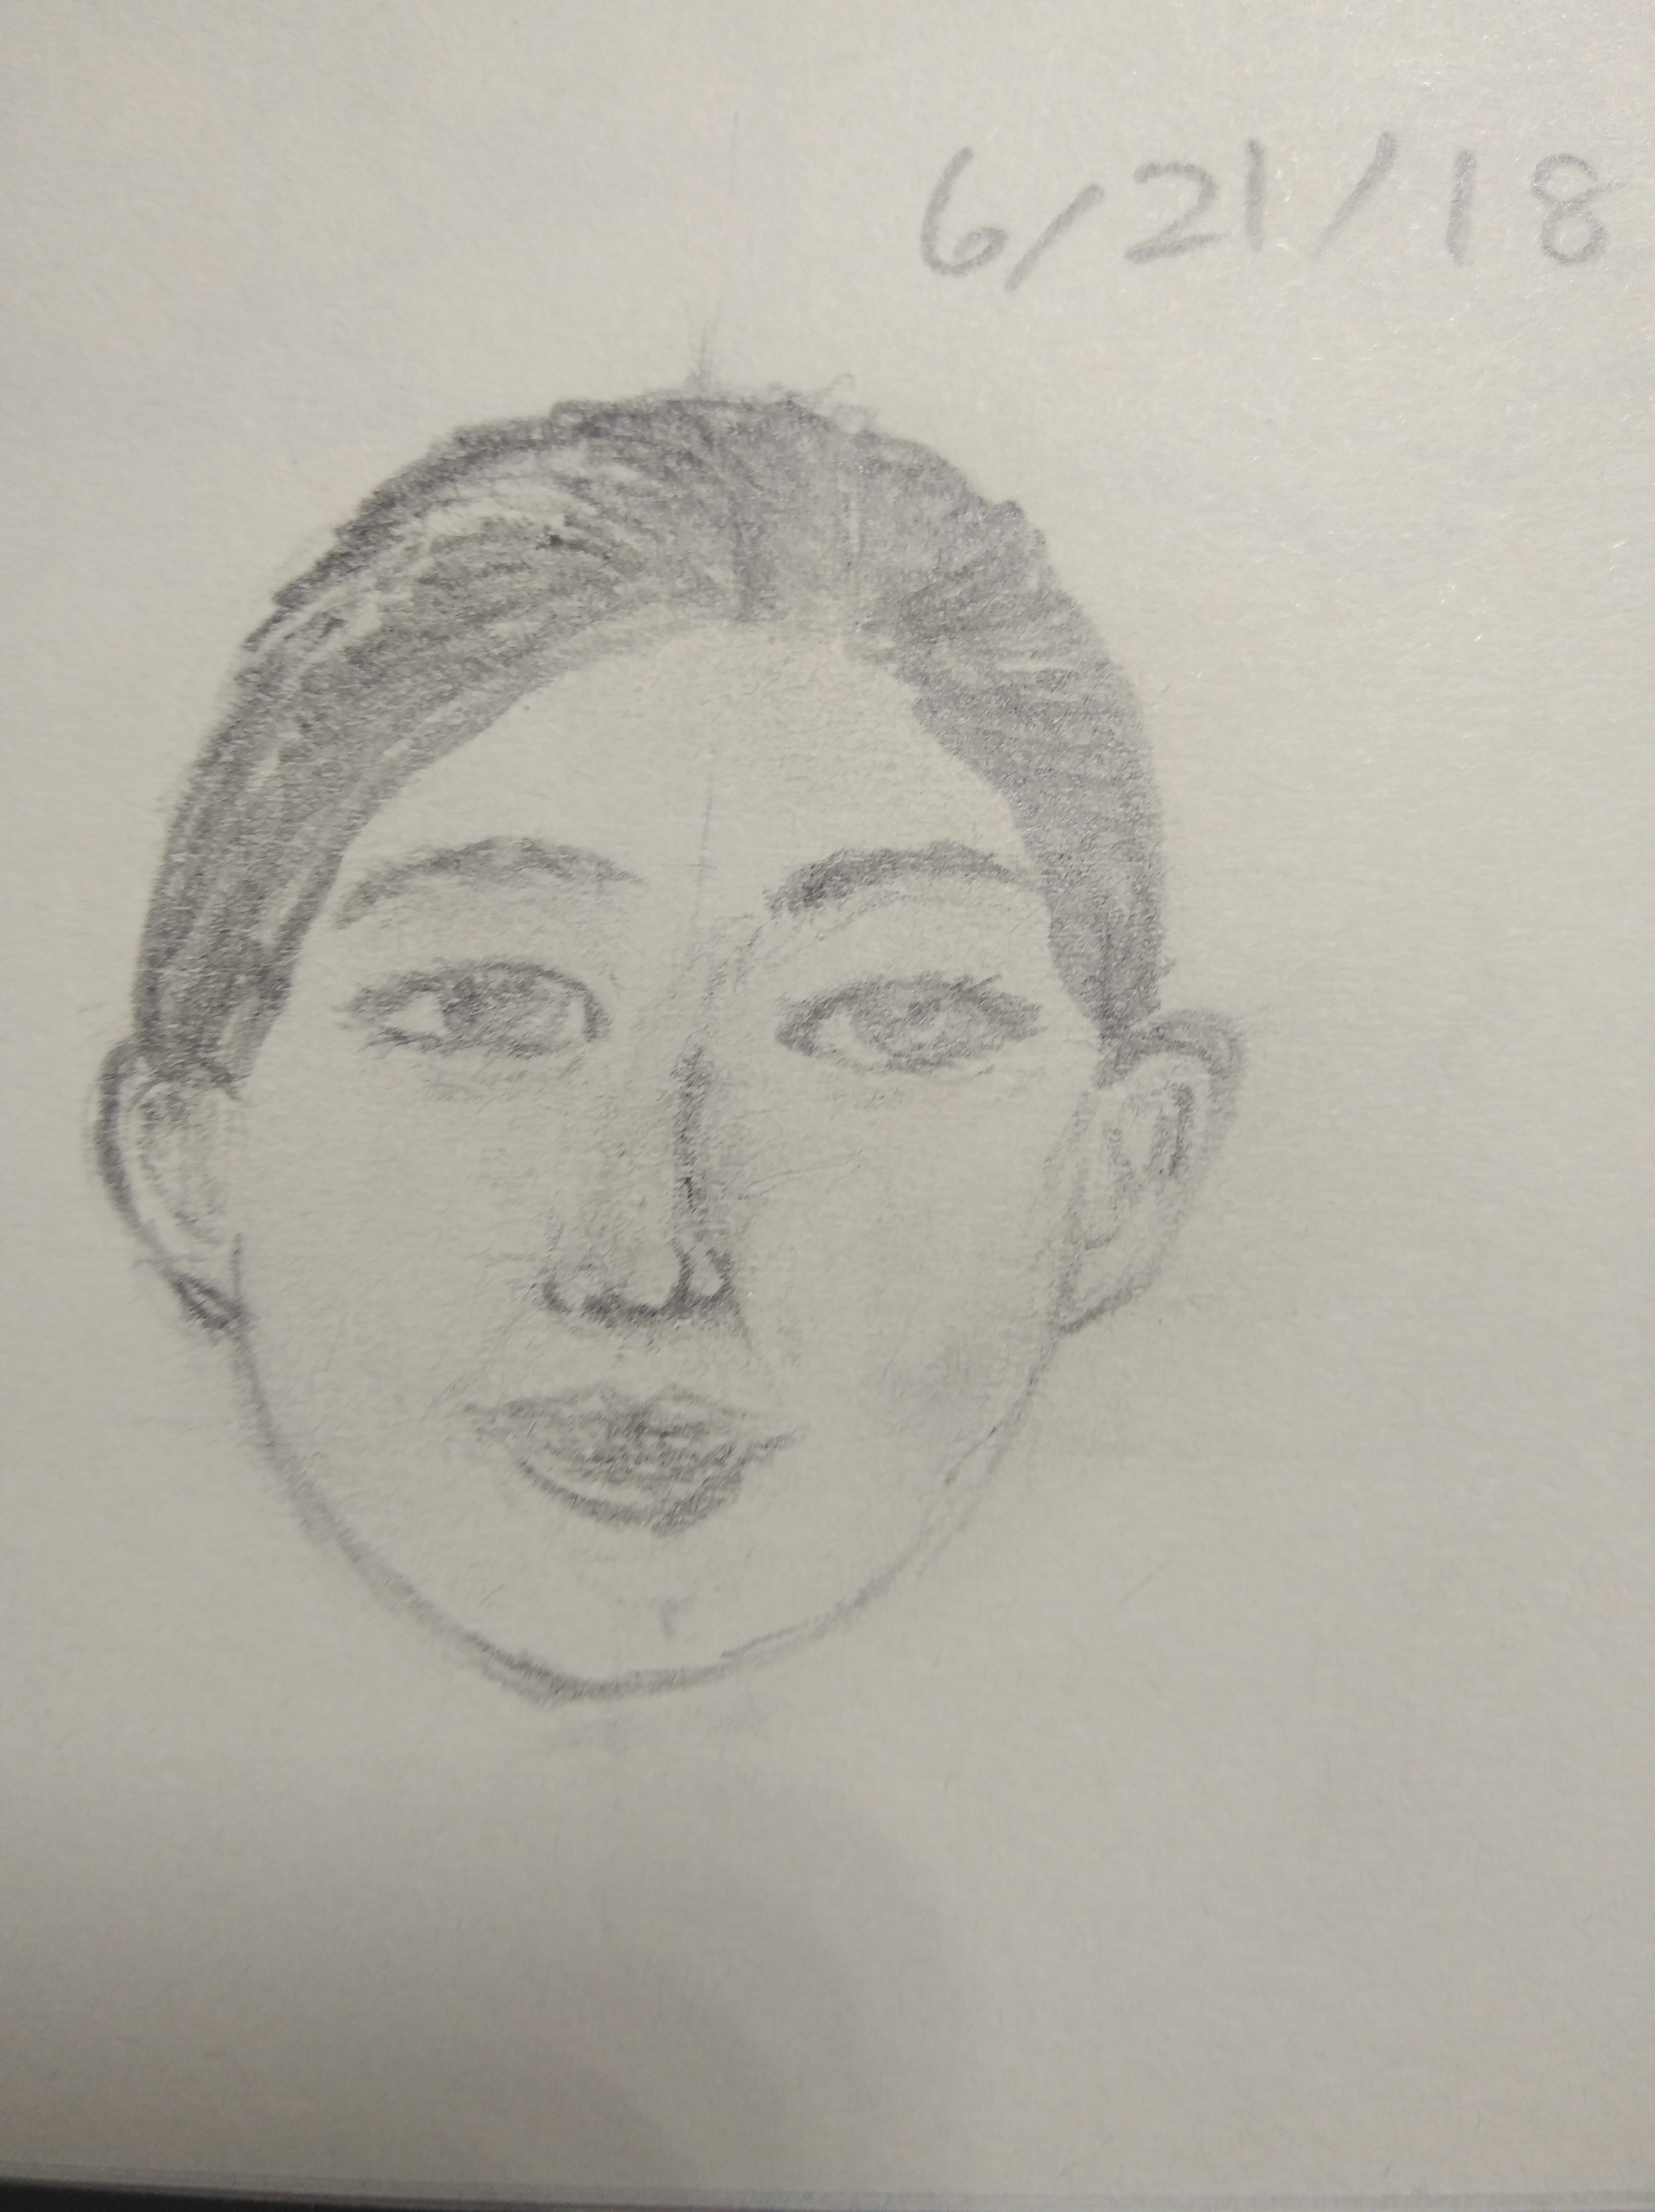
Try sketching your first portrait
Sketch your first portrait by observing a friend's face, measuring proportions with pencil, practicing shading, and refining features step by step to create a likeness.

Drawing Apps
Step-by-step guide to sketch your first portrait
Step 1
Gather your drawing paper pencil eraser sharpener and a tissue or cotton swab for blending.
Step 2
Ask a friend to sit in a comfortable well-lit chair facing you.
Step 3
Sit across from your friend at the same eye level about an arm's length away.
Step 4
Hold your pencil at arm's length vertically to measure the top of the head to the chin and transfer that measurement to your paper with two light dots.
Step 5
Hold the pencil horizontally to measure the left-to-right face width and mark two light dots for the sides on your paper.
Step 6
Connect the top chin and side dots and draw a light oval for the head.
Step 7
Draw a straight vertical center line down the middle of the oval.
Step 8
Draw a horizontal eye line halfway down the oval.
Step 9
Put a light mark for the nose line halfway between the eye line and the chin.
Step 10
Put a light mark for the mouth line about one third of the way above the chin.
Step 11
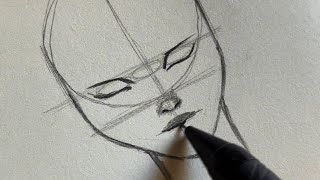
Lightly sketch the basic shapes of the eyes nose and mouth using the guide marks you made.
Step 12
Add ear and hair shapes where they appear on your friend's head.
Step 13
Add small details like eyelids nostrils and the curve of the lips with light careful lines.
Step 14
Shade the shadow areas with short strokes and blend gently with your tissue or cotton swab then erase extra guidelines and refine small details to improve the likeness.
Step 15
Share your finished portrait on DIY.org
Help!?
What can I use if I don’t have a tissue or cotton swab for blending?
If you don't have a tissue or cotton swab for blending the short-stroke shading, use a clean fingertip, a rolled piece of paper towel, a Q-tip, or a paper blending stump as an alternative.
My portrait looks out of proportion after I drew the oval—what should I check and fix?
If the oval is too narrow or wide, re-measure by holding your pencil at arm's length vertically and horizontally again, erase the incorrect light dots, and adjust them before connecting to redraw the head shape.
How can I adapt this activity for different ages?
For younger kids simplify by drawing a single light oval and big basic shapes for eyes and mouth with crayons and skipping blending, while older kids can follow all measurement steps, add small details like eyelids and nostrils, and practice shading and blending with a tissue or cotton swab.
How can we extend or personalize the finished portrait?
Personalize the portrait by adding your friend's hairstyle, clothing and a simple background, refine details and shading with short strokes and blending, then photograph it to share on DIY.org.
Watch videos on how to sketch your first portrait
Self Portrait Drawing for 3rd- 5th Grade | How to Draw a Face Step-by-Step Tutorial for Kids
4 Videos
Self Portrait Drawing for 3rd- 5th Grade | How to Draw a Face Step-by-Step Tutorial for Kids
How to draw easy face for beginners with these Technique | Easy Portrait Drawing Tutorial
How To Draw A Self Portrait: For Kids!
Step-by-Step Portrait Drawing Made Easy | Complete Guide for Beginners
Facts about portrait drawing for kids
🎯 Artists often use “sighting” with a pencil to compare angles and distances — it’s a simple measuring trick anyone can learn!
✏️ A helpful rule: the eyes usually sit about halfway down the head — a quick shortcut for starting a portrait.
🌗 Shading with three values (light, midtone, shadow) can make a flat sketch look like a real face.
👀 Humans are wired to spot faces quickly — that’s why tiny changes in features make a portrait look like someone specific.
🖼️ Leonardo da Vinci studied proportions closely (he drew the Vitruvian ideas) to make faces and bodies look lifelike.
How do I help my child sketch their first portrait step by step?
What materials do I need to sketch a child's first portrait?
What ages is trying a first portrait suitable for?
What are the benefits of teaching kids to sketch portraits?
