Test Your Bridge on Roblox Studio
Design and build a bridge in Roblox Studio, then test stability by adding vehicles or weights to learn about balance, forces, and problem-solving.


Step-by-step guide to test your bridge on Roblox Studio
Step 1
Open Roblox Studio and start a new Baseplate project.
Step 2
Save the project and name it "Bridge Test".
Step 3
Add two Block parts and place one on each bank where your bridge will sit.
Step 4
Use the Scale tool to make the support blocks tall and wide enough to hold a bridge deck.
Step 5
Add several thin Block parts to act as planks for the bridge deck.
Step 6
Move the deck parts so they span the gap and sit on top of the supports.
Step 7
Select all the deck parts and group them into one model to make them easier to move.
Step 8
Select the support blocks and set their Anchored property to true so they do not move.
Step 9
Select the grouped deck and set its Anchored property to false so physics will affect it.
Step 10
Insert a vehicle model from the Toolbox and place it at one end of the bridge.
Step 11
Press Play to start the simulation.
Step 12
Drive the vehicle across the bridge using the vehicle controls to test stability.
Step 13
Stop the simulation after the test finishes.
Step 14
Edit the deck thickness or move the supports to make the bridge stronger if it failed.
Step 15
Share your finished bridge and what you learned on DIY.org.
Help!?
What can I use if I can't find a vehicle model in the Toolbox to test the bridge?
If you can't find a vehicle in the Toolbox, build a simple test vehicle by grouping a few Block parts into a body and wheel shapes, unanchor the group, and place it at one end so physics will move it across the bridge.
My vehicle falls through or the bridge collapses during Play—what should I check?
If the bridge fails, confirm the support blocks have Anchored = true, the grouped deck is unanchored so physics affects it, the deck parts actually sit on top of the supports (not barely touching), and try increasing deck thickness or moving the supports closer with the Scale tool.
How can I adapt the activity for younger or older kids?
For younger kids use fewer, thicker Block parts for the deck and very wide support blocks (use the Scale tool) so the Toolbox vehicle easily crosses, while older kids can add Constraints (Welds/Hinges), experiment with thinner planks, or script a weight test to measure when the bridge fails.
How can we extend or personalize our bridge beyond the basic test?
To enhance the project, change part Colors and Materials, add guardrail planks and decorative parts, test multiple vehicle models from the Toolbox and different deck thicknesses or support positions, then share your finished bridge and findings on DIY.org.
Watch videos on how to test your bridge on Roblox Studio
Roblox studio tutorial : How to make a glass bridge game
4 Videos

Roblox studio tutorial : How to make a glass bridge game
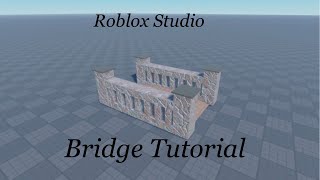
Roblox Studio Bridge Tutorial

Roblox studio speed build : Golden Gate Bridge
The ULTIMATE Beginner Guide to Roblox Studio.. (Start BUILDING Now!)
Facts about bridge engineering and physics
🎮 Roblox Studio uses the Lua programming language to script how parts move and interact — perfect for building bridges that behave realistically.
🏗️ The world's longest bridge, the Danyang–Kunshan Grand Bridge, stretches about 164.8 km — real bridges can be enormous!
⚖️ Bridge engineers use load testing and safety factors (often around 1.5–2×) so structures stay safe even under surprises.
🚗 In tests, heavy point loads (like a single vehicle) can cause failure quickly, while distributed loads (many small weights) spread the force more evenly.
🧠 Designing bridges in Roblox teaches trial-and-error problem-solving: build, test, observe what fails, and try a smarter design—just like real engineers.
How do I design, build, and test a bridge in Roblox Studio?
What materials and tools do I need to test a bridge in Roblox Studio?
What ages is this Roblox bridge-building activity suitable for?
What safety tips should parents follow when kids test bridges in Roblox Studio?
