Tell us what do you like the most about procreate.
Make a colorful digital animal portrait in Procreate using brushes and layers to practice drawing, color blending, and simple layer organization skills.

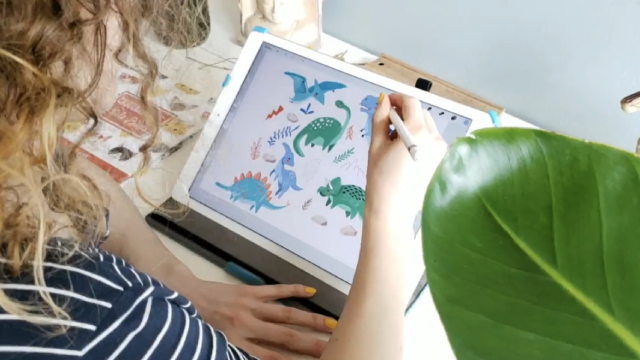
Step-by-step guide to make a colorful digital animal portrait in Procreate
Step 1
Open the Procreate app.
Step 2
Tap the + button to create a new canvas.
Step 3
Insert your reference photo into the canvas.
Step 4
Lower the reference photo layer opacity to about 50 percent.
Step 5
Add a new layer above the reference layer for sketching.
Step 6
Choose a sketch brush from the brush library.
Step 7
Draw simple shapes for the animal's head body eyes and nose on the sketch layer.
Step 8
Add a new layer below the sketch layer for base colors.
Step 9
Pick a base color from the color picker.
Step 10
Paint flat color areas inside your sketch on the base color layer using a broad brush.
Step 11
Add a new layer above the base colors for shading.
Step 12
Select a soft low-opacity brush for blending.
Step 13
Paint shadows and highlights on the shading layer to blend colors gently.
Step 14
Export your finished portrait as a PNG using the Share menu.
Step 15
Share your finished colorful digital animal portrait on DIY.org.
Final steps
You're almost there! Complete all the steps, bring your creation to life, post it, and conquer the challenge!

Help!?
What can I use if I don't have the Procreate app or an Apple Pencil?
If you don't have Procreate or an Apple Pencil, use a touch-friendly app such as Autodesk SketchBook or Procreate Pocket and draw with your finger or a third-party stylus while still creating a canvas, inserting a reference photo, using layers, and exporting a PNG as in the instructions.
My colors keep going outside the sketch—how do I fix that?
If paint bleeds outside your sketch, keep the base color layer below the sketch layer and either use the Selection or Fill tool to confine color, or enable Alpha Lock / create a clipping mask on the base color area before painting.
How can I change the activity to suit different age groups?
For younger kids, simplify to only a sketch layer and one base color layer with a broad brush and no shading, while older kids can add multiple shading layers, custom brushes from the brush library, and finer details before exporting the PNG.
What are ways to enhance or personalize my finished animal portrait?
Personalize it by adding a textured background layer behind the base colors, experimenting with different sketch and shading brushes for fur or fur-like highlights, tweaking layer opacities for mood, and then exporting the PNG to share on DIY.org.
Watch videos on how to make a colorful digital animal portrait in Procreate
20 EASY Doodles You Can Draw in PROCREATE
4 Videos

20 EASY Doodles You Can Draw in PROCREATE
Procreate for Kids Tutorial // How to Use Procreate for Kids!

Intro to Procreate - The Basics for Beginners in 10 Minutes
PROCREATE Drawing Made EASY - Beginner Step-by-Step Tutorial
Facts about digital art for kids
✏️ When you use an Apple Pencil with Procreate it senses pressure and tilt, letting you make thicker or thinner strokes naturally.
🖌️ Procreate includes hundreds of brushes and you can customize or create your own for different animal fur and textures.
🎨 Procreate is a raster-based app, so it paints like real media—great for blending colors and soft shading.
🧩 Procreate saves layered artworks in a .procreate file so your layers, blend modes, and brushes stay editable.
🌈 The smudge tool and layer blend modes make color mixing easy—try layering colors and smudging for realistic fur or feathers.
How do I make a colorful digital animal portrait in Procreate?
What materials do I need for a Procreate animal portrait?
What ages is this Procreate activity suitable for?
What are the benefits, safety tips, and variations for this activity?


One subscription, many ways to play and learn.
Only $6.99 after trial. No credit card required