Take a Picture of the Night Time!
Take night photos using a phone or camera on a tripod, try long exposures or light painting, and learn safe outdoor photography with an adult.

Step-by-step guide to take night photos
How to Photograph the Night Sky | National Geographic
Step 1
Ask an adult to join you and pick a safe nearby spot to take night photos.
Step 2
Put on your warm jacket and shoes so you stay comfortable outside.
Step 3
Gather your phone or camera tripod or stable surface and your small flashlight or glow sticks.
Step 4
Mount your phone or camera securely on the tripod or place it steady on the stable surface.
Step 5
Point the camera at something interesting and move closer or farther until it looks good in the frame.
Step 6
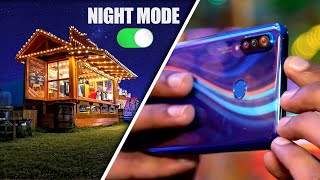
Turn on night mode or choose a long exposure setting around 1–5 seconds on your camera.
Step 7
Set a 2–5 second timer or use a remote shutter so the camera stays still when you take the photo.
Step 8
Press the shutter to take a test photo and look at the picture on the screen.
Step 9
Start a long exposure and wave your flashlight or glow stick through the frame to make light-painting designs.
Step 10
Try changing the exposure time or the speed you wave the light to make different effects.
Step 11
Scroll through your photos and pick your favorite image.
Step 12
Put away your gear and make sure the area is clean before you go home.
Step 13
Share your favorite night photo on DIY.org.
Final steps
You're almost there! Complete all the steps, bring your creation to life, post it, and conquer the challenge!

Help!?
If I don't have a tripod or a small flashlight, what can I use instead?
Mount your phone on a steady surface like stacked books or a picnic table and use a headlamp, LED keychain, or your phone screen as a light source while using the 2–5 second timer instead of a tripod or remote shutter.
My long-exposure photos look blurry or too dark—what should I check and change?
Make sure the camera is mounted securely on the tripod or stable surface, increase the timer to 2–5 seconds or use a remote shutter to prevent movement, and lengthen the exposure time or wave your flashlight/glow stick more slowly to brighten the image.
How can I adapt this activity for younger kids or older kids who want more challenge?
For younger kids, have an adult hold the camera steady while the child waves glow sticks close with short 1–2 second exposures, and for older kids let them set 3–5 second long exposures, experiment with night mode/manual settings, and try different light speeds and distances.
What are some fun ways to extend or personalize our night photos before sharing them on DIY.org?
Use colored gels or tape over your flashlight, create themed light-painting shapes with multiple glow sticks, take several exposures and combine them in a simple photo editor, or make a mini gallery of favorites to post on DIY.org.
Watch videos on how to take night photos
Night Vision | Ready, Set, Zoom!
4 Videos

Night Vision | Ready, Set, Zoom!
Become an Epic Kid Photographer

The Huawei P20 Pro camera can see in the Dark!
Night Mode on a BUDGET Smartphone Camera!?
Facts about night photography for kids
✨ The artist Pablo Picasso once 'drew' with light in photos taken by photographer Gjon Mili—an early famous light-painting collaboration.
🧭 A tripod and a remote shutter or timer are the easiest ways to stop camera shake and get crisp long-exposure shots.
📱 Many modern smartphones use multi-frame stacking (Night Mode) to brighten dark scenes and reduce noise automatically.
🌙 Night photography often uses exposures that last seconds or even minutes to capture details our eyes can't see.
🦺 When shooting at night always go with an adult, carry a flashlight, and wear something reflective so you can stay safe and visible.
How do I take night photos with my child using a phone or camera?
What materials and gear do we need for a safe night photography session?
What ages are suitable for night photography and how can I adapt it?
What safety tips, benefits, and creative variations should we know?


One subscription, many ways to play and learn.
Only $6.99 after trial. No credit card required