Take a photo using an invented filter
Design and build a simple physical camera filter using colored gels or materials, then take and compare photos using your invented filter to explore effects.


Step-by-step guide to design and use an invented camera filter
Step 1
Gather all the materials from the list and bring them to a clear tabletop or desk.
Step 2
Decide what special look you want your filter to create like a warm orange glow bright blue tint or soft blur.
Step 3
Cut a rectangle of cardboard about the size of your phone camera area to make a filter holder.
Step 4
Use the scissors to cut a round or square hole in the center of the cardboard just a little bigger than your camera lens.
Step 5
Cut a piece of colored cellophane a bit larger than the hole so it can fully cover the opening.
Step 6
Tape the cellophane flat over the hole so light will shine through the color evenly.
Step 7
If you want a layered color, cut a second color of cellophane and tape it on top of the first piece.
Step 8
If you want patterns, gently punch a few tiny holes or tear a small shape in one layer to make star or stripe effects.
Step 9
Fasten the cardboard filter to your camera by holding it over the lens and wrapping the rubber band around the phone or using small pieces of tape to keep it lined up.
Step 10
Set your camera to photo mode and keep the same zoom and brightness settings for every picture to make a fair comparison.
Step 11
Take a clear photo without the filter so you have a baseline picture to compare.
Step 12
Put your finished filter over the lens and take a photo using your invented filter.
Step 13
Try one quick change like moving the filter a tiny bit or adding one more layer and take a third photo to see the difference.
Step 14
Look at the three photos side by side and write or draw one sentence about how the colors and light changed with your filter.
Step 15
Share a photo of your finished filter and your favorite filtered photo on DIY.org to show your invention to others.
Help!?
I can't find colored cellophane — what can I use instead?
Use a piece of colored tissue paper, a translucent plastic folder, or cut a thin colored plastic shopping bag to cover the hole in the cardboard just as you would the cellophane.
My filter keeps slipping or the color looks uneven — what should I do?
Smooth the cellophane flat before taping, make sure the hole you cut is just a little bigger than the camera lens, and secure the cardboard with a rubber band or small pieces of tape so it stays aligned over the lens.
How can I change this activity for a 4-year-old or a 12-year-old?
For a 4-year-old have an adult pre-cut the cardboard hole and one sheet of cellophane for them to tape and punch one big shape, while a 12-year-old can layer multiple colors, punch tiny patterns, control zoom/brightness, and write the comparison sentence themselves.
How can we make the filter more creative or use it for a school project?
Try layering different colored cellophane, tearing small shapes or adding sticker cutouts for patterns, take the baseline and changed photos to compare effects, and annotate the differences before sharing on DIY.org.
Watch videos on how to design and use an invented camera filter
Become an Epic Kid Photographer
4 Videos
Become an Epic Kid Photographer

Take a silly selfie | Fun Photography for kids | #doitwithdiy
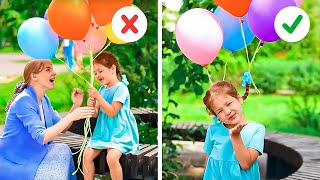
Amazing Photo Illusions To Try With Your Kids!
Invention of Camera - History of the Camera - When was Photography Invented? - Learning Junction
Facts about camera filters and basic optics
🎬 Colored gels (filters) have been used in theater and filmmaking for over 100 years to tint light and set a scene's mood.
🎨 Stack two colored gels and your camera will mix the light — red + blue light shows up as purple in the photo.
🌈 Digital camera sensors record red, green, and blue (RGB) light — combining red and green light appears yellow on images.
🔍 Pinhole cameras need much longer exposures than regular lenses because the tiny hole only lets in a little light.
♻️ You can make great DIY filters from everyday items like cellophane, colored plastic folders, sunglasses lenses, or cling wrap.
How do I design and use an invented camera filter for kids?
What materials are needed to build a simple physical camera filter?
What ages is this invented camera filter activity suitable for?
What are the benefits of making and testing a homemade camera filter?
