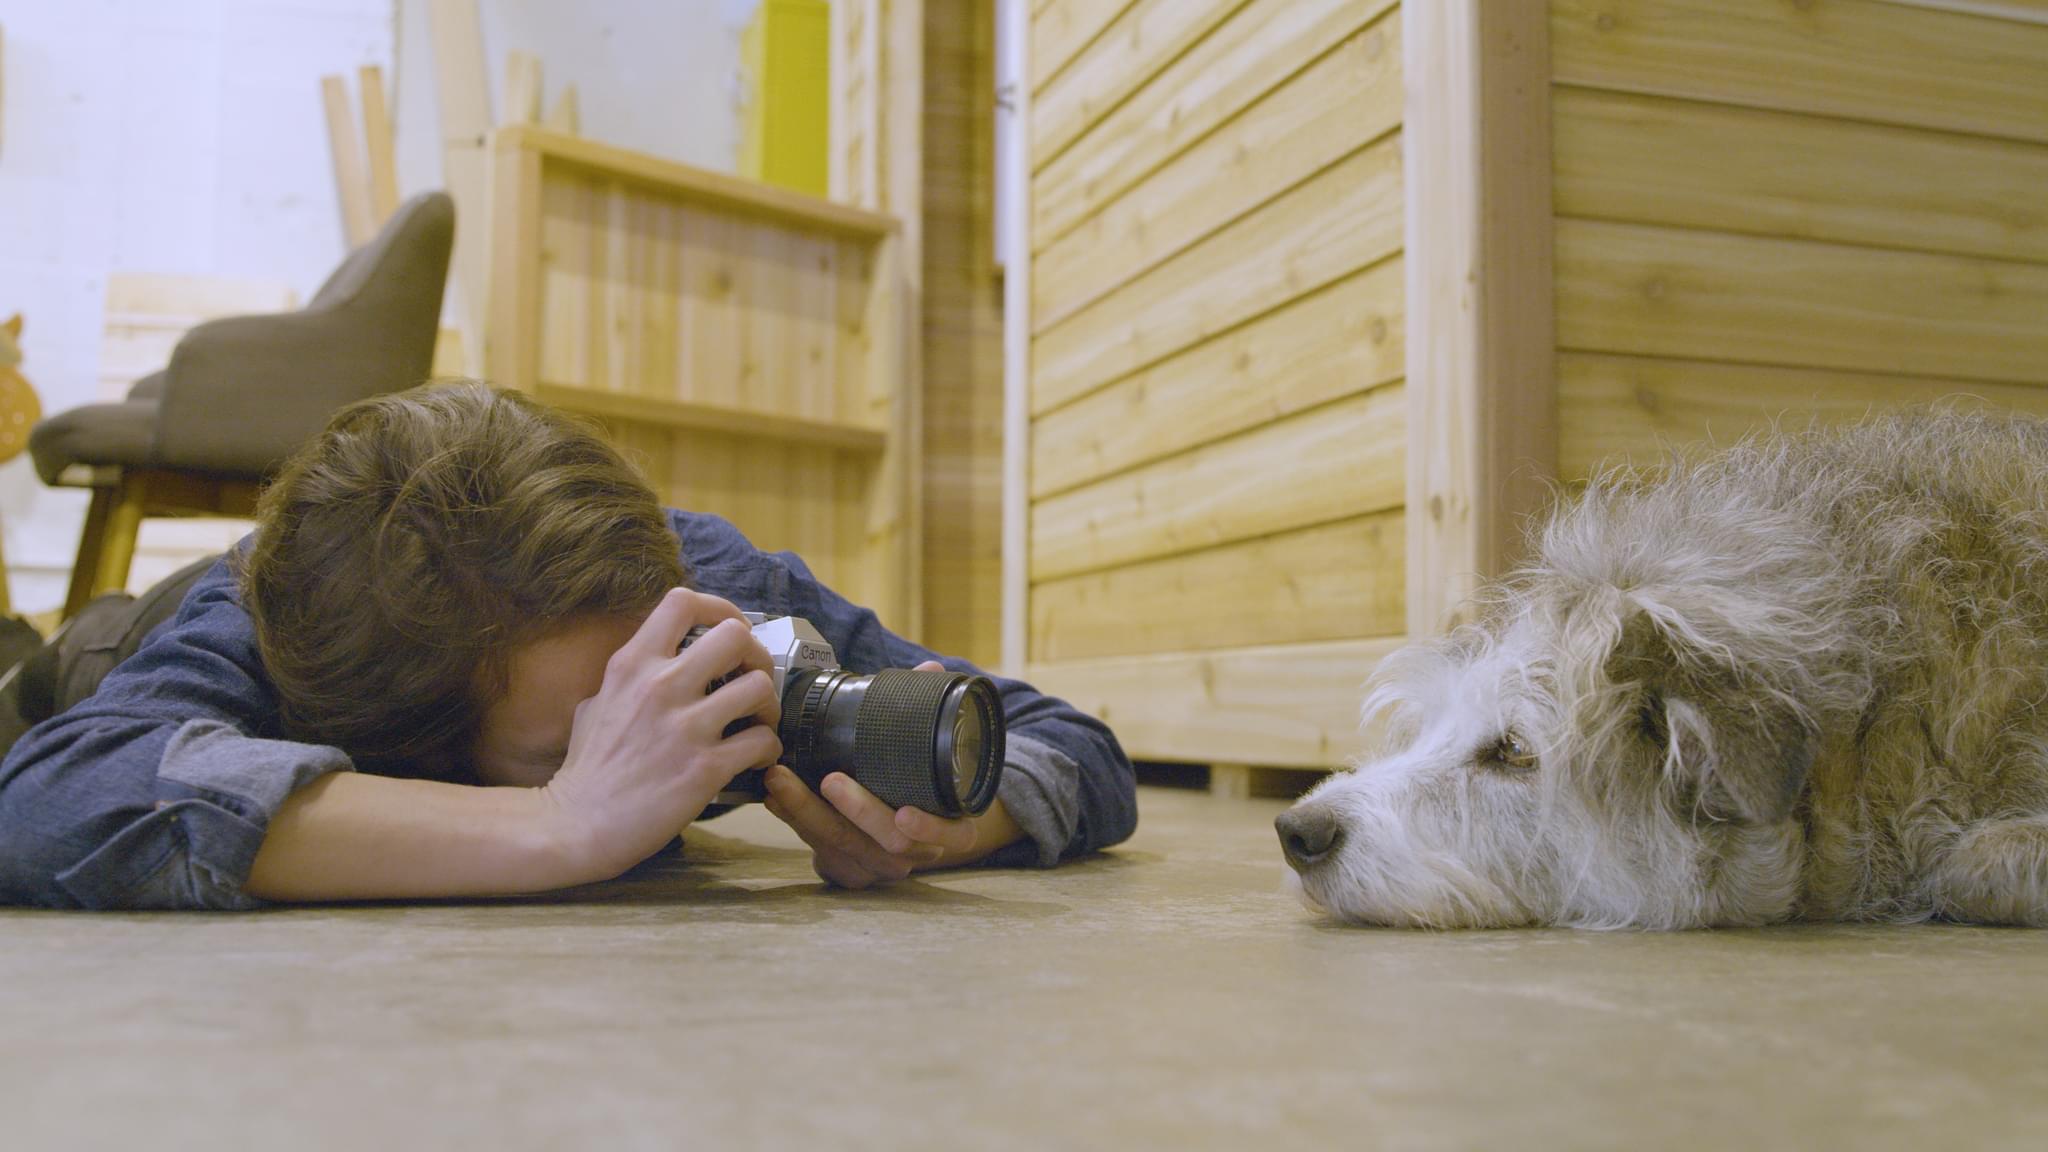
Take a photo of your pet from the floor
Lie on the floor and photograph your pet from their level, experimenting with angles, lighting, and patience to capture a friendly close-up.


Step-by-step guide to take a photo of your pet from the floor
Ferne and Rory Vet Tales | How to Look After a Puppy
Step 1
Choose a quiet spot on the floor near a window.
Step 2
Spread the soft blanket or mat on that spot.
Step 3
Invite your pet onto the blanket using a small treat or favorite toy.
Step 4
Lie down on your belly so your eyes are level with your pet.
Step 5
Hold your camera or phone low and steady at your eye level.
Step 6
Call your pet's name softly.
Step 7
Wait until your pet looks at you.
Step 8
Take a close-up photo when your pet is looking at you.
Step 9
Tilt the camera slightly upward and take another photo.
Step 10
Tilt the camera slightly downward and take another photo.
Step 11
Ask an adult to adjust curtains or lights if the light is too bright or too dark.
Step 12
Take one more photo with the softer light.
Step 13
Share your finished creation on DIY.org
Help!?
What can we use instead of a soft blanket or mat if we don't have one?
Use a towel, small rug, yoga mat, or a folded sheet spread on the same spot near the window as a substitute for the soft blanket or mat.
My pet won't stay on the blanket or won't look at me—what should I try?
Invite your pet onto the blanket with a small treat or favorite toy, call their name softly while holding the camera low and steady, and try a quieter spot near the window if they move away.
How can I adapt this activity for a toddler or a teenager?
For toddlers, have an adult help by holding the camera at the child's eye level while the child sits or lies on their belly on the blanket, and for teenagers let them handle the camera, practice tilting up and down, and edit shots before sharing on DIY.org.
How can we enhance or personalize the pet photos?
Add a colorful bandana or favorite toy on the blanket, ask an adult to adjust curtains or lights for softer light, use close-up and tilted shots as instructed, and add the pet's name or simple edits before sharing on DIY.org.
Watch videos on how to take a photo of your pet from the floor
How to Care for Your Dog - A Kid friendly tutorial
4 Videos
How to Care for Your Dog - A Kid friendly tutorial

Best New Puppy Surprise For Kids | Try Not To Cry

Teaching Kids to Care for Pets | Videos for Toddlers

Little Girl Reacts to Puppy Surprise | The Dodo
Facts about pet photography for kids
🐾 Shooting at a pet's eye level makes photos feel friendlier and more personal than top-down shots.
📷 A low-angle shot can make a small pet look bigger and more heroic in the frame.
☀️ Soft natural light (early morning or late afternoon) gives the nicest close-ups—harsh midday sun causes strong shadows.
🎯 Placing your pet's eyes near the top third of the photo follows the rule of thirds and often makes the picture more engaging.
⏱️ Using burst mode or a fast shutter speed helps you catch the perfect expression when pets move or blink.
How do I take a great floor-level photo of my pet?
What materials do I need to photograph my pet from the floor?
What ages is this floor-level pet photography activity suitable for?
What are the benefits and safety tips for lying on the floor to photograph pets?
