Take a Monochrome Portrait
Use a camera or smartphone to create a monochrome portrait, adjust lighting and composition, then edit to black and white to study tone and mood.


Step-by-step guide to take a monochrome portrait
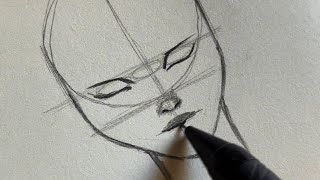
How to draw a black and white portrait using pastel pencils
Step 1
Decide what mood you want the portrait to show like serious happy or mysterious.
Step 2
Choose a plain background and tape or hang it so there are no distracting patterns.
Step 3
Place the chair or stool about one to two steps in front of the background.
Step 4
Set your lamp or position the subject near a window so light shines from one side of the face.
Step 5
Make a reflector by folding white paper or aluminium foil and hold it opposite the light to bounce gentle light back onto the shadow side.
Step 6
Ask your subject to sit on the chair and turn their face slightly toward the light for a gentle three-quarter angle.
Step 7
Hold the camera at the subject's eye level and move so the face and shoulders fill most of the frame.
Step 8
Tap the screen to focus on the eyes and use the exposure slider to make the image a bit darker so the brightest parts are not too bright.
Step 9
Take at least ten photos while the subject changes small expressions and head positions between shots.
Step 10
Look through your photos and pick the two that best show the mood you chose.
Step 11
Open one chosen photo in a photo app and convert it to black and white.
Step 12
Adjust contrast shadows and highlights until the tones show the mood clearly.
Step 13
Save your final black and white portrait and share your finished creation on DIY.org
Help!?
What can I use if I don't have a plain backdrop, lamp, or aluminium foil reflector?
Use a smooth bedsheet, large poster board, or plain wall taped with painter's tape as the background, use window light or a desk lamp instead of a studio lamp, and make the reflector from folded white paper, a white cereal box, or a mirror as suggested in the 'make a reflector' step.
My subject's shadow side is too dark or the highlights are blown out — what should I try?
Move the folded white paper or foil reflector closer opposite the lamp or window, soften the light by draping a thin white cloth over the lamp or window, and tap the screen to focus on the eyes then lower the exposure slider as the instructions say.
How can I adapt this portrait activity for younger children or teens?
For younger kids (about 4–7) shorten the shoot, have a parent hold the reflector and position the child on the chair while you take 3–5 photos, and for older kids (11+) encourage experimenting with three-quarter angles, reflector distance, manual exposure, and converting to black and white and adjusting contrast, shadows, and highlights.
What are simple ways to personalize or extend the project after I save the black and white portrait?
Make a mini-series by using the two chosen photos as a diptych, add small props that match your chosen mood before retaking shots, test different reflector materials and contrast settings during the black-and-white conversion, and then print or share the final portrait on DIY.org as instructed.
Watch videos on how to take a monochrome portrait
Amandine Comte show how to creat monochrome portrait art with Goldfaber Aqua Dual Marker
4 Videos
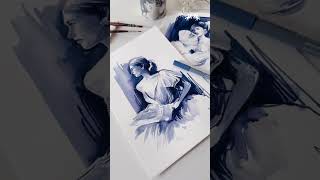
Amandine Comte show how to creat monochrome portrait art with Goldfaber Aqua Dual Marker

Unlock Your Portrait Drawing Skills: Loomis Method Tutorial Drawing girl
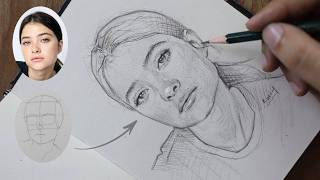
Step-by-Step Portrait Drawing Made Easy | Complete Guide for Beginners
You don't need artistic talent! Learn to draw portraits using loomis method✨
Facts about portrait photography for kids
📷 Many smartphones can shoot RAW photos, which keep more detail for richer black-and-white editing.
🖤 Black-and-white portraits highlight tone, texture, and shape — mood comes from light, not color.
💡 Side lighting and rim lighting are favorites for dramatic monochrome portraits because they sculpt the face with shadows.
🎛️ When you convert to monochrome you can adjust the luminance of individual colors so a red shirt can become light gray while blue skies turn dark.
🎞️ Ansel Adams helped develop the Zone System, a method photographers use to control exposure and capture a wide range of tones.
How do I take a monochrome portrait with my child?
What materials do I need to make a monochrome portrait (camera, lighting, apps)?
What ages is taking a monochrome portrait suitable for and when should parents supervise?
What are the benefits of photographing in black and white for children?
