Stitch something busted
Learn basic sewing to repair a ripped shirt or torn stuffed toy, practicing simple stitches, threading, and careful, safe needlework.


Step-by-step guide to stitch a ripped shirt or torn stuffed toy
Learn to Sew with Debbie Shore, Kids! Lesson 1
Step 1
Gather all the Materials Needed and set them on a clean well-lit table.
Step 2
Ask an adult to sit nearby to help and to check that the workspace is safe.
Step 3
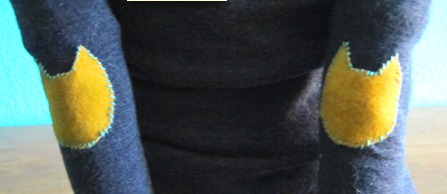
Lay the ripped shirt or torn stuffed toy flat and look closely at the tear to decide if it needs a patch or just a simple stitch.
Step 4
Place a scrap fabric patch behind the hole if the tear is larger than about one inch so the patch sits smoothly under the tear.
Step 5
Cut a single length of thread about 18 inches long using the scissors.
Step 6
Push one end of the thread through the needle eye so the thread goes all the way through.
Step 7
Tie a small knot at the thread end by looping the thread and pulling it tight.
Step 8
Bring the torn edges together so they match and secure them with pins or a clothespin.
Step 9
Start a running stitch by pushing the needle up through the fabric about a quarter inch from the edge and pulling the thread through.
Step 10
Continue sewing small even running stitches along the tear until you reach the other end.
Step 11
Make two tiny locking stitches on top of each other to secure the thread then trim the extra thread and remove the pins.
Step 12
Smooth the repaired area and share a photo of your finished repair on DIY.org
Help!?
What can we use if we don't have a sewing needle, pins, or the specific thread?
If you don't have a sewing needle or pins, ask an adult to let you use a large-eye plastic or tapestry needle and a clothespin (as the instructions already suggest) and substitute embroidery floss or doubled regular thread for the 18-inch thread.
My stitches are puckering or the tear keeps opening—what should I do?
If the fabric puckers or the tear keeps opening while you 'bring the torn edges together' and 'start a running stitch', loosen your tension, make smaller even quarter-inch running stitches, and place the scrap fabric patch behind the hole before sewing.
How can I adapt this activity for younger children or older kids?
For younger children use a blunt plastic needle, have an adult pre-thread the 18-inch thread and help with 'push the needle' and 'tie a small knot', while older kids can try smaller invisible stitches, use decorative patches, or practice a ladder stitch when joining the edges.
How can we make the repair look nicer or more fun?
To enhance the repair, sew a colorful scrap fabric patch with contrasting decorative stitches instead of plain running stitches, add embroidered initials, smooth the repaired area and then share a photo of the finished repair on DIY.org.
Watch videos on how to stitch a ripped shirt or torn stuffed toy
Learn to Sew with Debbie Shore, Kids! Lesson 2, blanket stitch
4 Videos

Learn to Sew with Debbie Shore, Kids! Lesson 2, blanket stitch
Simple Kids Apron Sewing Pattern - Step by Step Tutorial
Tips For Teaching Children How To Sew (Ages 2-11+) | Paige Handmade
Sewing Tutorial-How to do a basic running stitch.
Facts about basic sewing and mending for kids
🧵 Sewing goes back thousands of years — archaeologists have found ancient needles made from bone used to stitch clothing.
🪡 Two of the first stitches people learn are the running stitch and the backstitch — backstitch is extra strong for repairing rips.
🧶 Darning is a weaving-style mending method that can make holes in socks or toys strong again and even look decorative.
🧸 Many stuffed toys can be rescued with just a few careful stitches and a bit of spare stuffing — perfect for fixing a favorite friend!
♻️ Mending clothes instead of tossing them reduces waste and helps the planet — tiny repairs can keep fabric out of landfills.
How do I teach my child to stitch a ripped shirt or repair a torn stuffed toy?
What materials do I need to repair a ripped shirt or stuffed toy?
What ages is basic sewing for repairs suitable for?
How can I keep children safe while they learn sewing to repair toys and clothes?
