Show Off Your Restaurant on Scratch
Design and code a playful restaurant on Scratch with animated sprites, interactive menu buttons, sound effects, and customer orders to showcase your creativity.

Step-by-step guide to Show Off Your Restaurant on Scratch
Step 1
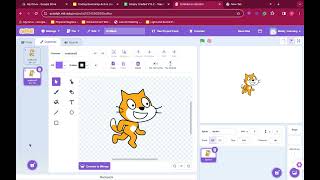
Open Scratch and start a new project.
Step 2
Pick a fun restaurant theme and quickly sketch the layout on your paper.
Step 3
Create or choose a backdrop in Scratch that matches your sketch.
Step 4
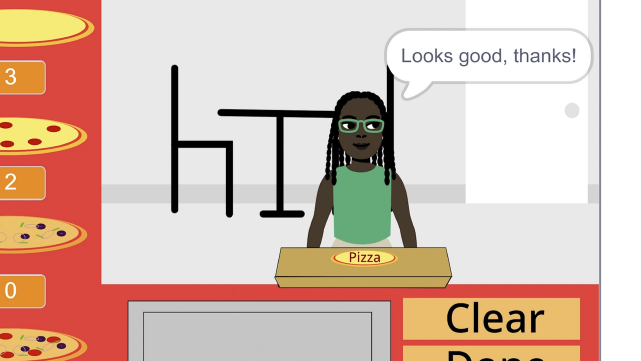
Add sprite characters for a chef and at least two customers.
Step 5
Edit each sprite's costumes to make two or more poses for simple animation.
Step 6
Add a script to each animated sprite that uses "when green flag clicked" then a "forever" loop with "next costume" and "wait" to animate them.
Step 7
Create menu button sprites and give each button a food name on its costume.
Step 8
For one menu button add a "when this sprite clicked" block that broadcasts a unique order message like "order pizza".
Step 9
Add a "play sound" block under the same button's click script so the button makes a sound when pressed.
Step 10
For each customer sprite add a "when I receive [order]" block that makes the customer say what they ordered.
Step 11
Add a second block to each customer so they glide or move to the counter after they say their order.
Step 12
Make a variable called "Tips" and add code to change it when an order is served correctly.
Step 13
Test your restaurant by clicking the green flag and trying the menu buttons until animations sounds orders and tips work smoothly.
Step 14
Share your finished restaurant project on DIY.org.
Final steps
You're almost there! Complete all the steps, bring your creation to life, post it, and conquer the challenge!

Help!?
If we don't have paper to sketch on or can't record sounds, what can we use instead?
Use the Scratch backdrop editor to draw your layout instead of paper and pick sounds from Scratch's built-in Sounds library (or 'Choose a Sound') instead of recording a new one.
My customers won't respond to menu clicks or the animations look wrong—what should I check?
Make sure the menu button's 'broadcast' message text exactly matches each customer's 'when I receive [order]' block and confirm every animated sprite's 'forever' loop includes a 'wait' between 'next costume' blocks so costumes advance properly.
How can I adapt the activity for younger or older kids?
For younger kids simplify by using one customer sprite, pre-made costumes and longer 'wait' times in the animation loop, while older kids can add a list to queue orders, extra menu buttons, and scripts that change the 'Tips' variable with more complex broadcast logic.
What are some easy ways to extend or personalize our Scratch restaurant project?
Add custom recorded sounds for menu buttons, give the chef extra costumes and a 'when I receive [serve]' script to animate cooking, use a list to handle multiple 'order' broadcasts, and show the running 'Tips' total on-screen before sharing on DIY.org.
Watch videos on how to Show Off Your Restaurant on Scratch
Introduction to Coding with Scratch | Beginner's Guide to Scratch Programming
4 Videos
Introduction to Coding with Scratch | Beginner's Guide to Scratch Programming
Get Started with Scratch Guide: 5 Tips & Tricks for Beginners 🎉
EASY BEGINNER TUTORIAL: Make Your Own BAKERY GAME on Scratch!
Scratch Basics - A Beginners Guide to Scratch
Facts about Scratch programming and interactive game design for kids
🧩 Broadcast messages and lists in Scratch help your restaurant handle button clicks and customer orders like a real event-driven kitchen.
🐱 Scratch began at the MIT Media Lab in 2007 and its default project sprite is a friendly cat!
🔊 Scratch includes a built-in sound editor so you can record, trim, and add effects to make menus and notifications pop.
🎨 Sprites are like actors on a stage: swapping costumes creates simple frame-by-frame animation for characters and food items.
🍽️ The word "restaurant" comes from the French restaurer, meaning "to restore" — early restaurants sold restorative broths.
How do I design and code a playful restaurant on Scratch?
What materials and tech do I need to make a Scratch restaurant?
What ages is creating a Scratch restaurant suitable for?
What are the benefits of making a restaurant project on Scratch?


One subscription, many ways to play and learn.
Only $6.99 after trial. No credit card required