Show Off your DIY Contest Giveaways
Create three small DIY contest giveaways—decorated bookmarks, custom badges, and mini treat bags—package, photograph, and write short descriptions to share.


Step-by-step guide to Show Off your DIY Contest Giveaways
Easy DIY Playhouse Ideas For Your Kids
Step 1
Gather all the Materials Needed and put them on a clean table so you can reach everything easily.
Step 2
Cut three long rectangle strips from the paper or cardstock to make three bookmarks.
Step 3
Decorate each bookmark using coloring materials and stickers to make them bright and unique.
Step 4
Use the hole punch to make one hole near the top center of each bookmark.
Step 5
Thread a short piece of ribbon through each bookmark hole and tie a knot to finish the tassel.
Step 6
Cut three circles or fun shapes from cardstock to make three custom badges.
Step 7
Decorate each badge with markers stickers and small decorations to create different designs.
Step 8
Tape a safety pin securely to the back of each badge so people can wear them.
Step 9
Fill three small paper bags or zip-top snack bags with the small treats you chose.
Step 10
Seal or fold each mini treat bag and decorate the outside with stickers or a small label.
Step 11
Package each giveaway by placing one bookmark one badge and one treat bag together and tie or wrap them neatly.
Step 12
Take clear photos of each packaged giveaway and one photo of all three together.
Step 13
Write a short one to two sentence description for each giveaway explaining what it is and why someone would love it.
Step 14
Share your finished creation on DIY.org.
Help!?
What can we use instead of cardstock, a hole punch, or ribbon if those items are hard to find?
If you don't have cardstock, use a cereal box or layer printer paper for bookmarks, make the hole by carefully poking the top center with scissors or a sharpened pencil in place of a hole punch, and use yarn or thin twine instead of ribbon when threading the tassels.
What should we do if a bookmark hole rips, a safety pin won't stick, or treat bags keep opening?
Reinforce punched bookmark holes with a small square of clear tape before threading to prevent tearing, attach the safety pin to the back of each badge with a strip of strong double-sided tape or a dab of hot glue for security, and fold and seal treat bags with packing tape or a sticker to keep treats from spilling.
How can we adapt the activity for different age groups while following the steps like cutting strips, decorating, and attaching pins?
For toddlers (3–6) have an adult cut the three bookmark strips and pre-punch holes while kids decorate with stickers and yarn loops, for elementary kids (7–10) let them cut, punch, decorate, and tie simple ribbon knots with supervision, and for older kids (11+) challenge them to design themed badges, photograph their three packaged giveaways professionally, and write creative one- to two-sentence descriptions for DIY.org.
What are some ways to extend or personalize the giveaway packages beyond the basic instructions?
Personalize and upgrade the packaged giveaways by laminating bookmarks or covering them with clear contact paper for durability, adding metal eyelets at the hole, layering tiny charms or embroidery on badges before taping pins, including a handwritten mini note in each treat bag, and staging a themed photo setup for the final group shot to post on DIY.org.
Watch videos on how to Show Off your DIY Contest Giveaways
Fun Activities And Cool Crafts To Try With Your Kids || Toy DIYs, Parenting Hack
4 Videos
Fun Activities And Cool Crafts To Try With Your Kids || Toy DIYs, Parenting Hack
DIY.org | Fun Activities For Kids | The Largest Online Community of Kids Who Learn Skills Together
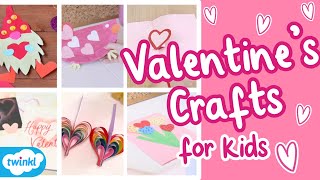
10 Easy DIY Valentine's Day Crafts for Kids | Valentine's Gifts Kids Can Make
DIY Projects For Kids | Halloween Craft | Twinkl
Facts about DIY crafts for kids
📚 Bookmarks keep books tidy and were an early collectable craft—no more folded corners!
🎖️ Badges and pin-back buttons are a fun way to turn art into wearable mini-posters.
🎁 Mini treat bags make small surprises feel fancier—adding a sticker or tissue paper boosts excitement.
📸 Shooting crafts in soft, natural window light gives bright, even photos without harsh shadows.
✍️ A short description listing materials, size, and how it was made makes giveaways easier to share and judge.
How do I create and present three DIY contest giveaways (bookmarks, badges, and mini treat bags)?
What materials do I need to make decorated bookmarks, custom badges, and mini treat bags for a DIY contest?
What ages is the DIY contest giveaways activity suitable for?
What are the benefits of making and sharing DIY contest giveaways with kids?
