Show Objects Placed on Tinkercad Workplane
Use Tinkercad to place and arrange shapes on the workplane, adjust size and color, and export or screenshot your finished design.


Step-by-step guide to place objects on a Tinkercad workplane
Step 1
Go to Tinkercad.com and sign in to your account.
Step 2
Click "Create new design" to open a blank workplane.
Step 3
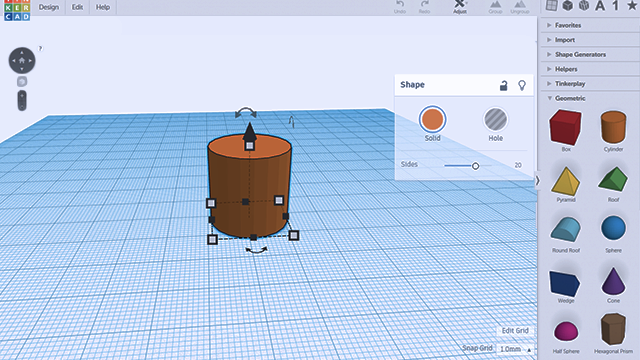
Drag one shape from the Shapes panel onto the workplane.
Step 4
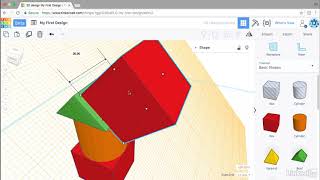
Drag two or three different shapes from the Shapes panel onto the workplane.
Step 5
Click one shape once to select it.
Step 6
Resize the selected shape by dragging a white corner handle to change its size.
Step 7
Change the color of the selected shape by clicking the color swatch and picking a color.
Step 8
Move a shape by dragging it to a new spot on the workplane.
Step 9
Hold Shift and click each shape you want to select to choose multiple shapes.
Step 10
Click the Align button in the top toolbar to line your selected shapes up.
Step 11
Click the Group button to combine the selected shapes into one object.
Step 12
Click the design name at the top of the screen to start renaming it.
Step 13
Type a new name for your design and press Enter to save it.
Step 14
Click Export and choose PNG image or STL file to save a copy of your design to your computer.
Step 15
Share your finished creation on DIY.org.
Final steps
You're almost there! Complete all the steps, bring your creation to life, post it, and conquer the challenge!

Help!?
What can we use if we can't sign in to Tinkercad or Tinkercad.com is blocked?
If you can't access Tinkercad.com or create an account, use a free alternative like 3D Slash or BlocksCAD to drag shapes, resize, recolor, group, and export similar to the steps here.
I'm trying to group shapes but the Group button won't work—what did I miss?
If Group or Align won't work, make sure you've selected more than one shape by holding Shift while clicking each shape as described, then click Align and Group in the top toolbar.
How can I change the activity for a younger child or make it more challenging for older kids?
For younger kids (3–6), simplify by dragging a single shape, changing its color, and renaming the design, while older kids (10+) can add two or three different shapes, use Align and Group, and export an STL for 3D printing.
How can we make the final design more unique before exporting and sharing on DIY.org?
Personalize your design by resizing with the white corner handles for new proportions, changing color swatches, aligning and grouping shapes into a character or object, renaming the file, and exporting a PNG or STL to share on DIY.org.
Watch videos on how to place objects on a Tinkercad workplane
TinkerCAD - Tutorial for Beginners in 10 MINS! [ FULL GUIDE 2024 ]
4 Videos
![TinkerCAD - Tutorial for Beginners in 10 MINS! [ FULL GUIDE 2024 ]](https://img.youtube.com/vi/QIn9c5TjrKk/mqdefault.jpg)
TinkerCAD - Tutorial for Beginners in 10 MINS! [ FULL GUIDE 2024 ]
Tinkercad Tutorial - Using the workplane

Learn Tinkercad in 10 Minutes! Everyone can Design in 3D 💯🔥for FREE
How to Use Tinkercad for 3D Printing (Step-by-Step Beginner's Guide)
Facts about 3D design and Tinkercad for kids
🤝 Autodesk acquired Tinkercad in 2013, connecting it to a suite of professional CAD tools.
🎮 Tinkercad also includes Codeblocks and Circuits so kids can explore coding and electronics alongside 3D design.
🧩 Tinkercad builds complex models from simple "basic shapes" you can resize, rotate, color, and group.
🖥️ Tinkercad is a free, browser-based 3D design tool that's popular in classrooms for teaching beginners.
🖨️ You can export Tinkercad designs as STL or OBJ files for 3D printing or capture them with screenshots.
How do I place and arrange shapes on the Tinkercad workplane?
What materials do I need to use Tinkercad for this activity?
What ages is using Tinkercad suitable for?
What are the benefits of placing objects on the Tinkercad workplane?


One subscription, many ways to play and learn.
Only $6.99 after trial. No credit card required