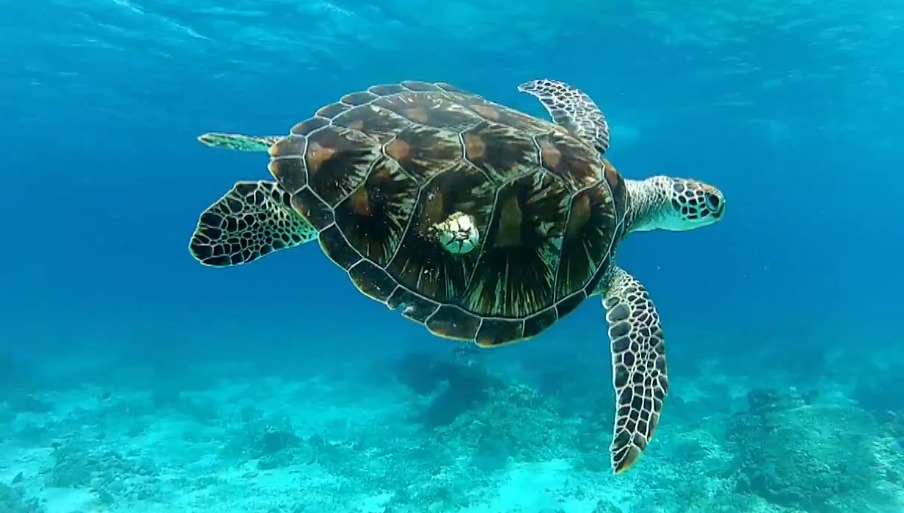
Shoot underwater
Take underwater photos using a waterproof camera or phone case, experiment with angles, lighting, and bubbles to learn about light, refraction, and motion.


Step-by-step guide to take underwater photos
How to hold your breath 💦😮💨 💦UNDERWATER! Learn Pool Safety for Kids! #blippi #shorts
Step 1
Gather all the materials and ask an adult to help you with the activity.
Step 2
Put on your goggles or swim mask so your eyes are protected.
Step 3
Place the camera or phone into the waterproof case and seal it tightly.
Step 4
Ask the adult to test the sealed case in a cup of water for a few seconds to check for leaks.
Step 5
Take one quick test photo above the water to make sure the camera is working.
Step 6
Move to shallow water or sit safely beside the bathtub with the adult present.
Step 7
Aim the camera just below the water surface and press the shutter to take a photo.
Step 8
Lower the camera a bit and point the lens up toward the surface and press the shutter to take a photo.
Step 9
Point the camera straight down into the water and press the shutter to take a photo.
Step 10
Make bubbles near the camera by blowing through the straw or using the squirt bottle.
Step 11
Press the shutter to take a photo of the bubbles close to the lens.
Step 12
Turn on the waterproof flashlight so it is ready to use.
Step 13
Place the flashlight at the side of the water so light shines through the water.
Step 14
Press the shutter to take a photo of the light beams underwater.
Step 15
Share your favorite underwater photo on DIY.org
Help!?
What can we use instead of a waterproof case if we can’t find one?
If you don't have a waterproof case for your camera or phone, ask an adult to use a disposable waterproof camera or a waterproof action camera (for example, a GoPro) and always follow step 4 by testing the sealed option in a cup of water for leaks.
My photos are blurry or water got inside — what should we check first?
If photos are blurry or water gets inside, re-check the case seal and any buttons from step 3, repeat the leak test in a cup of water from step 4, and take a quick test photo above the water as in step 5 to confirm the camera is working before trying steps 6–11 again.
How can we adapt this activity for different ages?
For toddlers have them sit beside the bathtub while an adult holds and aims the sealed camera and makes bubbles with the straw (steps 6–10), and for older kids let them safely take photos in shallow water and experiment with light and angles from steps 6–11 under supervision.
How can we make the underwater photos more creative or personal?
To enhance the activity, place colored cellophane over the waterproof flashlight from step 11 to create colored beams, try different bubble sizes with the straw or squirt bottle in steps 9–10, and then edit and share your favorite photo on DIY.org as in step 12.
Watch videos on how to take underwater photos
Can you kick UNDERWATER🌊 and swim safely🛟?! #blippi #poolsafety
4 Videos
Can you kick UNDERWATER🌊 and swim safely🛟?! #blippi #poolsafety
What Is The Best Way To Get Started In Underwater Photography & Video

Water Safety for Kids! | Water Safety Rules | Water Safety Tips
Underwater Breath Hold Training for Kids on Oahu
Facts about underwater photography for kids
📷 Water absorbs colors — red and orange disappear within a few meters, so underwater photos often look bluer unless you add light.
🌊 Refraction bends light at the water surface, making things viewed through a mask or flat glass appear about 25% closer and larger.
💡 Sunlight underwater changes quickly with depth and angle, so bright shafts and sparkles show up on sunny days while deeper shots get bluer and darker.
🫧 Bubbles act like tiny lenses and mirrors — they can make bright sparkles, distortions, and even little rainbows in photos.
🔍 Get close and shoot slightly upward — less water between you and the subject gives sharper, more colorful pictures and fun silhouettes against the surface.
How do I shoot underwater photos with my child?
What materials do I need to take underwater photos with my child?
What ages is underwater photography suitable for?
What safety tips should I follow when taking underwater photos with my child?
