Share Your Book Cutting
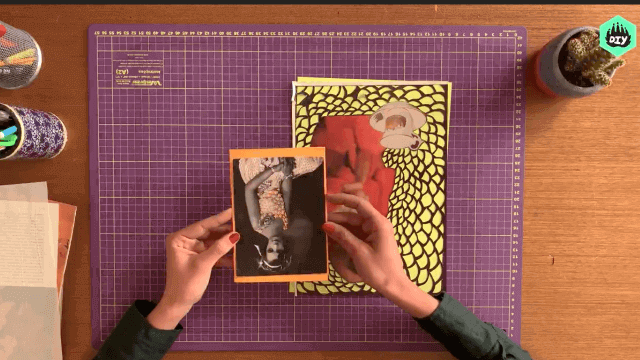
Make small folded books by cutting and stapling paper with adult help, decorate pages with drawings and messages, then share your creations with friends.


Step-by-step guide to Share Your Book Cutting
Step 1
Gather all materials and place them on a clear table.
Step 2
Choose four sheets of paper and stack them neatly into one pile.
Step 3
Fold the stacked papers in half so the short edges meet.
Step 4
Press your finger along the folded edge to make a sharp crease.
Step 5
Open the folded stack flat on the table.
Step 6
With an adult, trim about 1 cm off the open edges using scissors to make the pages even.
Step 7
Re-fold the stack in half along the crease.
Step 8
With an adult, staple twice along the folded spine to hold the pages together.
Step 9
Write the title and your name on the front cover.
Step 10
Use colouring materials to draw pictures and write messages on the inside pages.
Step 11
Add stickers or glue small decorations to the cover if you like.
Step 12
Show your finished mini-book to a friend or family member and tell them about it.
Step 13
Share your finished creation on DIY.org.
Help!?
What can we use instead of a stapler if we don't have one at home?
If you don't have a stapler for step 8 (staple twice along the folded spine), glue a thin line of strong craft glue along the folded spine and hold it with a clothespin until dry, or punch two holes and tie the pages with yarn or ribbon.
My pages became uneven after cutting—how can we avoid or fix this when trimming about 1 cm off the open edges in step 6?
To keep the pages even when you trim about 1 cm off the open edges in step 6, have an adult guide the scissors using a ruler as a cutting guide or use a paper trimmer, and if already uneven, re-stack and carefully re-trim small amounts until even.
How do we change the activity for a preschooler compared to an older child?
For preschoolers, an adult should do steps 2–8 (stacking, folding, trimming, stapling) while the child focuses on colouring and stickers in steps 11–12, and for older kids let them use 8–12 sheets, write a full story, add glued-on small decorations, and design a decorated cover in step 10 before sharing.
How can we make the mini-book more special or longer-lasting before sharing it on DIY.org?
To enhance the mini-book (steps 10–12), laminate or reinforce the cover with cardstock and glue, add a little pocket glued inside for notes, create a pop-up page from an extra folded sheet, or personalize with photos and washi tape before showing and sharing.
Watch videos on how to Share Your Book Cutting
Safe and Unsafe Situations | Safety Tips for Kids!
4 Videos
Safe and Unsafe Situations | Safety Tips for Kids!
Teaching Children How to Use Scissors Safely

How to support parents to explore books with children: Advice for early years practitioners

How to Print Your Book on a Budget! | Step by Step - Organize, Print, Bind, Cut
Facts about bookmaking for kids
📚 You can make an 8-page mini-book from a single sheet of paper with a few folds and one cut — great for tiny stories!
✂️ Saddle-stitching (placing staples down the folded spine) is the same basic binding used for magazines and small booklets.
🖍️ Many children's picture books are 32 pages long because printers lay out pages in groups of 8-page signatures.
🤝 Zines and handmade mini-books have long been used to share ideas, art, and stories in community swaps and festivals.
🧷 A single staple through the fold can hold several pages; an adult can help pick the right stapler to keep your book snug.
How do I do the Share Your Book Cutting activity with my child?
What materials do I need for Share Your Book Cutting?
What ages is the Share Your Book Cutting activity suitable for?
What are the benefits and safety tips for Share Your Book Cutting?
