Sew in a zipper
Sew a zipper into a small fabric pouch using basic stitches, measuring, pinning, and practicing safe needle handling and sewing skills.


Step-by-step guide to sew a zipper into a small fabric pouch
How to Sew a Zipper, TWO ways
Step 1
Practice a running stitch on the scrap fabric to learn needle control and keep the needle point away from your fingers.
Step 2
Thread your needle and tie a small knot at the end of the thread.
Step 3
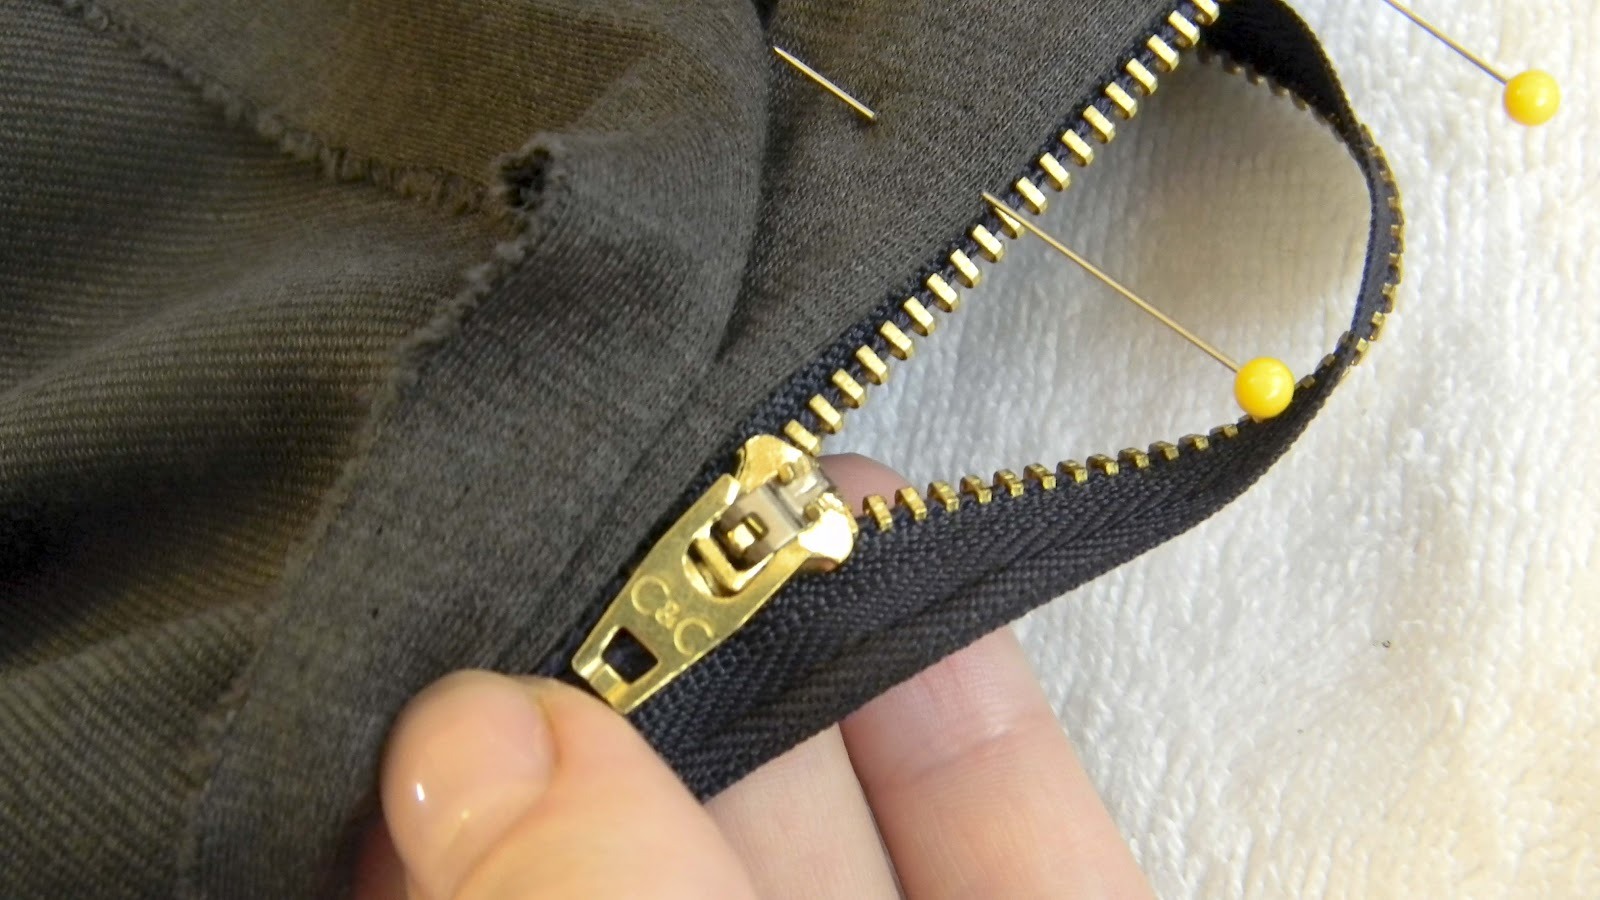
Measure the zipper and mark the center of each fabric top edge so the zipper will sit centered on the pouch.
Step 4
Lay the two fabric pieces so their top raw edges face each other and place the zipper between them with the zipper teeth aligned to those edges.
Step 5
Pin the zipper and both fabric top edges together so the raw edges stay lined up.
Step 6
Baste the zipper to both fabric pieces along the top edge using a running stitch to hold everything in place.
Step 7
Close the zipper halfway to make it possible to turn the pouch later.
Step 8
Fold the fabric so the right sides of the fabric pieces face each other and the zipper is centered between them.
Step 9
Pin the two side edges and the bottom edge together so the pouch shape is held.
Step 10
Sew around the pinned sides and bottom with a backstitch for strength.
Step 11
Trim any excess thread and carefully clip the corners close to the stitches to reduce bulk.
Step 12
Turn the pouch right side out through the open zipper and push out the corners for a neat shape.
Step 13
Close the zipper and share your finished zipper pouch on DIY.org
Help!?
What can we use instead of a zipper or sewing pins if those are hard to find?
If you don't have a zipper, use a strip of Velcro sewn or glued where the instructions say to 'place the zipper between them', and replace sewing pins with fabric clips, clothespins, or straightened paperclips while you 'pin the two side edges and the bottom edge together'.
My zipper pouch comes out crooked or the zipper gets stuck—how do I fix that?
If the zipper is crooked or stuck, unpick the basting stitches from the 'baste the zipper to both fabric pieces' step, realign using the center marks from 'measure the zipper and mark the center', re-baste so the zipper teeth sit on the raw edges, and remember to 'close the zipper halfway' before turning the pouch to prevent jamming.
How can I adapt this activity for younger or older kids?
For younger children, have them 'practice a running stitch on scrap fabric' using a large plastic needle and skip the 'backstitch' by using fabric glue to join sides, while older kids can use a sewing machine to replace the 'baste' and 'sew around the pinned sides and bottom with a backstitch' steps for a more finished pouch.
How can we make the zipper pouch more special or functional after finishing it?
Personalize the pouch by embroidering or painting on one fabric piece before you 'pin the zipper and both fabric top edges together', add an interior pocket sewn to the lining before folding, or attach a decorative zipper pull after you 'turn the pouch right side out through the open zipper' and 'push out the corners for a neat shape'.
Watch videos on how to sew a zipper into a small fabric pouch
How to sew a zipper step-by-step | Sewing Tutorial with Angela Wolf
4 Videos

How to sew a zipper step-by-step | Sewing Tutorial with Angela Wolf
HOW TO SEW A ZIPPER | SEWING FOR BEGINNERS

How To Sew a Zipper Into Anything The Easiest Way | Sew Anastasia

How To Use A Zipper Foot And Sew A Basic Zipper
Facts about hand-sewing for kids
🪡 Gideon Sundback improved the zipper design in the early 1900s, turning it into the interlocking teeth we use today.
🧵 A backstitch done by hand can be nearly as strong as a machine stitch — great for making a sturdy pouch.
📏 Even a tiny measuring mistake (like 1/8 inch) can make a zipper sit crooked, so pin and re-check your placement.
🧷 Safety tip: keep needles and pins in a pincushion and never leave them loose — lost pins are the most common sewing hazard.
🎒 Zippered pouches are super versatile — people use them for coins, school supplies, makeup, and tiny tool kits.
How do you sew a zipper into a small fabric pouch with a child?
What materials are needed to sew a zipper into a small fabric pouch?
What ages is sewing a zipper into a small fabric pouch suitable for?
What are the benefits, safety tips, and variations for sewing a zipper pouch with kids?
