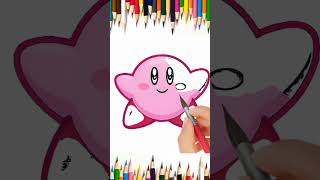
Sculpt Kirby!
Sculpt a soft, round Kirby figure using air-dry clay or playdough, simple shaping tools, and safe paints to practice sculpting and creativity.


Step-by-step guide to sculpt a Kirby figure
Create Kirby in SculptGl - 3D Clay Easy Instructions
Step 1
Set up your work area by placing a tray or placemat and arranging your materials within reach.
Step 2
Knead the clay with your hands until it feels soft and easy to shape.
Step 3
Roll a big chunk of clay into a smooth round ball for Kirby's body.
Step 4
Lightly dip a fingertip in the small cup of water and smooth the ball so it is perfectly round.
Step 5
Roll two equal small pieces of clay into fat ovals to make Kirby's feet.
Step 6
Press each foot gently onto the bottom front of the body to attach them.
Step 7
Roll two tiny pieces of clay into short teardrop shapes to make Kirby's arms.
Step 8
Press each arm onto the sides of the body to attach them.
Step 9
Use a toothpick or tool to make two oval indents for eyes and a small smile indent for the mouth.
Step 10
Add tiny round clay highlights for the eyes if you like by pressing on two small white dots.
Step 11
Let your Kirby dry completely if you used air-dry clay.
Step 12
Paint Kirby's eyes mouth and rosy cheeks with non toxic paints using a small brush.
Step 13
Let the paint dry completely and then share your finished Kirby on DIY.org
Final steps
You're almost there! Complete all the steps, bring your creation to life, post it, and conquer the challenge!

Help!?
What can I use if I can't find air-dry clay or non-toxic paints?
If air-dry clay or non-toxic paints aren't available, substitute oven-bake clay (and bake per package instructions) or non-drying modeling clay and use washable acrylics to paint Kirby after your clay has set or baked.
My Kirby's feet or arms keep falling off or the body cracks when I smooth it—what should I do?
If feet or arms fall off or the body cracks after smoothing with the water-dipped fingertip, re-knead the clay, score the attachment spots, press and blend seams with the damp fingertip or a toothpick, and avoid adding too much water while drying.
How can I adapt this Sculpt Kirby! activity for different ages?
For toddlers, pre-roll the big body and feet and let them press and smooth with a damp sponge under supervision, while older kids can sculpt the tiny teardrop arms and use the toothpick for detailed eye indents and finer painting with the small brush.
How can we extend or personalize our finished Kirby?
To personalize, mix pigments into the clay for different Kirby colors, add accessories like a clay hat or star before letting it dry, paint custom facial expressions and rosy cheeks, and then photograph the scene on your tray to share on DIY.org.
Watch videos on how to sculpt a Kirby figure
Draw Kirby - Easy Art Tutorial for Beginners! #kirby #supersmash
3 Videos
Draw Kirby - Easy Art Tutorial for Beginners! #kirby #supersmash
How to Draw Kirby: Step-by-Step Guide for Beginners

Easy Way to Make 3D Kirby | Blender 4.1 Speed Model
Facts about clay sculpting for kids
🧱 Air-dry clay hardens without baking — many brands set firm in about 24–48 hours depending on thickness.
🖌️ Fully dried air-dry clay accepts acrylic paint well; sealing with a child-safe varnish helps protect your sculpture.
🎈 Kirby was created by Masahiro Sakurai and first appeared in the 1992 Game Boy game Kirby's Dream Land.
🧼 Play-Doh was marketed as a children’s toy in 1956 and is non-toxic and washable, making it great for beginners.
🎨 You can blend clay colors by kneading them together, but mixing all primary colors usually makes a brownish tone.
How do you sculpt a Kirby figure step-by-step?
What materials do I need to sculpt a soft Kirby with air-dry clay or playdough?
What ages is sculpting Kirby suitable for?
What are safety tips and variations for sculpting Kirby?


One subscription, many ways to play and learn.
Only $6.99 after trial. No credit card required