Screen print a design
Make a simple screen print design on fabric using cardboard frames, mesh, paint, and stencils. Learn stenciling, alignment, and color layering.

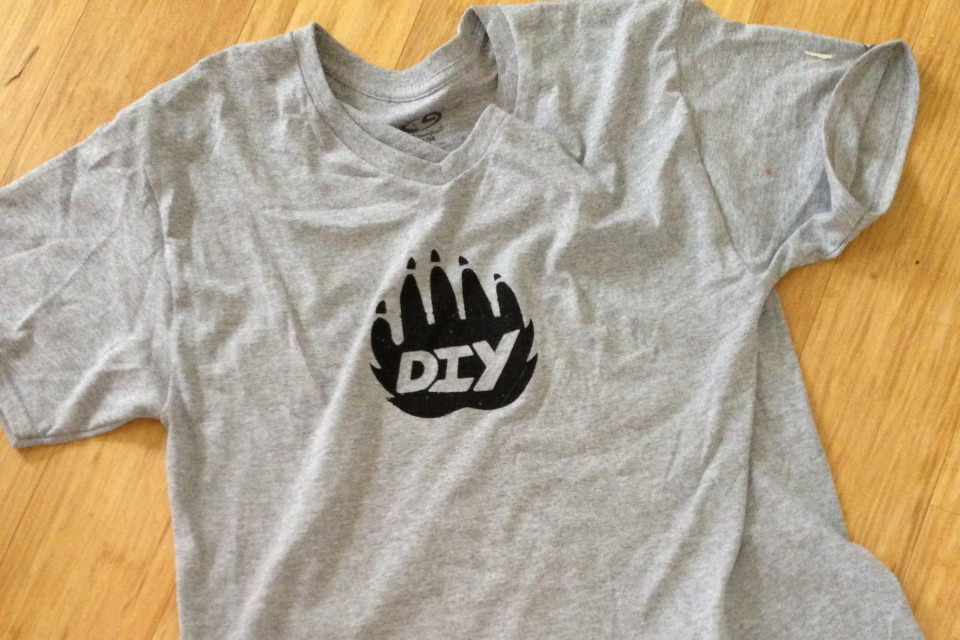

Step-by-step guide to make a simple screen print design on fabric
Print making drawing |step by step Print making ideas at home for KVS students |
Step 1
Lay the protective covering on your work table to keep it clean.
Step 2
Slide the scrap cardboard inside the fabric item to stop paint from soaking through.
Step 3
Draw a rectangle on a piece of cardboard about the size of your design.
Step 4
Cut out the inside of the rectangle to make a cardboard frame.
Step 5
Make two small pencil registration marks on two sides of the cardboard frame.
Step 6
Stretch the mesh over the frame opening and tape it tightly to the back of the cardboard.
Step 7
Place your stencil on the fabric where you want the design to be printed.
Step 8
Make two matching pencil registration marks on the fabric next to the stencil.
Step 9
Align the frame registration marks with the fabric marks and tape the frame to the fabric so it won’t move.
Step 10
Put a small amount of fabric paint onto a plate or palette.
Step 11
Lightly dab your sponge or roller into the paint to pick up a thin even amount.
Step 12
Dab or roll the sponge across the mesh above the stencil using short even strokes until the stencil shape is filled with paint.
Step 13
Carefully lift the frame and stencil straight up to reveal your print.
Step 14
Let the print dry completely before adding more colors or touching the fabric.
Step 15
Share a photo of your finished screen print creation on DIY.org.
Help!?
What can we use instead of the mesh, fabric paint, or a sponge/roller if we can't find them?
If you don't have screen mesh, stretch a clean nylon stocking or lightweight tulle over the cardboard frame and tape it to the back, and if you lack fabric paint use acrylic mixed with textile medium or fabric markers, while a folded kitchen sponge or foam brush can replace the roller.
My print has paint under the stencil and looks blurry—what should I check?
Check that the mesh is taped tightly to the cardboard frame, the frame is firmly taped to the fabric aligned with the registration marks, the scrap cardboard is inside the fabric to stop soak-through, and you are dabbing a thin even amount of paint on the sponge or roller.
How can we adapt this project for younger or older kids?
For younger children, have an adult pre-cut the cardboard frame and stencil and do the taping and registration marks while the child dabs paint in step 10, and for older kids let them cut the frame, design complex stencils, and create multi-color prints by repeating the aligning and printing steps.
How can we make our screen prints more creative or long-lasting?
To personalize and improve the outcome, layer more colors by letting each print dry completely (step 13) before repeating with new stencils, add details with fabric markers or glitter paint, and heat-set the fabric paint per its instructions before sharing your photo on DIY.org.
Watch videos on how to screen print a design on fabric
How to make easy paper cut designs for decoration | Step by step instructions | Paper Design Simple
4 Videos
How to make easy paper cut designs for decoration | Step by step instructions | Paper Design Simple
Paper cut designs to create patterns and stencils

4 Amazing Paper Cutting Design | How to make simple and easy paper cutting designs | Paper Art
How To Design & Create Printable Greeting Cards | Beginner Friendly | Using Canva
Facts about textile printing for kids
🎨 Screen printing (silkscreen) was used by pop artist Andy Warhol to create bold, repeating images that made art feel like everyday objects.
🧵 Textile printing has been decorating cloth for centuries — ancient civilizations used simple block and resist-printing techniques long before modern screens existed.
♻️ Cardboard is inexpensive, widely available, and recyclable, which makes it a perfect kid-safe material for one-off screen frames and stencils.
🌈 By layering semi-transparent inks in different colors, you can mix new shades on fabric without ever touching a paintbrush to a palette.
🎯 Registration marks are tiny target-like guides printers use so each color layer lines up perfectly — even small shifts are easy to spot and fix.
How do you make a simple screen print design on fabric at home?
What materials do I need to screen print with cardboard frames and stencils?
What ages is simple screen printing suitable for?
What are the benefits of screen printing for kids and safety tips?
