Run an obstacle course
Design and set up a safe yard obstacle course using cones, ropes, cushions; then run, time, adjust it to practice agility and problem-solving skills.


Step-by-step guide to design and run a yard obstacle course
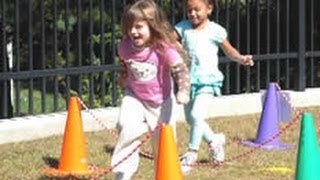
Physical Activity Games for Kids: Obstacle Course
Step 1
Find a flat safe spot in the yard to build your obstacle course.
Step 2
Ask an adult to walk the area and remove any hazards like sharp sticks or toys.
Step 3
Choose how many obstacles you want in your course.
Step 4
Place cones in a zigzag pattern to make a weaving run.
Step 5
Lay a rope on the ground in a straight line to act as a balance beam.
Step 6
Arrange cushions spaced apart to make stepping stones you must jump or step on.
Step 7
Ask an adult to secure another rope low to the ground to create a crawl-under or limbo obstacle.
Step 8
Put a small soft toy or beanbag at the end of the course for a pick-up challenge.
Step 9
Mark a clear start line and finish line with chalk or tape.
Step 10
Walk slowly through the whole course to test each obstacle and spot any problems.
Step 11
Move or change any obstacle that feels unsafe or too easy.
Step 12
Use your stopwatch or timer to time one full run of the course.
Step 13
Change one obstacle to make the course harder or easier.
Step 14
Run the course and try to beat your recorded time.
Step 15
Share your finished obstacle course and your best time on DIY.org.
Help!?
What can we use if we don't have cones, rope, cushions, a beanbag, chalk, or a stopwatch?
Use flipped plastic cups or empty water bottles for cones, a garden hose or jump rope for the balance and crawl ropes, pillows or folded towels as cushions, a rolled sock or rice-filled sock for the beanbag, a stick in the dirt or masking tape for the start/finish instead of chalk, and a phone or kitchen timer instead of a stopwatch.
What should we do if the rope balance beam keeps moving or the cushions slip during the test walk?
Anchor the rope or garden hose with tape or small rocks and put a non-slip mat or place cushions closer together, then 'Walk slowly through the whole course to test each obstacle' and 'Move or change any obstacle that feels unsafe or too easy' until it stays stable.
How can we adapt the course for much younger children or make it harder for older kids?
For younger kids use fewer obstacles, lay the rope flat as a wide line of tape for easier balancing, space cushions closer, and raise or remove the low crawl rope, while for older kids add more cones, narrow the balance line, tighten cushion spacing, and follow 'Change one obstacle to make the course harder or easier' to increase challenge.
How can we extend or personalize the obstacle course to make it more fun or competitive?
Add a theme (like pirate treasure), color-code obstacles with tape or stickers for extra points, create a relay or timed tournament using your stopwatch or phone, and 'Share your finished obstacle course and your best time on DIY.org' to show your improvements.
Watch videos on how to design and run a yard obstacle course
Using an Obstacle Course to Promote Active Outdoor Play
3 Videos
Using an Obstacle Course to Promote Active Outdoor Play

10 FREE backyard obstacle course ideas to UP YOUR DAD GAME
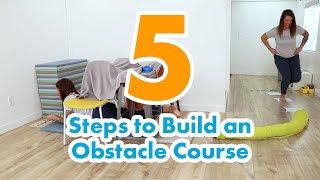
Easy 5-Step Guide to Build Obstacle Course at Home | Indoor OT Fun
Facts about outdoor play and physical fitness for kids
🏃 Obstacle courses began as military training exercises and later became popular as fun races and fitness events.
⏱️ Timing runs with a stopwatch or phone helps kids track progress and turn practice into a friendly challenge.
🤸 Simple moves like balancing, jumping, and crawling build gross motor skills and coordination in children.
🧠 Designing a course sparks problem-solving — kids plan routes, test ideas, and adapt when something doesn’t work.
🛡️ Using soft cushions, clear boundaries, and adult supervision keeps yard obstacle courses fun and much safer.
How do I design and run a safe yard obstacle course for my child?
What materials do I need to set up a yard obstacle course?
What ages is this yard obstacle course suitable for?
What are the benefits, safety tips, and fun variations for a yard obstacle course?
