Render beeswax
Render and purify beeswax from old honeycomb or cappings using gentle heat, straining, and molds with adult supervision to make clean wax blocks.


Step-by-step guide to render beeswax
How to Make Beeswax Candles | DIY Step-by-Step Tutorial for Beginners
Step 1
Spread newspaper or paper towels on your work surface to catch drips and crumbs.
Step 2
Break the old honeycomb into small pieces and put them into the heatproof bowl.
Step 3
Fill the large pot about one third full with water.
Step 4
With an adult help place the heatproof bowl into the pot so it sits above the water like a double boiler.
Step 5
With an adult turn the stove to low so the water simmers gently and the bowl warms slowly.
Step 6
Stir the wax pieces gently with the wooden spoon as they melt until most of the wax is liquid.
Step 7
With an adult lift the bowl and pour the melted wax through the cheesecloth or strainer into the glass jar to catch bits of debris.
Step 8
Let the jar sit undisturbed until the wax cools and solidifies on top and any water or impurities settle below.
Step 9
With an adult carefully pour off the water from the bottom of the jar leaving the solid wax behind.
Step 10
If the wax still looks dirty repeat the melting and straining process one more time to purify it further.
Step 11
Warm the clean wax again until it is pourable using the double boiler with an adult.
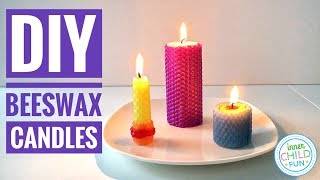
Step 12
With an adult pour the hot liquid wax into silicone molds or small cups to make blocks.
Step 13
Let the molds cool at room temperature until the wax hardens completely.
Step 14
Pop the wax blocks out of the molds and trim any rough edges with a blunt knife if needed.
Step 15
Share your finished beeswax blocks and what you learned about rendering wax on DIY.org
Help!?
What can we use instead of cheesecloth or silicone molds if they're hard to find?
Use a fine-mesh kitchen strainer or a clean cotton T-shirt to strain the melted wax into the glass jar when you pour, and use ice cube trays or paper muffin cups instead of silicone molds when you pour the hot wax.
My wax still has dark bits or smells, what should I check or do differently?
If the wax still looks dirty or smells, repeat the melting-and-straining process by warming the wax in the heatproof bowl over simmering water, stirring with the wooden spoon as it melts, pouring through the cheesecloth/strainer into the glass jar, and then carefully pouring off the water from the bottom of the jar.
How can we adapt this activity for younger kids or older kids who want more challenge?
For young children have them spread the newspaper, break honeycomb into pieces, and pop cooled blocks out of the molds while an adult handles the double boiler and pouring, and for older kids let them supervise heating with an adult, repeat purification, design custom molds, and trim edges with the blunt knife.
How can we personalize or extend the beeswax blocks once we have clean poured wax?
Before the final pour when the clean wax is warm and pourable, stir in a little coconut oil or a drop of food-grade essential oil and add dried herbs or stamped names in the silicone molds to make personalized balms or blocks.
Watch videos on how to render beeswax
How to Make Beeswax Candles from Sheets (EASY)
4 Videos
How to Make Beeswax Candles from Sheets (EASY)

How to Make Beeswax Candles | Easy DIY Tutorial
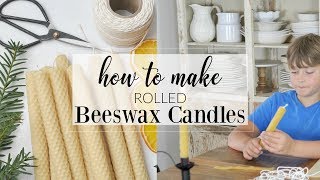
How to Make Rolled Beeswax Candles | Easy DIY Tutorial
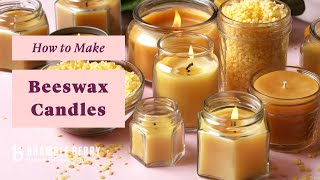
Beeswax Candle Tutorial - Learn From An Expert Candlemaker | BrambleBerry.com
Facts about beekeeping for kids
🐝 Worker honey bees secrete beeswax from special abdominal glands to build the hexagonal cells of the honeycomb.
🔥 Pure beeswax melts at about 62–64°C (144–147°F), so gentle heat like a warm water bath works best for rendering.
♻️ Beekeepers often recycle cappings and old comb by rendering them into clean beeswax blocks for candles and crafts.
🕯️ Beeswax candles typically burn longer and cleaner than many paraffin candles and give off a light honey scent.
🍽️ Beeswax is food-safe (listed as additive E901) and is used in cosmetics, food wraps, and wood polish.
How do you render beeswax from old honeycomb or cappings?
What materials do I need to render beeswax safely at home?
What ages is beeswax rendering suitable for?
What are the benefits and safety tips for making beeswax blocks with kids?
