Remake a Harry Potter Book Cover
Design and recreate your own Harry Potter book cover using drawing, collage, and color techniques to explore composition, symbolism, and creativity.


Step-by-step guide to Remake a Harry Potter Book Cover
Step 1
Pick which Harry Potter book you want to redesign.
Step 2
Think about the book's mood and main events to inspire your cover.
Step 3
Pick three symbols or scenes from the book that you want on the cover.
Step 4
Lightly sketch a cover layout with pencil and ruler showing where the title main image and author name will go.
Step 5
Gather collage images and decorative bits from magazines fabric or printed pictures.
Step 6
Paint or color the background of your cover using broad strokes or collage pieces.
Step 7
Let the background dry completely before adding anything on top.
Step 8
Glue your cut collage pieces and decorative bits onto the cover in the spots you planned.
Step 9
Draw the main illustration or symbols in pencil over the collage or background.
Step 10
Trace and darken your pencil drawings with a black marker to make them pop.
Step 11
Add the book title and author name in a bold lettering style that matches the mood.
Step 12
Add small details like sparkles borders or shadows to finish the composition.
Step 13
Share your finished Harry Potter book cover creation on DIY.org
Final steps
You're almost there! Complete all the steps, bring your creation to life, post it, and conquer the challenge!


Help!?
What can we use instead of hard-to-find collage materials like magazines, fabric, or printed pictures?
Use colored construction paper, old greeting cards, food packaging, wrapping paper, or print images from the computer to gather collage pieces for the 'Gather collage images' and 'Glue your cut collage pieces' steps.
My collage pieces are wrinkling or peeling off after I glue them—what should I do?
Make sure the painted or collaged background is fully dry (step 6), apply a thin even layer of PVA glue or a glue stick to the back of each piece, and press them flat under a heavy book until set to stop wrinkling and peeling.
How can we adapt this Harry Potter cover project for different ages or skill levels?
For younger kids, pre-cut collage bits, use simple stencils when you 'Lightly sketch a cover layout with pencil and ruler', and let them sticker-decorate, while older kids can do detailed pencil illustrations, hand-letter the bold title (step 11), and experiment with layered paint and fabric textures.
What are some ways to enhance or personalize the finished book cover beyond the basic instructions?
Add 3D elements like glued-on charms or ribbon, emboss or varnish the title, scan the finished cover to make prints, or incorporate glitter, hand-drawn borders, and shadows (step 12) to match the book's mood.
Watch videos on how to Remake a Harry Potter Book Cover
Aesthetic History Notebook Cover Page | Easy & Creative Harry Potter Theme Design | DIY Project Idea
4 Videos
Aesthetic History Notebook Cover Page | Easy & Creative Harry Potter Theme Design | DIY Project Idea

How to Make Easy DIY Harry Potter Ornaments with Book Covers
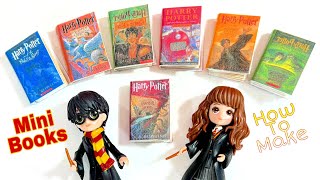
HARRY POTTER MINIATURE BOOK - HOW TO MAKE

Harry Potter theme popup book card
Facts about book cover design and illustration
🪄 The Harry Potter series has sold over 500 million copies worldwide, making it one of the best-selling book series ever.
🎨 Cover colors and imagery help set a book's mood—warm palettes feel cozy, while cool or muted tones can feel mysterious.
🧩 Collage as an art technique rose to fame with Cubist artists like Pablo Picasso and Georges Braque in the early 1900s.
🔡 Typography (the font choice) can change how a cover is read: serifs feel traditional, sans-serifs feel modern, and hand-lettering feels personal.
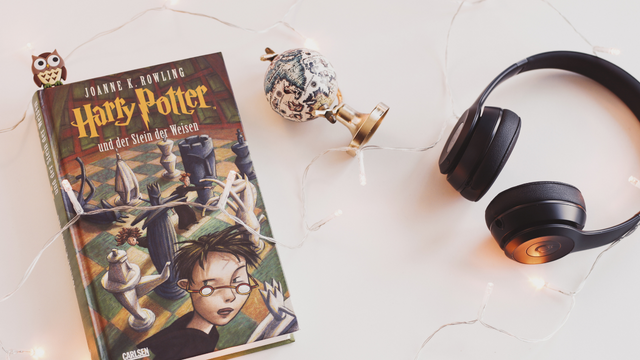
🌍 Publishers often commission different cover art for different countries—some Harry Potter editions show unique symbols or scenes not seen elsewhere.
How do you remake a Harry Potter book cover?
What materials do I need to remake a Harry Potter book cover?
What ages is this Harry Potter book cover activity suitable for?
What are the benefits and creative variations of remaking a Harry Potter book cover?


