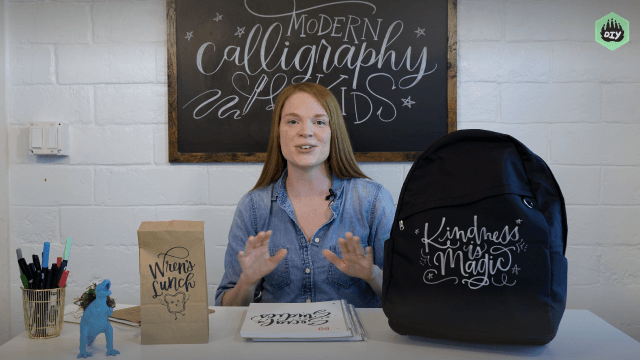
Reflection and some more calligraphy :)
Practice calligraphy strokes and create mirrored lettering by folding or tracing and using a mirror, exploring symmetry, reflection, and decorative flourishes carefully.


Step-by-step guide to Reflection and some more calligraphy
Step 1
Place a sheet of paper on a flat surface in portrait orientation.
Step 2
Use your ruler and pencil to draw a vertical center line and two horizontal guide lines for the top and bottom of your letters.
Step 3
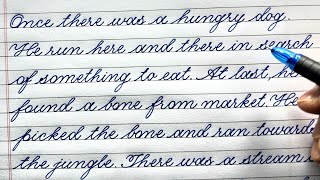
Practice basic calligraphy strokes on a scrap piece of paper by making thin upstrokes and thicker downstrokes for a few minutes.
Step 4
Lightly pencil-write the word or letters you want to mirror on the left side of the center line between the guide lines.
Step 5
Carefully go over your penciled letters on the left side with your calligraphy pen to make clean inked letters.
Step 6
Wait a minute for the ink to dry so it won’t smudge.
Step 7
Place the small mirror along the center line so it shows a clear reflection of your inked letters.
Step 8
While looking at the mirror reflection copy the reversed shapes by lightly pencil-drawing the mirrored letters on the right side between the guide lines.
Step 9
Trace over the mirrored pencil letters on the right side with your calligraphy pen using the same thin and thick stroke rules.
Step 10
Gently erase any leftover pencil guide lines and stray marks once the ink is dry.
Step 11
Add matching decorative flourishes on both sides by drawing symmetrical swirls or dots that mirror each other.
Step 12
Add color or small decorations with your colouring materials to make your mirrored design pop.
Step 13
Share your finished mirrored calligraphy creation on DIY.org.
Help!?
What can we use if we don't have a small mirror or a calligraphy pen?
If you don't have a small mirror, use a clean metal spoon or your phone screen placed along the center line, and if you lack a calligraphy pen, substitute a felt-tip brush pen, chisel-tip marker, or regular pen while practicing thin upstrokes and thicker downstrokes on scrap paper.
My ink smudged or the mirrored letters don't line up — what should I do?
If ink smudges, follow the instruction to wait a minute for the ink to dry and blot gently with a scrap sheet, secure the small mirror along the center line with a bit of tape so it doesn't shift while copying, and repeat the thin-up/thick-down practice on scrap paper before retracing the mirrored letters.
How can I adapt this activity for different age groups?
For younger children, widen the guide lines and let them use broad markers to pencil-draw and trace the mirrored letters between the guide lines, while older kids can try finer nibs or dip pens, more elaborate symmetrical flourishes, and colored inks when tracing.
How can we extend or personalize our mirrored calligraphy once it's finished?
To personalize the piece, add matching decorative flourishes and colored accents on both sides, try foil or watercolor washes around the guide lines, or scan and mirror the design digitally before sharing your finished mirrored calligraphy creation on DIY.org.
Watch videos on how to Reflection and some more calligraphy
Perfecting Penmanship: Expert Handwriting Practice Tips | Palash Calligraphy
4 Videos
Perfecting Penmanship: Expert Handwriting Practice Tips | Palash Calligraphy
Learn Calligraphy in 5(ish) Minutes With Just a PENCIL!
How to write CALLIGRAPHY with ANY PEN ✍️ | Step by Step Tutorial
5 Essential Handwriting Practices for Kids | Handwriting Heroes
Facts about calligraphy and symmetry
🖋️ Calligraphy has been practiced for over 2,000 years—ancient Chinese scripts helped shape many calligraphic traditions.
🪞 Leonardo da Vinci famously used mirror writing—he sometimes wrote right-to-left so his notes read normally in a mirror.
🔁 Ambigrams are clever typographic designs that read as the same (or a different) word when rotated or mirrored.
📐 Folding paper along a center line gives you a perfect line of symmetry—an easy trick for making mirrored lettering.
✨ Uppercase letters like A H I M O T U V W X Y look identical when mirrored vertically—great starters for symmetric designs.
How do I guide my child to practice calligraphy strokes and create mirrored lettering?
What materials do I need for reflection and mirrored calligraphy practice?
What ages is mirrored calligraphy and reflection practice suitable for?
What are the benefits and safety tips for kids doing mirrored calligraphy?
