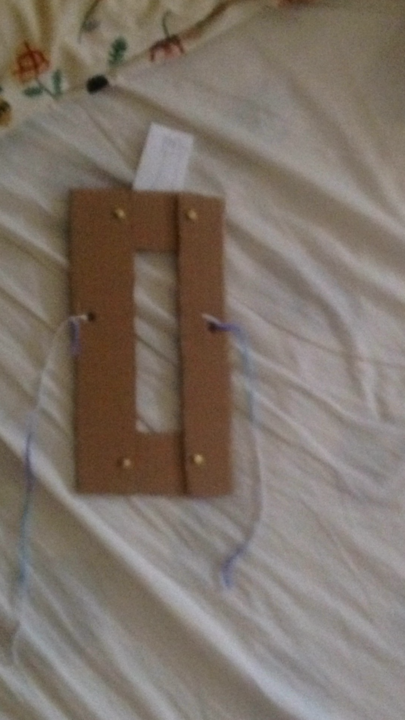
Power a wave with a string
Stretch a string between two supports and create pulses and waves by plucking, changing tension, and measuring speed to explore wave behavior safely.


Step-by-step guide to power a wave with a string
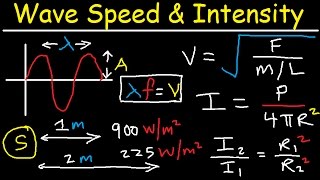
Derivation of power transmitted by wave along string
Step 1
Gather all your materials and bring them to a clear flat area where you can stretch the string.
Step 2
Place the two supports about 1 to 3 meters apart so the string can be stretched between them.
Step 3
Tie one end of the string securely to the first support using a simple knot.
Step 4
Tie the other end of the string securely to the second support using a simple knot.
Step 5
Pull the string so it runs straight between the supports and feels a little tight.
Step 6
Measure the length of the string between the supports with the ruler and write the number on your paper.
Step 7
Clip the clothespin to the midpoint of the string and attach the small weight to the clothespin.
Step 8
Pluck the string at the midpoint once to make a single pulse like a tiny splash.
Step 9
Use the stopwatch to time how long the pulse takes to travel from the midpoint to the nearest support and write the time down.
Step 10
Repeat the pluck and timing five times and record all five times on your paper.
Step 11
Calculate the average time for those five trials by adding the times and dividing by five and write the average down.
Step 12
Make the string tighter by retying one end so the string is shorter and more taut or by removing some weight.
Step 13
Repeat Steps 8 through 11 with the tighter string and write the new average time.
Step 14
Compare the two average times and write down which tension made the pulse travel faster and what you think that means.
Step 15
Share your finished creation and what you discovered about waves on DIY.org.
Help!?
What can I use if I don't have a clothespin or small weight for Step 6?
Instead of a clothespin and small weight in Step 6, use a binder clip at the midpoint and hang a stack of coins or a metal washer taped to the clip as the weight.
My times from Steps 8–11 keep changing and the clip slides — what should I do?
If timings vary or the clothespin slides during Steps 6–11, stop the clip with a small piece of tape or a tiny knot at the midpoint, make sure supports are firmly anchored, and pluck with the same gentle force each trial to get consistent pulses.
How can I change the activity for different age groups while still following the instructions?
For younger children, simplify Steps 5–11 by measuring once and doing three plucks to compare 'fast' versus 'slow' tension, while older kids can follow all steps and additionally calculate wave speed (string length ÷ average time) and test multiple tensions quantitatively.
How can we extend or personalize the experiment beyond the basic steps?
To extend the activity, try different string materials and weights across various tensions (repeat Steps 1–13), record and graph the average times or calculated speeds, film pulses with slow-motion, and then share your photos, charts, and conclusions on DIY.org as in Step 15.
Watch videos on how to power a wave with a string
Experiment: Waves on a String
4 Videos
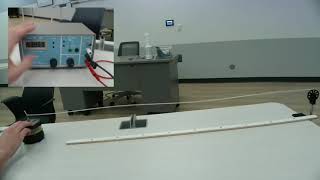
Experiment: Waves on a String
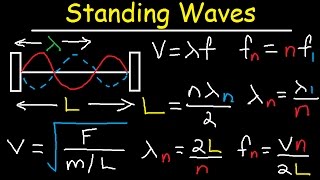
Standing Waves on a String, Fundamental Frequency, Harmonics, Overtones, Nodes, Antinodes, Physics
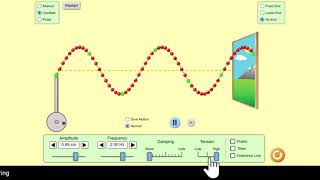
Wave on a String - PHET Tutorial
Wave Speed on a String - Tension Force, Intensity, Power, Amplitude, Frequency - Inverse Square Law
Facts about waves and vibrations
🎸 Plucking a stretched string makes transverse waves — the same trick that makes guitars and violins sing!
⚡ Wave speed on a string depends on tension and mass-per-length: higher tension → faster waves (c = √(T/μ)).
🧪 You can measure wave speed with a stopwatch and a ruler by timing a pulse along a known distance — simple, safe, and scientific.
🪢 Thicker or heavier strings slow down waves and give lower pitches — that’s why bass strings are much thicker than treble strings.
🔁 When a wave hits a fixed support it reflects and flips, and when reflections meet they can make standing waves and pretty harmonics.
How do I set up and run the ‘power a wave with a string’ activity?
What materials do I need to power a wave with a string?
What ages is this string wave activity suitable for?
What are the benefits and safety tips for the string wave experiment?


