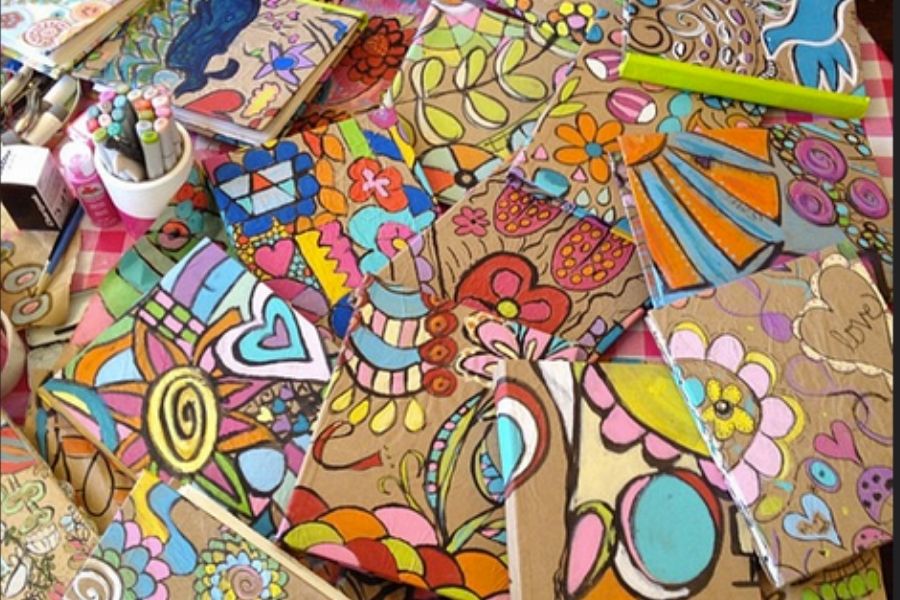
Paint your own sketchbook cover
Decorate and paint your own sketchbook cover using acrylic paints, brushes, stencils, and a sealant to personalize and protect your artwork.


Step-by-step guide to paint your own sketchbook cover
Step 1
Clear a flat workspace and cover it with newspaper or scrap paper.
Step 2
Put on your apron or old shirt to protect your clothes.
Step 3
Set out your sketchbook paints brushes stencils pencil eraser masking tape palette water cup and paper towels.
Step 4
Use masking tape to tape the edges of the sketchbook cover to make a neat painting border.
Step 5
Lightly draw your design on the cover with a pencil.
Step 6
Pour a small amount of paint onto your palette or paper plate.
Step 7
Paint a smooth base coat over the cover using a larger brush.
Step 8
Let the base coat dry completely before adding more paint (about 15 to 30 minutes).
Step 9
Use stencils and a smaller brush to add shapes and patterns to your design.
Step 10
Paint fine details and outlines with a thin brush to finish your artwork.
Step 11
Wait until all the paint is fully dry to the touch.
Step 12
Carefully peel off the masking tape slowly at a 45-degree angle.
Step 13
In a well-ventilated area ask an adult to spray or brush on the clear sealant following the product directions and let it dry fully.
Step 14
Share your finished sketchbook cover on DIY.org
Help!?
What can I use if I don't have masking tape, a palette, or stencils?
Use painter's tape instead of masking tape, a clean paper plate or disposable foil tray as a palette for pouring paint, and homemade stencils cut from cereal-box cardboard or freezer paper.
My base coat is streaky or still tacky after 30 minutes—what should I do?
Smooth a streaky base coat with even strokes using the larger brush, wait the full 15–30 minutes from the instructions and add a thin second coat if needed, then let it dry completely before adding stencils.
How can I adapt this project for different ages?
For younger children use washable paints, larger brushes, and pre-drawn pencil designs with adult help for taping and applying the clear sealant, while older kids can try acrylics, fine detail brushes, and more complex stencils to follow the steps independently.
How can we enhance or personalize the finished sketchbook cover?
After carefully peeling off the masking tape at a 45-degree angle, add metallic paint highlights or glued-on fabric/photo decoupage and then follow the instructions to spray or brush on the clear sealant so your custom details are protected before sharing on DIY.org.
Watch videos on how to paint your own sketchbook cover
How to make a watercolour sketch book - easy, no sew, perfect bound
4 Videos
How to make a watercolour sketch book - easy, no sew, perfect bound
7 Fun Ways to FILL your Sketchbook with Watercolor
How to Paint on Paper with Acrylic || Sketchbook Painting Tutorial
PERFECT BOUND MINI SKETCHBOOKS DIY - MAKE YOUR OWN USING SIMPLE MATERIALS
Facts about painting and craft projects for kids
🎨 Acrylic paint became a favorite for artists in the 1950s because it dries fast, is vibrant, and cleans up with water.
📒 Famous artists like Leonardo da Vinci filled sketchbooks with drawings and notes—some of his notebooks still exist today.
✋ Stencils were used in prehistoric cave art to make handprints thousands of years ago, showing how old this technique is!
🖌️ Gesso has been used since the Renaissance to prime panels and give paint a nice 'tooth' to stick to.
🛡️ A clear sealant (varnish) protects painted surfaces from dirt, moisture, and fading—some varnishes can even be removed and reapplied.
How do you paint a sketchbook cover step-by-step?
What materials do I need to decorate and paint a sketchbook cover?
What ages is painting a sketchbook cover suitable for?
What safety tips should parents follow when kids paint sketchbook covers?
