Paint Watercolour Fall Leaves
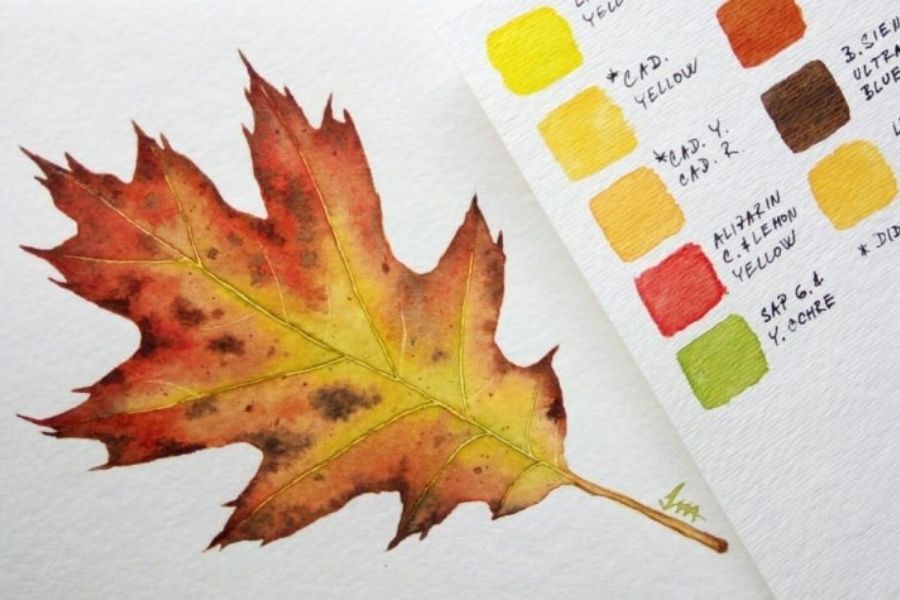
Paint watercolour fall leaves on paper using brushes and paints, practicing blending, wet-on-wet techniques, and observing leaf shapes, colors, and veins.


Step-by-step guide to paint watercolour fall leaves
Step 1
Gather the materials listed and bring them to a clean table.
Step 2
Tape the edges of your watercolor paper to the table so it stays flat while you paint.
Step 3
Choose one or two leaves or photos to study for shape and color ideas.
Step 4
Trace the outline of a chosen leaf with your finger while looking closely at its edges and veins.
Step 5
Lightly sketch the leaf shapes on your paper with a pencil.
Step 6
Mix two fall colors on your palette to make a soft new shade to start with.
Step 7
Wet the inside of one penciled leaf shape with a clean brush and plain water.
Step 8
Touch the wet area with your brush loaded with paint and let the color spread across the shape.
Step 9
Drop a second color into the still-wet paint to watch the colors blend and make new shades.
Step 10
Tilt the paper gently if you want the colors to flow and mix farther across the leaf.
Step 11
Paint the leaf veins using a smaller brush and a slightly darker or stronger color.
Step 12
Lift paint with a clean damp brush or a dab of paper towel to create highlights if you want.
Step 13
Repeat mixing wet-on-wet colors and painting details for the other leaves using different mixes and brush sizes.
Step 14
Let your painting dry completely before touching it.
Step 15
Share your finished watercolor fall leaves on DIY.org.
Help!?
What can we use if we don't have watercolor paper or a proper palette?
Tape heavyweight mixed-media paper or sturdy cardstock to the table as your 'watercolor paper', use a foam or synthetic craft brush and a clean plate or plastic lid for a palette, and when you 'wet the inside' use a bit less water so thinner paper won't buckle.
My colors aren't spreading or they're turning muddy—what should we try?
If paint won't spread or becomes muddy, make sure you truly 'wet the inside' first with clean water, use a cleaner brush and less pigment when you 'touch the wet area', and tilt the paper gently instead of overworking the wash.
How can I adapt the steps for different ages (preschool, elementary, older kids)?
For preschoolers, simplify by tracing with a finger and using large brushes and pre-mixed fall colors; for elementary kids, let them lightly sketch and practice 'drop a second color into the still-wet paint'; for older kids, encourage mixing complex hues, fine brushes to 'paint the leaf veins', and lifting highlights for detail.
How can we extend or personalize the finished watercolor leaves?
Try sprinkling salt into the wet wash when you 'drop a second color' for texture, press a painted real leaf to make prints, add metallic veins after the painting is dry, or scan and share your finished leaves on DIY.org.
Watch videos on how to paint watercolour fall leaves
How To Draw Fall Leaves
4 Videos

How To Draw Fall Leaves
How To Paint A Fall Tree

Blippi Creates Art with Autumn Leaves | Learning Colors for Kids | Educational Videos For Kids

Easy Trees Water Color Painting Art
Facts about watercolour painting for kids
🍁 In fall, chlorophyll breaks down and hidden pigments like carotenoids (yellows) and anthocyanins (reds) become visible.
🎨 Watercolor painting has been practiced for over 2,000 years, with early masterpieces from East Asia and Europe showing water-based pigments on paper.
🌧️ The wet-on-wet watercolor technique makes pigments spread and blend smoothly on damp paper—great for soft leaf edges and dreamy washes.
🔍 Leaf veins come in different patterns—netted veins in many trees and parallel veins in grasses—and studying them helps identify plants.
🖌️ A round watercolor brush (sizes 6–8) is kid-friendly: it can lay big washes and also make fine veins and tips for leaves.
How do you paint watercolor fall leaves?
What materials do I need for painting watercolor fall leaves?
What ages is painting watercolor fall leaves suitable for?
What are the benefits of painting watercolor fall leaves?
