Paint a Rainy Day
Paint a rainy day scene using watercolors or tempera, mixing colors, creating raindrops and reflections, and exploring mood through light and shadow.


Step-by-step guide to Paint a Rainy Day
Rainy Day Painting / Acrylic Painting for Beginners / STEP by STEP
Step 1
Choose a flat workspace and tape your paper to the surface so it stays still.
Step 2
Arrange your paints brushes palette cup of water and paper towel within easy reach.
Step 3
Lightly sketch a horizon line and big shapes like buildings trees or an umbrella with your pencil.
Step 4
Mix a light gray-blue on your palette by adding a little blue to a tiny bit of brown or black with water.
Step 5
Wet the sky area gently with a clean brush and plain water so the paint can spread smoothly.
Step 6
Paint the sky with the light gray-blue wash using broad strokes from the top toward the horizon.
Step 7
Paint cloud shapes with a darker gray-blue using soft dabbing motions to keep the edges blurry.
Step 8
Paint raindrops by making thin vertical strokes of different lengths with a small brush.
Step 9
Create puddle reflections by painting softer watered-down mirror shapes under buildings trees or umbrellas.
Step 10
Add highlights by dabbing tiny spots of white paint on the tops of puddles raindrops and shiny surfaces.
Step 11
Add soft shadows beneath objects with a thin wash of a darker color to change the mood.
Step 12
Add any small details like lights in windows umbrellas or wet street streaks with a small brush.
Step 13
Let your painting dry completely before touching it so colors stay neat.
Step 14
Rinse and clean your brushes and put your paints and tools away neatly.
Step 15
Share your finished rainy day painting on DIY.org
Help!?
What can I use if I don't have a palette, watercolor paints, or tape?
Use a clean ceramic plate as a palette, dilute acrylic or tempera (or even food coloring) with water to mix the light gray-blue by adding a little blue to a tiny bit of brown or black, and secure your paper with masking tape or low-stick scotch tape.
My sky looks blotchy or the paint won't spread smoothly — what should I do?
Gently re-wet the sky area with a clean brush and plain water as described in the instructions and then apply the light gray-blue wash in broad strokes from the top toward the horizon so the paint can spread smoothly.
How can I adapt this project for younger or older kids?
For younger children, tape thicker paper down and give them large brushes or sponges with pre-drawn horizon and big shapes to fill in, while older kids can follow all steps exactly and add finer raindrop strokes, layered glazes, and detailed reflections under buildings.
What are some ways to enhance or personalize the finished rainy day painting?
Add texture by sprinkling coarse salt on the wet sky wash, reserve or dab tiny white highlights on puddles and raindrops (or use masking fluid beforehand), and include personal small details like lights in windows or wet street streaks before letting it dry.
Watch videos on how to Paint a Rainy Day
Rainy Day Painting / Acrylic Painting for Beginners / STEP by STEP
4 Videos
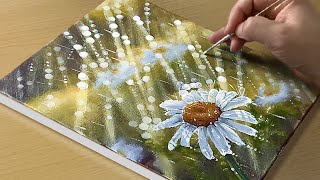
Rainy Day Painting / Acrylic Painting for Beginners / STEP by STEP
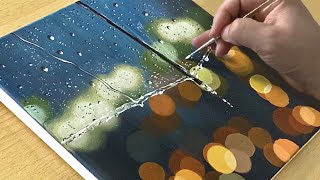
Rainy Day Painting / Acrylic Painting for Beginners / STEP by STEP
Easy Rainy Season painting / step by step tutorial / Rainy Day Scenery
Paint a Rainy Day in 3 Minutes! Easy One-Colour Watercolour for Beginners
Facts about watercolor and tempera painting for kids
🌧️ Rainy scenes often use cool blues and soft greys to create a calm or moody atmosphere.
🎨 Watercolor pigments usually dry lighter than they look wet, so artists plan highlights by leaving paper white.
🖌️ Mixing complementary colors (like blue + orange) makes muted greys or browns—great for rainy streets and subtle shadows.
🪞 Wet pavement reflects like a mirror: reflections tend to be darker, blurrier, and slightly distorted.
🏙️ Gustave Caillebotte's Paris Street; Rainy Day (1877) is huge—about 212 × 276 cm—showing how dramatic rain can be in a painting.
How do I guide my child to paint a rainy day scene?
What materials do I need to paint a rainy day with my child?
What ages is painting a rainy day suitable for?
What are the benefits of painting a rainy day and creative variations?


