Measure wind speed
Build a homemade anemometer using cups, straws, and a stick, then measure wind speed and record how wind changes over time.

Step-by-step guide to build a homemade anemometer and measure wind speed
How to make an anemometer (wind speed meter)
Step 1
Gather all the materials on a flat table so everything is ready to use.
Step 2
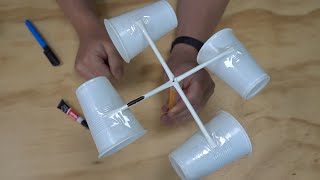
Cross two straws at their midpoints to make a plus sign and tape them together firmly at the center.
Step 3
Tape a straw to each of the other two straws so you have four straw arms extending from the center.
Step 4
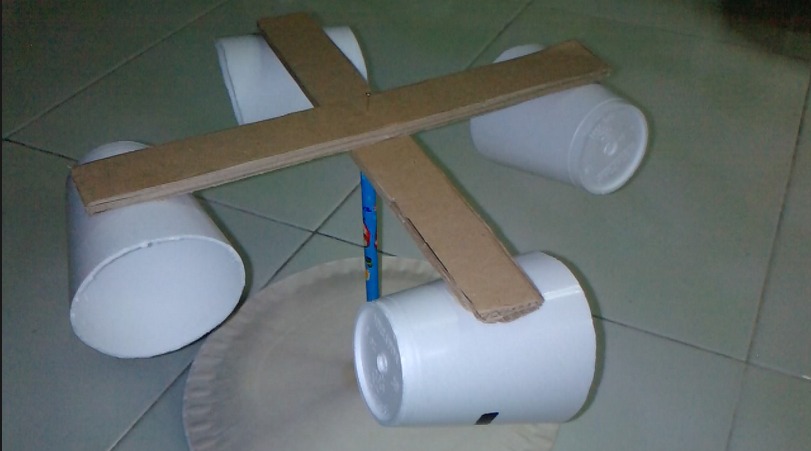
Tape one cup to the end of each straw so the cup is secure on every arm.
Step 5
Turn each cup so all open sides point the same direction around the anemometer.
Step 6
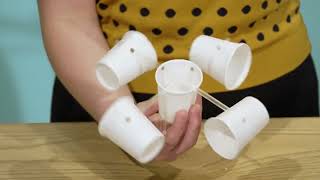
Push the push pin through the middle of the crossed straws and into the end of the wooden stick so the straw cross can sit on the stick like a spinner.
Step 7
Adjust the push pin depth so the straw cross spins freely on the stick with very little rubbing.
Step 8
Use the ruler to measure from the push pin center to the center of one cup and write that distance down in centimeters.
Step 9
Convert that distance to meters by dividing the centimeters by 100 and write the number on your paper.
Step 10
Multiply 2 × 3.14 × the radius in meters to calculate the circle circumference and write the result in meters.
Step 11
Go outside, hold the stick upright at arm’s length into the wind, and have someone start the stopwatch.
Step 12
Count how many full spins the cups make in 10 seconds and write that number down.
Step 13
Divide the number of spins by 10 to get rotations per second and write that down.
Step 14
Multiply rotations per second by the circumference in meters to find the wind speed in meters per second and write your answer.
Step 15
Repeat the timed count a few times at different moments to record how the wind changes and then share a photo and your results on DIY.org
Help!?
What can we use instead of straws, plastic cups, or a push pin if we can't find those materials?
Use sturdy pencils, wooden skewers, a chopstick, or a short dowel instead of the wooden stick or straws, small paper cups reinforced with tape instead of plastic cups, and substitute a straightened paperclip pushed into a pencil eraser or a toothpick through the crossed straws for the push pin, and use your phone's stopwatch and a tape measure or ruler if needed.
Why won't my anemometer spin freely, and how can I fix it?
If the straw cross rubs against the stick or feels tight, slightly back the push pin out or re-center the crossed straws on the pin so there's minimal rubbing, ensure tape isn't touching the stick, and make sure all four cups are taped equally and point the same direction to keep it balanced.
How can I change the activity for younger children or make it more challenging for older kids?
For younger children, have an adult assemble and push the push pin into the wooden stick and let them hold the stick and count spins for 30 seconds, while older kids can precisely measure the radius with the ruler, convert to meters, calculate circumference using 2×3.14×radius, run repeated timed trials, and convert meters-per-second to km/h for comparison.
How can we extend or personalize the project after we calculate the wind speed?
Personalize the anemometer by painting and labeling each cup, test different cup sizes or arm lengths and record how the rotations per 10 seconds change, keep the measured radius from the ruler constant while trying different heights and locations, plot your wind speed results, and compare them to a local weather station before sharing your photo and results on DIY.org.
Watch videos on how to build a homemade anemometer and measure wind speed
Measuring Weather - Wind Speed
4 Videos
Measuring Weather - Wind Speed

At Home Experiment: Make an Anemometer to Measure Wind Speed

Measuring Weather with Weather Tools
Wind Energy: How to Build an Anemometer | Bite-Size Science
Facts about weather instruments
🌬️ The classic four-cup anemometer is omnidirectional — it spins the same way no matter which direction the wind comes from.
🧭 The cup anemometer was invented in 1846 by John Thomas Romney Robinson and remains a simple, reliable design for measuring wind.
⏱️ A handy DIY trick: count rotations for 10 seconds, multiply by 6 to get rotations per minute (RPM), then calibrate against a known wind speed to convert to m/s or km/h.
🌪️ Wind speeds cover a huge range — from light breezes to violent storms, and tornado gusts can exceed 400 km/h in extreme cases.
⚡ Wind turbines typically start producing electricity around 3–4 m/s and automatically shut down around 25 m/s to prevent damage.
How do I build and use a homemade anemometer to measure wind speed and record changes over time?
What materials do I need to build a cup-and-straw anemometer at home?
What ages are suitable for making and measuring wind with a homemade anemometer?
What safety tips should parents follow when kids build and use a homemade anemometer?
