Map a park
Survey a local park with an adult and draw a scaled map using footsteps, a compass or tape measure, symbols, and a key.


Step-by-step guide to map a park
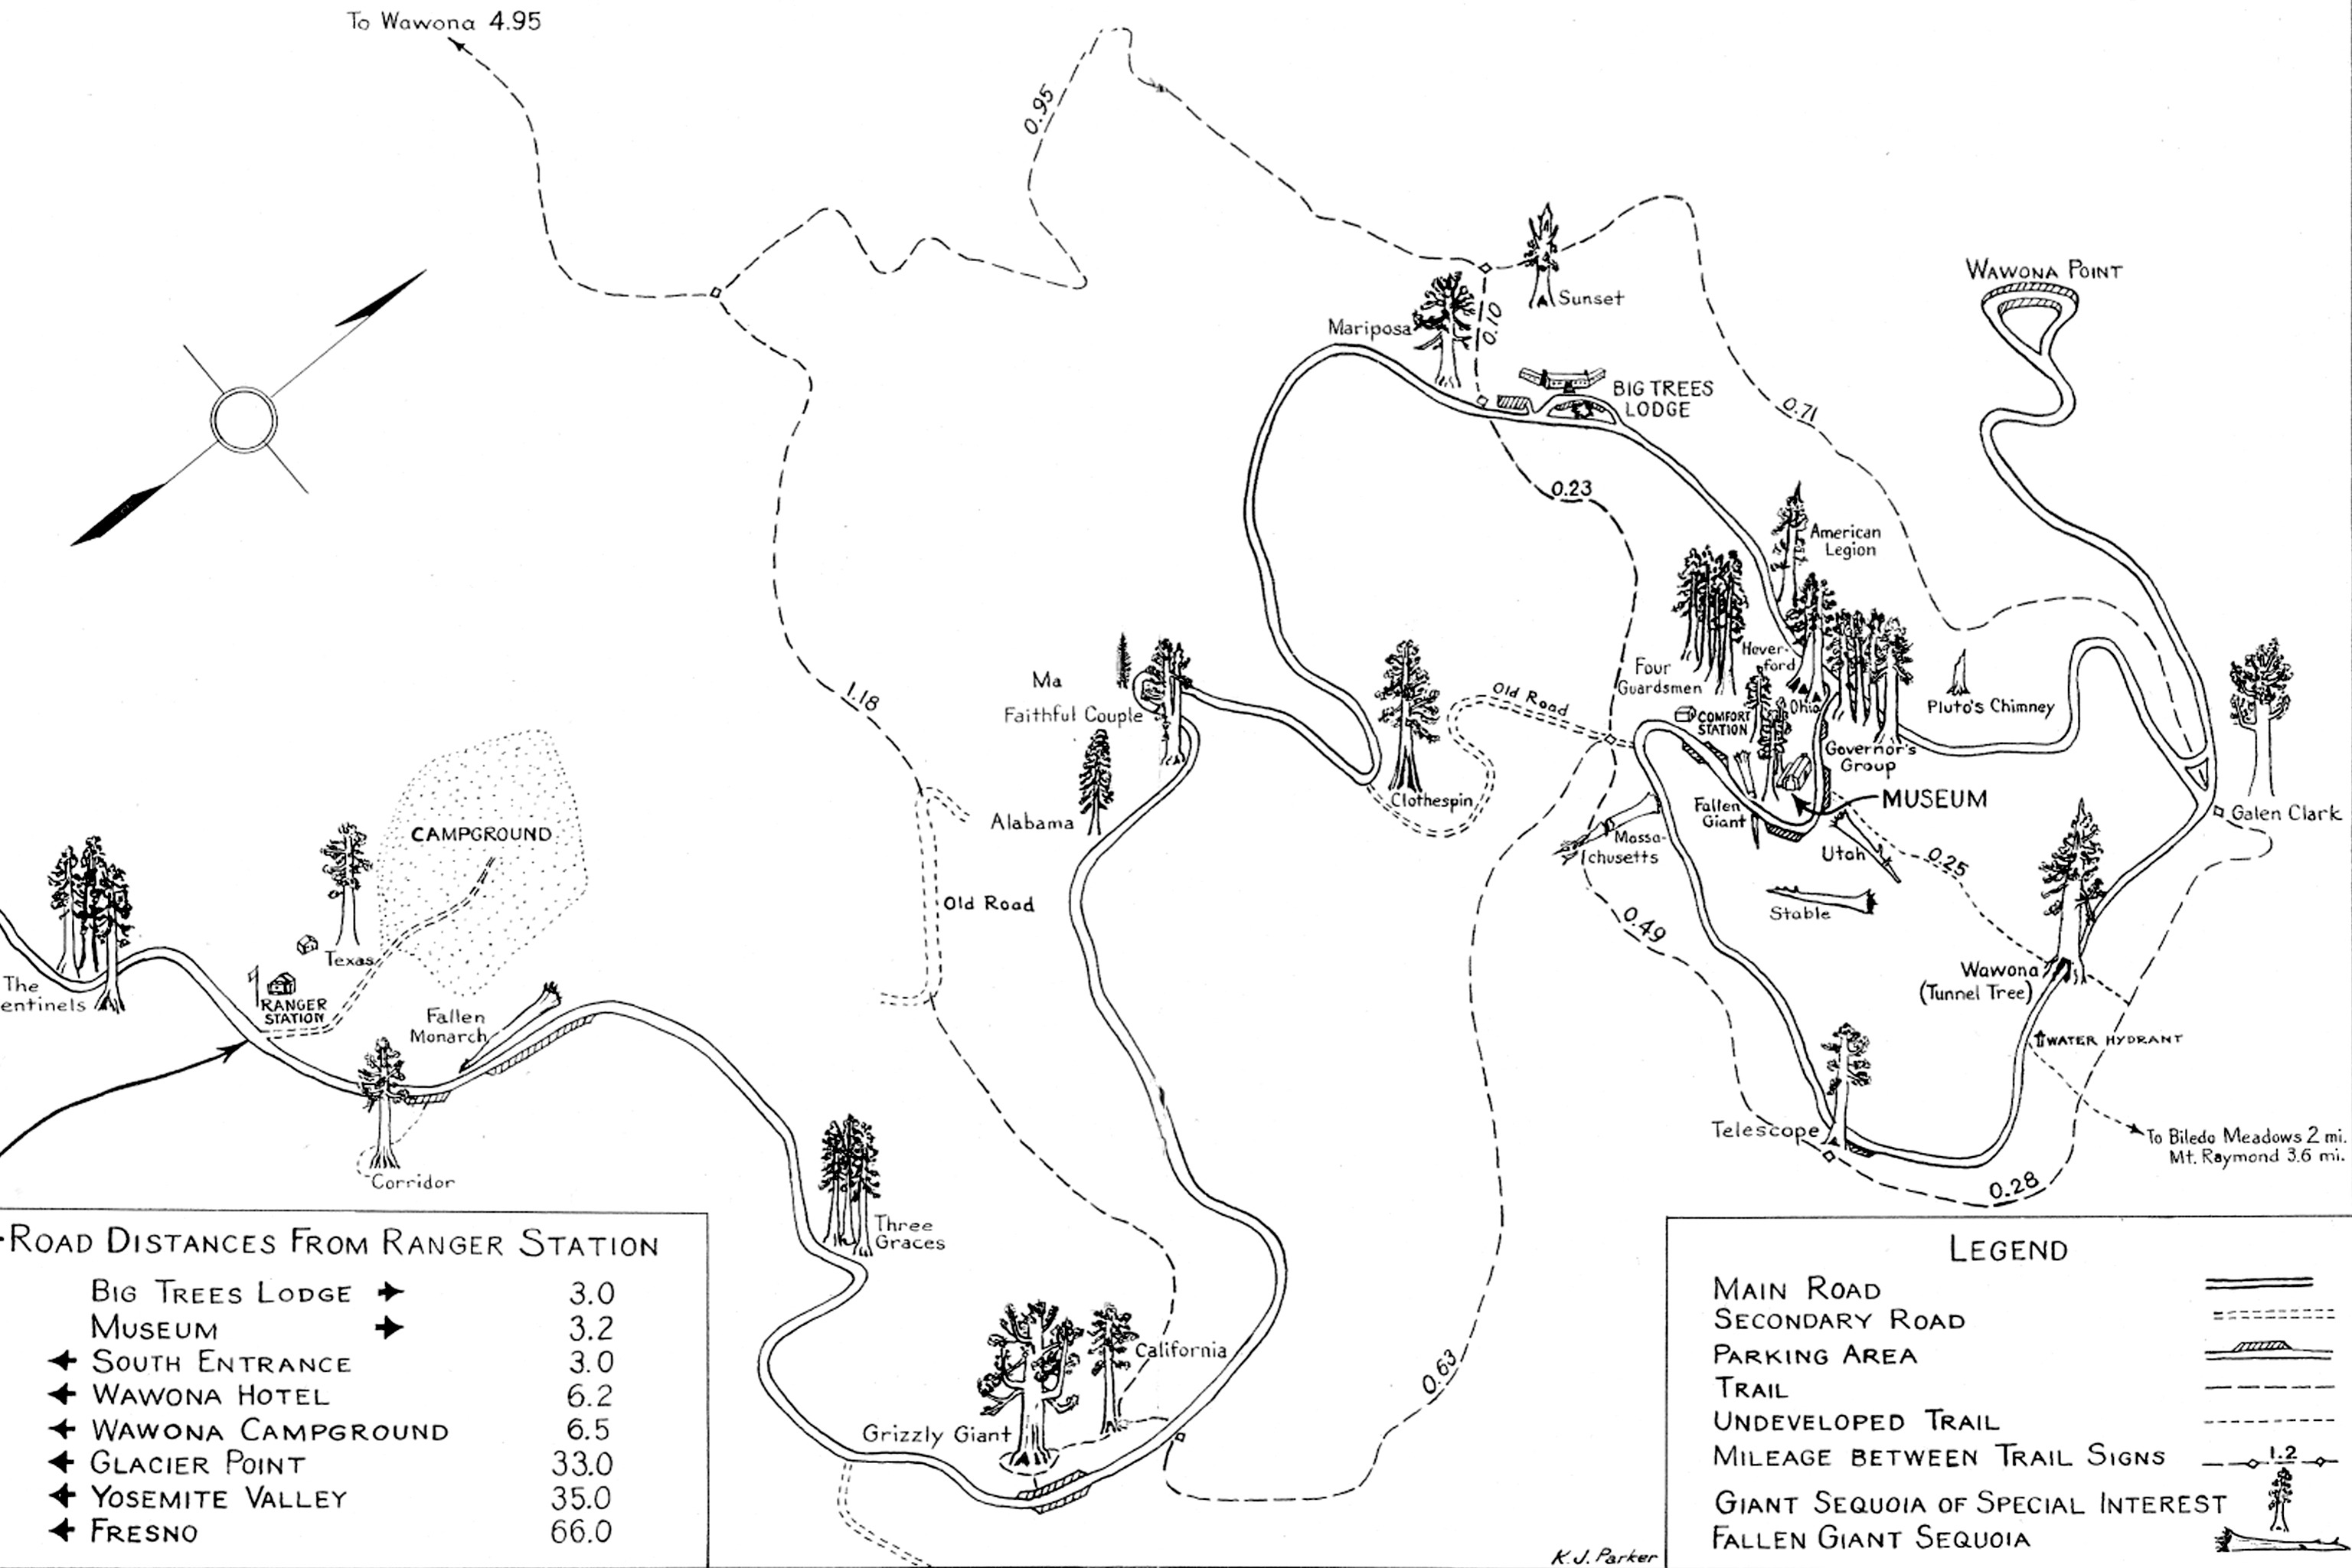
Map Skills 2 - Using a Map Key on a Park Map
Step 1
Gather all your materials and put them in a small bag.
Step 2
Ask an adult to supervise your whole park survey and agree on a time to go.
Step 3
Walk to the park with your adult.
Step 4
Choose a small safe area of the park to map.
Step 5
Pick one clear landmark to be your starting point.
Step 6
Mark the starting point with a sticky note so you can find it again.
Step 7
Measure three of your normal big steps with the tape measure.
Step 8
Calculate the average length of those three steps and write it down.
Step 9
Decide a map scale and write it on your paper (example: 1 cm = 1 m or 1 step = 1 cm).
Step 10
From the starting point walk to the next landmark while counting your steps.
Step 11
Use the compass to record the direction you walked and write it down.
Step 12
On your paper draw the path using your chosen scale and label both landmarks and the step count.
Step 13
Repeat Steps 10–12 for at least three more landmarks to connect paths around the area.
Step 14
Add simple symbols for trees benches paths and playgrounds and make a key that explains each symbol and shows your scale.
Step 15
Share your finished creation on DIY.org
Help!?
We don't have a tape measure or compass—what can we use instead?
Substitute a ruler or a printed measuring strip for the tape measure and use a smartphone compass app or pick a fixed landmark direction (for Step 11) while using your average step length from Step 6.
My step counts keep changing and my map looks wrong—how can I fix measurement and drawing mistakes?
Redo Step 6 by measuring three big steps on flat ground and calculating a new average, then re-walk and slowly recount each path in Steps 10–12 and correct the drawing in Steps 11–13 using the updated scale.
How can I adapt the activity for younger children or make it more challenging for older kids?
For younger kids simplify Steps 6–13 by using graph paper with '1 step = 1 square' and adult help labeling, while older kids can use exact meters with the tape measure, record compass bearings in Step 11, and add GPS coordinates or more symbols in Step 14.
How can we make our finished park map more creative or easier to share after Step 14 and before Step 15?
Enhance the map by adding photos or small sketches at each landmark, coloring and personalizing the symbols in Step 14, mounting the paper on cardboard or making a 3D model of features, then photograph the result to upload to DIY.org in Step 15.
Watch videos on how to map a park
Maps for Kids | Learn how to read a map and other skills in this fun introduction to maps
3 Videos
Maps for Kids | Learn how to read a map and other skills in this fun introduction to maps
Fun for children: How to make a town map

Mapmaking with Children: Sense of Place Education for the Elementary Years
Facts about basic cartography and surveying for kids
🗺️ Cartography is the science and art of making maps — the word comes from Greek for 'map' and 'to write'.
🧭 A magnetic compass points toward Earth’s magnetic north, which can be far from the geographic North Pole.
👣 You can measure distance by counting steps: an average adult step ≈ 0.75 m, so 100 steps ≈ 75 m.
📐 Map scale shows how much the real world is shrunk — 1:100 means 1 cm on the map = 1 m in real life.
🔑 A map key (legend) explains symbols — simple pictures like trees, benches, and paths make maps easy to read.
How do I survey a local park and draw a scaled map with my child?
What materials do we need to map a park using footsteps, a compass or tape measure, symbols, and a key?
What ages are suitable for surveying a park and making a scaled map?
What safety tips and benefits should we know when surveying a park?
