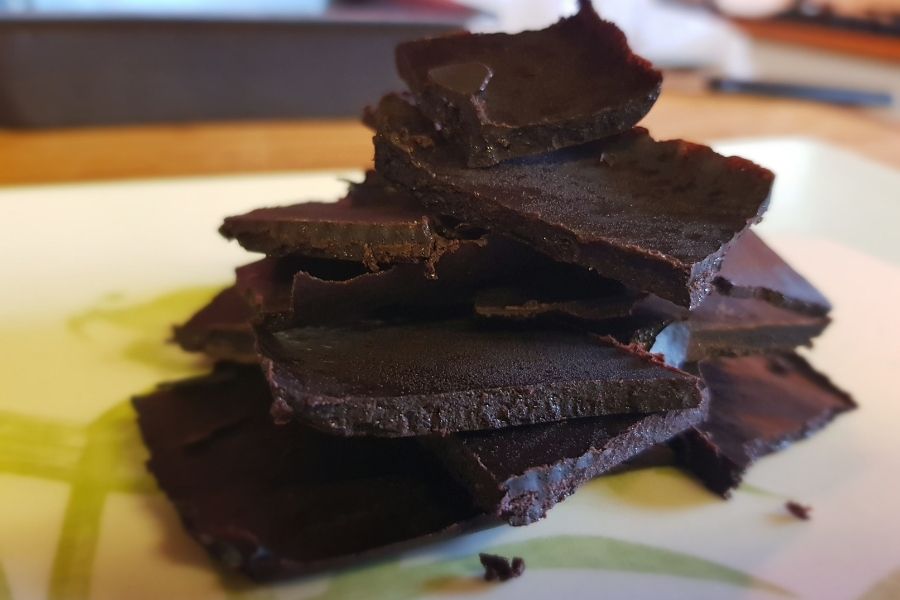
Make yummy chocolate with DIY Star JuliaGrace
Make tasty homemade chocolate with simple ingredients, pour into molds, add sprinkles, and learn safe melting and cooling techniques with DIY Star JuliaGrace.


Step-by-step guide to make yummy chocolate with DIY Star JuliaGrace
Step 1
Wash your hands with soap and water for 20 seconds.
Step 2
Cover a flat surface with wax paper or place a clean plate down.
Step 3
Put your silicone molds or ice cube tray on the covered surface.
Step 4
Measure 1 to 2 cups of chocolate chips or chopped chocolate into the microwave-safe bowl.
Step 5
Heat the bowl in the microwave for 30 seconds.
Step 6
Use an oven mitt or towel to carefully take the hot bowl out of the microwave.
Step 7
Stir the chocolate with the spoon until it looks mostly smooth.
Step 8
If you still see chunks, heat for 10-second bursts and stir between each burst until the chocolate is completely smooth.
Step 9
Spoon the melted chocolate into each mold cavity, filling most of the way.
Step 10
Tap the tray gently on the counter to pop air bubbles out of the chocolate.
Step 11
Sprinkle your sprinkles or chopped nuts onto each chocolate while the surface is soft.
Step 12
Put the molds in the refrigerator and let them chill for 20 to 40 minutes until firm.
Step 13
Pop the chocolates out of the molds and place them on a clean plate.
Step 14
Share your finished creation on DIY.org
Help!?
What can we use if we don't have silicone molds, an ice cube tray, or a microwave-safe bowl?
If you don't have silicone molds or an ice cube tray, use a clean muffin tin or paper cupcake liners on the wax paper, and if you don't have a microwave-safe bowl or microwave, melt the chocolate in a heatproof bowl over simmering water and follow the same stirring and spooning steps.
My chocolate looks lumpy or grainy after microwaving; what should I do?
If the chocolate is lumpy or grainy during Steps 6–7, heat in 10-second bursts and stir between each burst, and if it still seizes add a teaspoon of neutral oil or a small amount of warm cream while stirring until smooth, then continue spooning into molds.
How can I adapt the activity for preschoolers, elementary kids, or teens?
Have an adult handle the hot Steps 4–8 for preschoolers while they do safe tasks like tapping the tray and sprinkling, let elementary kids measure and spoon with supervision, and allow teens to microwave in bursts, experiment with tempering, and pipe fillings.
How can we make the chocolates more special or gift-ready?
For special or gift-ready chocolates, mix in chopped nuts or a drop of vanilla or peppermint during Step 6 before spooning, create layered flavors by chilling between pours, sprinkle sea salt or decorative sprinkles in Step 11, and arrange the popped chocolates on a clean plate with ribbon and photos to share on DIY.org.
Watch videos on how to make yummy chocolate with DIY Star JuliaGrace
How to Make 5 Handmade Chocolates | Handcrafted | Bon Appétit
4 Videos
How to Make 5 Handmade Chocolates | Handcrafted | Bon Appétit
I Made Chocolate From Scratch

4 ingredients Homemade Chocolate Recipe | How To Make Chocolate At Home | Yummy
How to Make Your Own Chocolate | Bon Appétit
Facts about kids' cooking and chocolate making
🍫 The scientific name Theobroma cacao means “food of the gods” — cocoa has been prized for thousands of years.
🌱 It takes roughly 400 cocoa beans to make about one pound (0.45 kg) of chocolate — lots of tiny beans for a tasty treat!
🔥 Chocolate (thanks to cocoa butter) starts to melt around 34–36°C (93–97°F), which is why it melts so nicely in your mouth.
❄️ Proper tempering gives chocolate a glossy shine and a snap — untempered chocolate can go soft or get a white 'bloom'.
💧 Even one tiny drop of water can make melted chocolate seize into a grainy mess, so use a dry double boiler or low-power microwave.
How do I make yummy homemade chocolate with DIY Star JuliaGrace?
What materials and ingredients do I need to make chocolate at home?
What ages is this chocolate-making activity suitable for?
What safety tips and fun variations can we try with DIY Star JuliaGrace?
