Make witch or wizard props
Make witch or wizard props using cardboard, fabric, paint, and glue. Create a wand, hat, and spellbook for imaginative play.


Step-by-step guide to make witch or wizard props
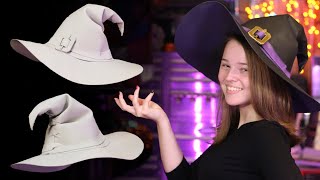
How To Make a Witch Costume for Kids | Channel Mum
Step 1
Cover your table with newspaper and lay out all the materials so you have a clear workspace.
Step 2
Cut a large circle for the brim and a tall triangle for the cone from a piece of cardboard.
Step 3
Cut a smaller circle from the center of the brim so the cone base can fit through.
Step 4
Roll the triangle into a cone shape and glue the long edge so the cone holds its shape.
Step 5
Push the cone base through the brim hole and glue the cone to the underside of the brim to make the hat.
Step 6
Drape a fabric scrap over the hat and glue it down, smoothing wrinkles as you press.
Step 7
Decorate the hat with paint or markers to add stars moons stripes or spooky symbols.
Step 8
Cut a long thin wand shape from cardboard using scissors.
Step 9
Paint the wand with craft paint and let the paint dry.
Step 10
Wrap ribbon or narrow fabric strips around one end of the wand and glue them in place for a magical handle.
Step 11
Cut two equal rectangles of cardboard for the spellbook front and back covers.
Step 12
Fold a stack of plain paper in half to make the pages and press the fold flat.
Step 13
Place the folded pages between the covers and glue the spine so the pages stay in the book.
Step 14
Let all your hat wand and spellbook pieces dry completely.
Step 15
Share your finished witch or wizard props on DIY.org so other kids can see your magical creations.
Help!?
What can we use if we don't have cardboard, craft paint, or ribbon listed in the materials?
Use flattened cereal or shipping boxes or poster board in place of cardboard, washable tempera or food coloring diluted as paint if craft paint is unavailable, and narrow fabric strips or cut-up gift wrap in place of ribbon for wrapping the wand handle.
What should we do if the cone won't fit through the brim hole or the hat won't stay together?
Widen the center hole in the brim with scissors or trim the cone base to fit, roll the triangle tightly and glue the long edge firmly, then glue the cone to the underside of the brim as instructed to secure the hat.
How can we adapt the cutting and gluing steps for different ages of children?
For toddlers and preschoolers, pre-cut the brim, cone, wand and book covers and let them decorate and glue fabric scraps and paint, for school-age kids have them cut shapes and assemble the hat and spellbook themselves, and for older kids let them design complex decorations, sew a fabric lining, or bind the spellbook with thread.
How can we enhance or personalize the hat, wand, and spellbook beyond the basic instructions?
Aged the spellbook pages with tea before folding, glue on sequins or foil stars and moons to the fabric-covered hat, add battery LED stickers under the hat fabric or inside the wand for light effects, and tie charms or beads to the ribbon-wrapped wand handle for extra magic.
Watch videos on how to make witch or wizard props
How to Make A Witch Hat out of Foam - Free Pattern - Easy DIY Tutorial Perfect Halloween / Cosplay
4 Videos
How to Make A Witch Hat out of Foam - Free Pattern - Easy DIY Tutorial Perfect Halloween / Cosplay

Easy DIY Witch Cauldron | Foam Base, Glowing Lights & Fiery Effect for Halloween
How to Witch costume: make a witch's hat
Cast a Style Spell! 🧙♀️ How to Make a Witch Costume in Dress to Impress
Facts about kids' costume and prop making
🪄 Wands are a storytelling shortcut — across cultures, a simple stick or rod often symbolizes magic and power.
📚 'Grimoire' is the historical word for a spellbook; some old grimoires mix charms, recipes, and folklore.
♻️ Cardboard is one of the most recycled materials and becomes very strong when folded or layered — great for hats and prop cores.
🧵 Felt doesn't fray, so it glues and layers easily — that's why felt is a favorite for kid-friendly costume details.
🎭 Making props boosts imaginative play and helps kids practice storytelling, problem-solving, and fine motor skills.
How do you make witch or wizard props?
What materials do I need to make witch or wizard props?
What ages is this activity suitable for?
What safety tips and variations can I use?
