Make tape shoes
Make simple wearable tape shoes by layering duct tape over cardboard foot templates and socks, then trim, decorate, and test fit safely.


Step-by-step guide to make tape shoes
How to Make Shoes at Home | Step-by-Step DIY Sneaker Kit Tutorial Shoemaking for Beginners
Step 1
Gather all your materials and sit at a clean flat table.
Step 2
Put on a sock for the foot you will make the shoe for.
Step 3
Place your socked foot flat on the cardboard.
Step 4
Trace around your foot with the marker to make a foot outline.
Step 5
Draw about one finger-width outside the outline using the ruler for extra room.
Step 6
Cut out the cardboard foot template along the outer line with scissors.
Step 7
Make a sticky tape sheet by laying overlapping strips of duct tape sticky side up until it is bigger than the template.
Step 8
Lay the cardboard template sticky side down onto the tape sheet.
Step 9
Fold tape over the cardboard edges to seal the taped sole.
Step 10
Place the taped sole under your socked foot.
Step 11
Wrap strips of duct tape around your foot and the sole to build a snug upper.
Step 12
Trim extra tape or cardboard from the edges with scissors so the shoe is comfortable.
Step 13
Walk slowly a few steps to test the fit and stop if it feels loose or uncomfortable.
Step 14
Decorate your tape shoes with colouring materials or extra tape to make them colorful.
Step 15
Share your finished tape shoes on DIY.org.
Help!?
What can we use if we don't have duct tape or cardboard for the taped sole?
If you don't have duct tape, use wide packing/shipping tape or gaffer tape layered sticky-side up, and substitute thin cereal-box or poster-board for the cardboard when you cut out the foot template.
My taped shoe is wrinkled or comes apart when I walk—what step should I redo or change?
If the sole peels or the upper is loose, press the cardboard template firmly sticky-side down, fold more tape over the cardboard edges to reseal the taped sole, and add extra wrapping strips around your foot when you wrap strips of duct tape to build a snug upper.
How can I adapt this activity for younger children or make it more challenging for older kids?
For preschoolers, have an adult do the tracing, cutting, and tape folding steps and let the child help smooth tape and decorate, while older kids can measure the one finger-width allowance themselves, experiment with layered soles for durability, and design complex color patterns.
What are some ways to improve comfort, durability, or personalize the finished tape shoes?
To enhance the shoes, glue a felt or foam insole onto the taped sole for comfort, reinforce high-wear areas with extra duct tape layers, add a heel strap by taping ribbon under the folded edges, and personalize with markers or colored tape before sharing on DIY.org.
Watch videos on how to make tape shoes
Shoemaking Build Kit DIY Build shoes at Home! shoemaking Video tutorial #shoemaker #shoemaking
4 Videos
Shoemaking Build Kit DIY Build shoes at Home! shoemaking Video tutorial #shoemaker #shoemaking
Simple Ways to Make Your Own Stylish Shoes from Scratch!
Make Your Own BABY Shoes at Home Easily Today✨ Mindful Stitch
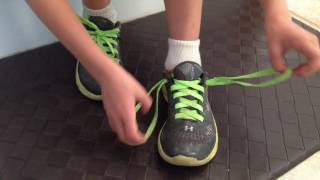
Teaching kids to tie shoes - NEW TECHNIQUE
Facts about duct tape crafts for kids
🛠️ Duct tape started in the 1940s during WWII to seal ammo boxes—and now makers use it for everything from wallets to shoes!
🦶 Shoemakers use a foot-shaped mold called a 'last'; a cardboard template is a quick DIY last for tape shoes.
🎨 Duct tape comes in hundreds of colors and patterns, so you can decorate shoes without paint or glue.
🧦 Wearing socks under tape shoes protects skin and makes the shoes easier to remove—safety first!
📏 Kids' feet grow fast—check fit often and leave extra room so homemade shoes stay comfy while playing.
How do you make wearable tape shoes step by step?
What materials do I need to make tape shoes?
What ages is making tape shoes suitable for?
What are safety tips and fun variations for tape shoes?
