Make Kawaii Miniature Donuts w/ Clay
Make kawaii miniature donuts with soft clay, shape tiny donut rings, add colorful glaze and smiling faces, then dry and display or attach as charms.


Step-by-step guide to make kawaii miniature donuts with clay
"DIY Mini Clay Donuts 🍩 | Cute Handmade Miniature Food Tutorial" yummy!! 😋
Step 1
Gather all your materials and clear a clean workspace covered with wax paper.
Step 2
Tear off a tiny piece of clay and roll it into a smooth ball in your palm.
Step 3
Flatten the ball into a small disc about the size of a coin and about half a fingertip thick.
Step 4
Press the straw or round cutter through the center of the disc to make a donut hole.
Step 5
Smooth the ring edges gently with your finger so the donut looks neat and round.
Step 6
Make 4 to 6 donut rings by repeating Steps 2 to 5 so you have a mini batch to decorate.
Step 7
Press a thin flat piece of a different colored clay onto the top of each donut to make the glaze.
Step 8
Use a toothpick to gently smooth and trim the glaze edges so it fits the donut neatly.
Step 9
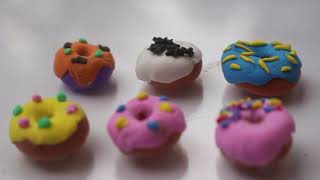
Pinch tiny bits of different colored clay and press them onto the glaze to make sprinkles.
Step 10
Use a toothpick to press two small dots and a tiny curved line to create a kawaii smiling face.
Step 11
If you want a charm, gently push an eye pin through the top edge of each donut leaving the loop exposed.
Step 12
Place your donuts on the wax paper and let them air dry undisturbed for at least 24 hours or follow the clay package instructions.
Step 13
After the donuts are fully dry, paint tiny cheek blush and any extra details with your paintbrush and coloring materials.
Step 14
Brush a thin coat of glossy varnish or clear nail polish over each donut to seal and make the glaze shiny.
Step 15
Share a photo of your finished kawaii miniature donuts on DIY.org so everyone can see your cute creations.
Help!?
What can we use if we don't have wax paper, a straw, or glossy varnish from the materials list?
Use parchment paper or a silicone mat for the workspace in Step 1, a pen cap or small round cutter instead of a straw in Step 4, and clear nail polish or Mod Podge in place of glossy varnish for Step 14.
My donut hole keeps collapsing or the glaze falls off—what should I do?
Make the disc a bit thicker in Step 3, support the underside and twist the straw slowly in Step 4, score both surfaces and press firmly when you add the glaze in Step 7, and let pieces dry flat and undisturbed for the full 24 hours in Step 12 so they don't crack or lose sprinkles before sealing in Step 14.
How can I adapt this activity for younger children or make it more challenging for older kids?
For preschoolers, have them roll larger dough balls and skip tiny sprinkles while an adult handles the straw hole in Step 4 and the eye pin in Step 11, whereas older kids can add finer sprinkles, painted details in Step 13, and make charm necklaces by threading the eye pin loops after varnishing in Step 14.
What are simple ways to enhance or personalize the kawaii miniature donuts?
Swirl two clay colors for marbled glazes in Step 7, press microbeads or glitter onto the glaze before sealing in Step 14, push an eye pin in Step 11 to make charms for a bracelet or necklace, and create a tiny display box to photograph and share on DIY.org in Step 15.
Watch videos on how to make kawaii miniature donuts with clay
Easy Miniature Donuts | Mini Donut Box | Polymer Clay Tutorial
4 Videos

Easy Miniature Donuts | Mini Donut Box | Polymer Clay Tutorial
How to make mini Donuts with Air Dry Clay -super easy steps! 🍩
Mini Donut Made with Clay 🍩 | Day 5 | Miniature Food Clay Series | Cute Air Dry Clay Craft |
Polymer CLAY Tutorial Miniature DONUT | Air Dry Clay CREATIONS | Clay DIY
Facts about clay crafts for kids
🥰 "Kawaii" means "cute" in Japanese and grew into a huge pop-culture style starting in the 1970s.
🍩 Doughnuts (or doughnuts) have many ancient cousins — fried sweet dough appears in recipes from cultures around the world.
🧪 Polymer clay stays soft until you bake it, then hardens into a durable, sandable plastic you can varnish.
🔑 Tiny charms and keychains are a popular way to turn miniature clay creations into wearable or displayable art.
✂️ Making miniatures like tiny donuts is great practice for fine motor skills, patience, and creative detail work.
How do I make kawaii miniature donuts with soft clay?
What materials do I need to make kawaii clay miniature donuts?
What ages are kawaii miniature donut clay crafts suitable for?
What safety tips and fun variations can I try when making kawaii miniature clay donuts?
