Make DIY Gifts for Your Mom!
Create three simple DIY gifts for your mom: a handmade card, painted flower pot, and decorated photo frame, learning measuring and decorating.


Step-by-step guide to make DIY gifts for your mom
5 DIY Gift Ideas for Moms (made by kids) | Birthday or Mother's Day presents
Step 1
Gather all the materials listed and bring them to your work table.
Step 2
Measure and mark the size of your card on the cardstock using the ruler and pencil.
Step 3
Cut along your pencil lines with scissors to remove the card shape.
Step 4
Fold the cut cardstock in half so it becomes a card.
Step 5
Paint a fun design on the front of your card using paint and a brush.
Step 6
Write a short loving message inside the card with a marker.
Step 7
Paint the flower pot with a base color using your paint and brush.
Step 8
Add dots or stripes to the pot using a small brush or marker to decorate it.
Step 9
Let the painted pot dry completely before touching it.
Step 10
Fill the dry pot with potting soil until it is about two thirds full.
Step 11
Plant a small seed or place your little plant into the soil and pat the soil gently.
Step 12
Lay the photo frame flat on the table and remove its backing carefully.
Step 13
Decorate the edges of the frame with stickers ribbon or drawings using markers.
Step 14
Insert your favorite photo into the frame and replace the backing so the picture is secure.
Step 15
Share your finished handmade card painted flower pot and decorated photo frame on DIY.org.
Final steps
You're almost there! Complete all the steps, bring your creation to life, post it, and conquer the challenge!

Help!?
What can we use if we don't have cardstock, a small flower pot, or a photo frame?
If you don't have cardstock, use cereal-box cardboard or layered construction paper for the card, paint a clean yogurt cup or tin can as the flower pot, and make a frame from cardboard decorated with stickers and secured with tape as a backing.
My paint keeps smudging and the frame backing is hard to remove—what should we do?
To prevent smudging, apply thin paint coats to the card and pot and let each dry fully (or use a low-heat hair dryer), use a ruler and fold before cutting for straight card edges, and have an adult gently pry the frame backing off with a flat tool and secure the photo with tape if clips break.
How can we change the activity to suit younger or older kids?
For younger children, pre-cut the card, use washable paint, big brushes and stickers and provide help when filling the pot with soil, while older kids can use fine brushes or acrylics, a bone folder for sharp card creases, try more detailed pot designs and plant seeds that require ongoing care.
What are simple ways to personalize or upgrade our handmade gifts?
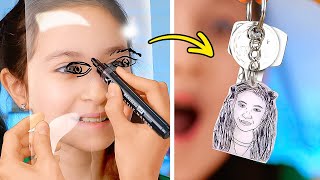
Personalize by adding pressed flowers or a hand-drawn sketch to the card, painting Mom's name on the pot and sealing it with clear varnish, inserting a tiny handwritten note into the photo frame, and attaching a care tag with watering instructions before sharing on DIY.org.
Watch videos on how to make DIY gifts for your mom
🌸 MOTHER'S DAY CRAFTS 💖 EASY & CREATIVE DIY GIFTS FOR MOM
4 Videos
🌸 MOTHER'S DAY CRAFTS 💖 EASY & CREATIVE DIY GIFTS FOR MOM
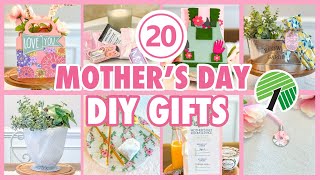
20 QUICK & EASY MOTHER'S DAY DIY GIFTS l DOLLAR TREE DIY MOTHERS DAY GIFT IDEAS l MOTHERS DAY CRAFTS
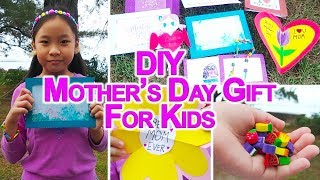
DIY Mothers Day Gift - 10 Easy DIY Mothers Day Gift For Kids

Mother's Day Crafts | 4 DIY Mother's Day Gifts for Kids to Make!
Facts about crafting for kids
📏 Measuring matters: even a 1 cm difference can make a photo or card not fit right, so measure before you cut or paint!
🎨 Mixing the three primary paints (red, yellow, blue) makes new colors like green, orange, and purple — try tiny tweaks to get hundreds of shades!
🖼️ Picture frames became a common way to display photographs in the 1800s after photography spread.
🌱 Terracotta flower pots are porous, so they let soil breathe and can help plant roots stay healthy.
💌 The first mass-produced greeting cards became popular in 19th-century Britain during the Victorian era.
How do I make DIY gifts for my mom: a handmade card, painted flower pot, and decorated photo frame?
What materials do I need to make a handmade card, painted flower pot, and decorated photo frame?
What ages are DIY gifts for mom suitable for?
What are the benefits of making DIY gifts for your mom?


One subscription, many ways to play and learn.
Only $6.99 after trial. No credit card required