Make An Ojo de Dios
Make an Ojo de Dios by weaving colorful yarn around crossed sticks to explore patterns, symmetry, and creative design while practicing fine motor skills.


Step-by-step guide to make an Ojo de Dios
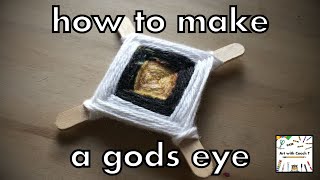
HOW to MAKE an OJO DE DIOS - DIY Tutorial for God's Eye Yarn Decoration by Naztazia
Step 1
Gather all your materials and find a comfy workspace.
Step 2
Place the two sticks on top of each other in a plus sign so they cross in the middle.
Step 3
Wrap a small piece of tape around the crossing point to hold the sticks together.
Step 4
Cut a length of your first yarn color about as long as your arm.
Step 5
Tie one end of that yarn tightly around the center where the sticks cross.
Step 6
Wrap the yarn once around the nearest stick arm and pull the yarn snug.
Step 7
Turn the sticks a quarter turn away from you so the next arm faces you.
Step 8
Wrap the yarn once around this new arm and pull the yarn snug.
Step 9
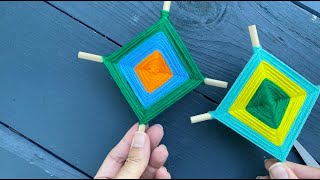
Repeat Step 7 and Step 8 until your woven square grows a few layers or looks ready for a color change.
Step 10
Cut a length of the next yarn color about as long as your arm.
Step 11
Tie the new yarn to the working yarn end with a secure knot.
Step 12
Continue repeating Step 7 and Step 8 to add the new color and grow the Ojo de Dios toward the stick tips.
Step 13
Tie the yarn end securely when your design is the size you like.
Step 14
Trim any extra yarn tails neatly with scissors.
Step 15
Share a photo of your finished Ojo de Dios on DIY.org.
Final steps
You're almost there! Complete all the steps, bring your creation to life, post it, and conquer the challenge!

Help!?
I don’t have wooden sticks, tape, or yarn — what can I substitute so I can still follow the steps?
Use two chopsticks, bamboo skewers, or craft sticks for the sticks, secure the crossing in Step 3 with a small rubber band or a drop of school glue instead of tape, and swap yarn for embroidery floss, thin ribbon, or baker's twine for Steps 4–12.
My weaving looks loose or lopsided — what should I check and how can I fix it?
Make sure the center knot in Step 4 is tight, pull each wrap snug in Steps 7–8 with consistent tension, add a bit more tape at the crossing (Step 3) if the sticks move, and retie or tighten the working yarn if the shape becomes uneven.
How can I adapt this activity for different ages so it's safe and engaging?
For preschoolers pre-cut arm-length yarn and pre-tape the sticks (Steps 3–4) and let them do a few wraps in Steps 7–9 with adult supervision for tying and cutting, while older kids can handle thinner yarn, more color changes (Step 10), and growing the design all the way to the stick tips (Step 10).
What are simple ways to extend or personalize my Ojo de Dios after finishing the basic version?
Add beads to the yarn as you wrap in Steps 7–9, create tassels by trimming extra yarn neatly in Step 12, combine several finished Ojos into a garland, or embellish with glitter glue before sharing a photo on DIY.org in Step 13.
Watch videos on how to make an Ojo de Dios
How to make a classic god's eye craft
3 Videos
How to make a classic god's eye craft

How to make an OJO DE DIOS- God´s Eye. Easy Art Craft for kids!
How to Make a God's eye | Step by Step | Art for Kids
Facts about yarn weaving and fiber crafts
✂️ All you need are two sticks, yarn, and scissors—this low-cost craft can produce hundreds of different color and pattern combinations.
🎨 Because you weave outward from the center over crossed sticks, God’s eyes naturally create radial symmetry and repeating patterns kids can explore.
🎂 In some traditions families add a new yarn layer to a child's God’s eye each birthday, often stopping after the child's fifth year.
🧶 The Ojo de Dios (God's eye) craft originates with indigenous Huichol and Tepehuan people in Mexico and is a traditional spiritual object.
🧠 Weaving an Ojo de Dios strengthens fine motor skills, concentration, and early math ideas like sequences and symmetry—great for developing minds.
How do I make an Ojo de Dios?
What materials do I need to make an Ojo de Dios?
What ages is making an Ojo de Dios suitable for?
What are the benefits of making an Ojo de Dios?


One subscription, many ways to play and learn.
Only $6.99 after trial. No credit card required