Make an led blink with an arduino
Make an LED blink using an Arduino, breadboard, resistor, and jumper wires; learn simple coding and basic circuits with safe adult supervision.


Step-by-step guide to make an LED blink with an Arduino
How to Blink an LED with Arduino (Lesson #2)
Step 1
Ask an adult to help and clear a flat workspace for your project.
Step 2
Plug the Arduino into the computer using the USB cable.
Step 3
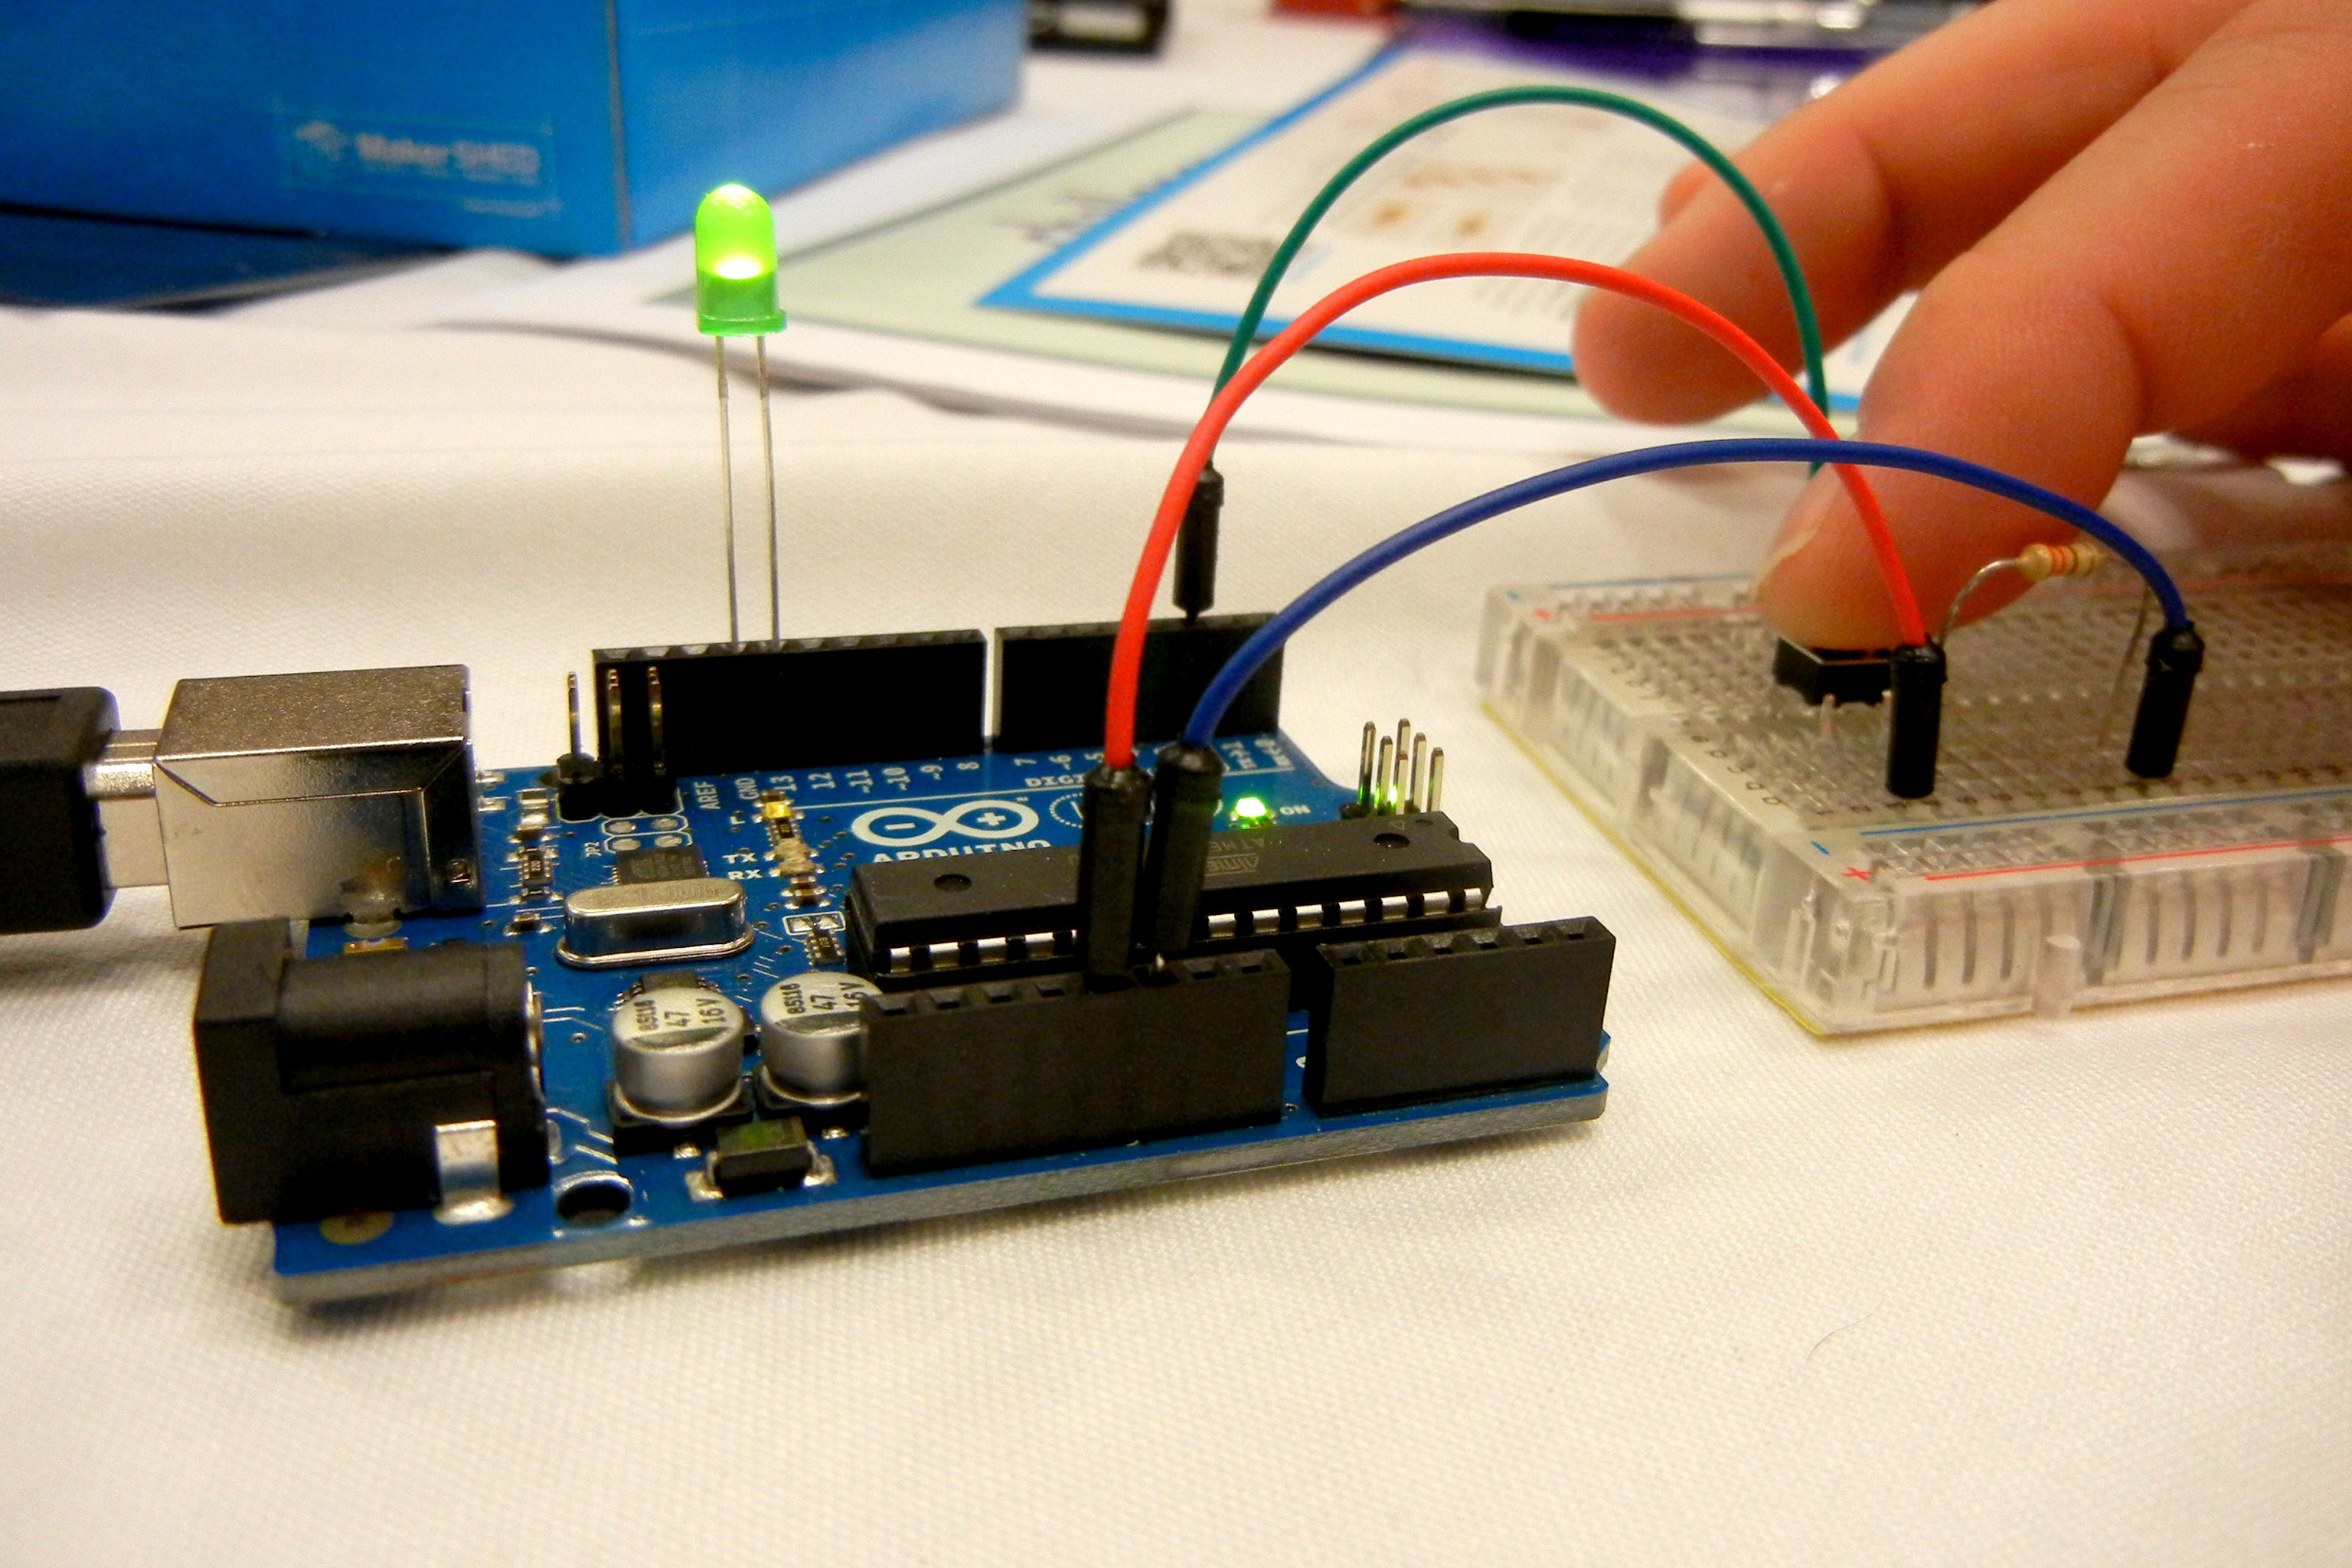
Put the LED into the breadboard so the long leg and short leg sit in different rows.
Step 4
Push one end of the 220 ohm resistor into the same row as the LED long leg.
Step 5
Use a jumper wire to connect the Arduino digital pin 13 to the row with the free end of the resistor.
Step 6
Use another jumper wire to connect the Arduino GND pin to the row with the LED short leg.
Step 7
Open the Arduino IDE on the computer.
Step 8
In the IDE choose your Arduino board and the correct serial port from the Tools menu.
Step 9
Open the Blink example sketch from File > Examples > 01.Basics > Blink.
Step 10
Click the Verify button in the IDE to compile the code.
Step 11
Click the Upload button in the IDE to send the code to the Arduino.
Step 12
Watch the LED blink on and off when the upload finishes.
Step 13
If the LED does not blink ask your adult to help re-check the wiring and upload again.
Step 14
Share your finished creation on DIY.org
Help!?
What can we use if we can't find a 220 ohm resistor, jumper wires, or a breadboard?
If you don't have a 220 ohm resistor you can use a 330 ohm resistor, and if you lack jumper wires or a breadboard use alligator clip leads to connect the LED/resistor between Arduino digital pin 13 and GND or simply use the Arduino's built‑in onboard LED on pin 13 so no external LED/resistor are needed.
The LED won't blink after upload—what should we check first?
Check that the LED long leg is placed in the same row as the resistor (step 3), the resistor's free end is connected to Arduino digital pin 13 with a jumper (step 4), the LED short leg is tied to Arduino GND with the other jumper (step 5), and that you chose the correct board and serial port in the Arduino IDE before verifying and uploading (steps 6, 8, 9).
How can we adapt this activity for younger or older kids?
For younger kids have an adult handle plugging the Arduino into the computer and using the IDE while the child places the LED and resistor on the breadboard and watches the LED blink, and for older kids ask them to edit the Blink example in the Arduino IDE to change delay times or add extra LEDs on other digital pins.
What are some fun ways to extend or personalize the blinking LED project?
Extend the project by editing the Blink sketch in the Arduino IDE to vary blink patterns, add more LEDs each with a 220 ohm resistor on different digital pins, or wire a pushbutton so the LED only blinks when pressed and then share your finished creation on DIY.org.
Watch videos on how to make an LED blink with an Arduino
Arduino Tutorial - #1 LED Blink | With Code | For Beginners
4 Videos

Arduino Tutorial - #1 LED Blink | With Code | For Beginners
Arduino tutorial 2- LED Blink program with code explained | How to blink an LED using Arduino |
Arduino Blinking LED Tutorial
Blinking LED using Arduino Uno || Simplest project for absolute beginners
Facts about Arduino and basic circuits for kids
🔌 Arduino boards are open-source and were created in 2005 to make electronics prototyping easy for artists, students, and beginners.
💡 The first visible-spectrum LED was built in 1962 by Nick Holonyak, and modern LEDs can last tens of thousands of hours.
🧰 Breadboards let you plug components in without soldering, so you can build and change circuits quickly and safely.
🧮 A resistor limits current so an LED doesn't burn out — small LEDs typically use about 10–20 milliamps (0.01–0.02 A).
🚦 "Blink" is the classic Arduino starter sketch that turns an LED on and off and is often the first program learners run.
How do I make an LED blink with an Arduino step by step?
What materials do I need to make an LED blink with an Arduino?
What ages is making an Arduino LED blink suitable for?
Is it safe for kids to build this circuit and what precautions should I take?
