Make an electronic instrument
Build a simple electronic instrument using a buzzer or speaker, battery, wires, and switches, then explore how changing components alters sound and pitch.


Step-by-step guide to make an electronic instrument
The Keyboard for Kids| A Fun and Interactive Guide|Kidz Korner Creative Learning|How to use Keyboard
Step 1
Insert the 555 timer IC across the center gap of the breadboard with the notch facing up so the pins sit on either side.
Step 2
Clip the 9V battery to the battery clip and plug the red wire into the breadboard positive rail and the black wire into the negative rail.
Step 3
Use a jumper wire to connect pin 1 of the 555 (bottom-left next to the notch) to the negative rail to make the ground connection.
Step 4
Use a jumper wire to connect pin 8 of the 555 (top-right) to the positive rail to provide power to the IC.
Step 5
Connect a short jumper wire to join pins 2 and 6 of the 555 so the trigger and threshold share the same node.
Step 6
Place the 0.1uF capacitor between the pins 2/6 node and the negative rail with each leg in separate breadboard rows.
Step 7
Put the 1k resistor between the positive rail and pin 7 of the 555 to make the fixed Ra resistor.
Step 8
Connect one outer leg of the 100k potentiometer to pin 7 so one side of the pot is tied to the discharge node.
Step 9
Connect the middle wiper of the 100k potentiometer to the pins 2/6 node so turning the pot changes Rb and the oscillation rate.
Step 10
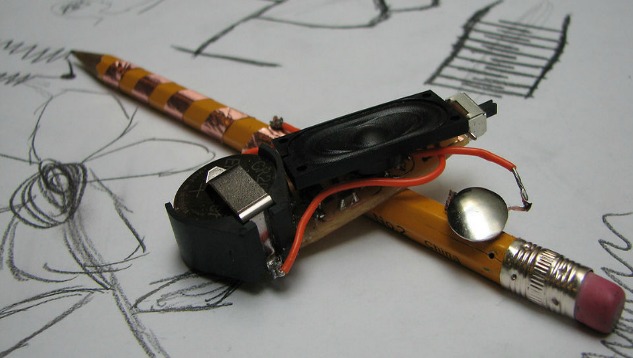
Use the 100 ohm resistor and a jumper wire to connect pin 3 (output) to the positive terminal of the speaker and connect the speaker negative terminal to the negative rail.
Step 11
Insert the switch in the positive rail between the battery clip red wire and the breadboard positive rail so flipping it turns the circuit on and off.
Step 12
Flip the switch to power the circuit and listen for a tone from the speaker.
Step 13
Slowly turn the potentiometer and listen as the pitch changes to learn how resistance changes the frequency.
Step 14
Carefully remove the 0.1uF capacitor and try the 10nF then the 1uF capacitor to hear how changing capacitance alters the pitch.
Step 15
Share your finished electronic instrument on DIY.org.
Help!?
What can I substitute if I don't have the 9V battery clip, the 555 timer, the 100k potentiometer, or the speaker?
Use a 6×AA battery holder wired into the positive/negative rails in place of the 9V battery clip, a 7555/NE555-compatible timer placed across the breadboard center gap instead of the 555, a 50–200k potentiometer or a fixed resistor network tied to pin 7 and the pins 2/6 node in place of the 100k pot, and a small piezo buzzer connected from pin 3 through the 100Ω resistor to the positive speaker terminal and the buzzer negative to the negative rail instead of the speaker.
I'm not hearing any tone when I flip the switch—what should I check first?
First verify the 555 is inserted with the notch facing up and pin 1 is connected to the negative rail, confirm the switch is inserted in the positive rail between the battery clip red wire and the breadboard positive rail and turned on, and make sure pin 3 is wired to the speaker positive through the 100Ω resistor while the speaker negative goes to the negative rail and pins 2 and 6 are joined with the capacitor to ground as instructed.
How can I adapt this project for younger children or for older kids who want more challenge?
For younger children, pre-insert the 555, battery clip, switch, and speaker and let them simply flip the switch and turn the 100k potentiometer to hear pitch changes, while older kids can build the full circuit themselves, swap the 0.1µF for the 10nF and 1µF capacitors as the instructions say to compare pitches, and measure frequency with a phone app.
What are simple ways to enhance or personalize the electronic instrument after it's working?
Add a small LED and a 1k resistor from pin 3 to the negative rail to blink with the tone, mount the speaker and the 100k potentiometer in a decorated cardboard or plastic box as an enclosure, experiment with different capacitor values from the instructions for new pitches, and then share the finished instrument on DIY.org.
Watch videos on how to make an electronic instrument
Your 1st Beginner Keyboard Piano Lesson - Getting Started
4 Videos

Your 1st Beginner Keyboard Piano Lesson - Getting Started

How To Play Electronic Keyboard - Step By Step

Keyboards for Kids: Top 5 Keyboards for Children | Gear4music Keys

How To Play Piano for Beginners, Lesson 1 || The Piano Keyboard
Facts about basic electronics for kids
🎵 Higher frequency means a higher pitch — humans can usually hear sounds from about 20 Hz to 20,000 Hz.
🔋 Increasing battery voltage often makes a buzzer or speaker louder, but too much voltage can burn out the parts.
🔊 A loudspeaker makes sound by moving a cone or diaphragm to push air and create pressure waves your ears sense.
⚡ Buzzers and simple speakers create tones by oscillating; adding resistors or capacitors can change that oscillation speed (and the pitch).
🧪 Some buzzers are piezoelectric — they bend a tiny crystal when electricity flows to make sound without magnets or coils.
How do I build a simple electronic instrument with a buzzer, battery, wires, and switches?
What materials do I need to make this electronic instrument?
What ages is this electronic instrument activity suitable for?
What safety tips should I follow when making an electronic instrument?
