Make an Arrow Glider Plane!
Build an arrow shaped paper glider using simple folds, tape, and small paperclips. Test flight stability, measure distance, and improve design.

Step-by-step guide to make an Arrow Glider Plane
Easy Origami Plane: Arrow Jet Glider - Fly Far
Step 1
Gather all materials and spread them out on a flat table.
Step 2
Fold the paper in half lengthwise and crease firmly along the fold.
Step 3
Unfold the paper so the center crease is visible.
Step 4
Fold the top two corners down to meet the center crease so the top becomes a point.
Step 5
Fold the pointed tip down about 2 cm to lock the nose in place.
Step 6
Fold each outer edge toward the center crease to make a narrow arrow-shaped body.
Step 7
Flip the glider over and put a small piece of tape along the center seam and nose to hold the folds.
Step 8
Attach one small paperclip to the nose to add weight.
Step 9
Stand at least two big steps back and gently throw the glider straight ahead from eye level.
Step 10
Measure the flight distance with the ruler or measuring tape and write the number down.
Step 11
Observe how the glider flew and decide one small change to try (for example add or remove a paperclip or bend the wingtip slightly).
Step 12
Make the one small change you decided on to the glider.
Step 13
Throw the glider again and measure the new distance to see if it improved.
Step 14
Share a photo and what you learned about flying and fixing your arrow glider plane on DIY.org.
Final steps
You're almost there! Complete all the steps, bring your creation to life, post it, and conquer the challenge!

Help!?
What can I use instead of a paperclip, tape, or ruler if I don't have them?
If you don't have a paperclip you can tape a small coin or folded bit of aluminum foil to the nose to add weight, substitute a sticker or a staple for the small piece of tape to hold the center seam and nose, and use a length of string or count big steps instead of the ruler or measuring tape to measure flight distance.
My glider spirals or dives — what step might I have done wrong and how do I fix it?
Check that your folds are symmetric by re-creasing the top corners to meet the center crease and ensure the small piece of tape is centered along the seam and that the paperclip weight is not off to one side, then try slightly bending one wingtip up or down as the instructions say to correct lift and balance.
How can I adapt this activity for different ages?
For younger children (3–6) have an adult pre-fold the center crease and corners and let them add the paperclip and throw from a shorter distance, for elementary kids (7–10) follow all steps and try one small change, and for older kids (11+) challenge them to test different paper types, multiple weights, and record distances to compare results.
What are simple ways to improve or personalize the arrow glider plane after the first test?
Decorate the wings with markers, try using heavier printer paper or lighter tissue to change flight characteristics, experiment with moving or removing the paperclip as described in the instructions, and keep a record of each change and distance to see which tweak improves the flight most.
Watch videos on how to make an Arrow Glider Plane
How to Make Paper Airplane - Step By Step Making Paper Arrow Airplane
4 Videos
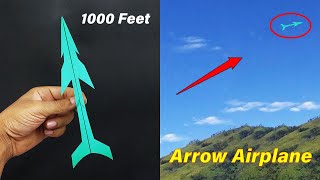
How to Make Paper Airplane - Step By Step Making Paper Arrow Airplane

Best Paper Airplane: How to Make an Arrow-Shaped Plane That Flies Far | Easy Paper Airplane Tutorial

Best Flying Arrow Airplane | Easy Paper Plane Tutorial

How to Make a Arrow Paper Plane | Easy Paper Airplane Tutorial
Facts about aerodynamics for kids
✈️ The world record for the longest paper airplane flight is 69.14 m (226 ft 10 in), thrown by Joe Ayoob from a plane folded by John Collins in 2012.
📐 A slight dihedral (upward angle) on the wings helps a paper glider self-correct and stay level during flight.
🧲 Adding a small paperclip to the nose shifts the center of mass forward and often helps arrow gliders fly straighter and farther.
🧭 Four forces act on every glider: lift, weight (gravity), thrust (none for paper gliders), and drag—balancing them makes flight stable.
🎯 Tiny tweaks—like bending a trailing edge, trimming a wingtip, or shifting nose weight—can change a glider's distance by meters during tests.
How do you make an arrow glider plane step-by-step?
What materials do I need to build an arrow glider plane?
What ages is the arrow glider plane activity suitable for?
What safety tips and design variations help improve arrow glider plane flights?


One subscription, many ways to play and learn.
Only $6.99 after trial. No credit card required