Make a woodwind
Make a simple woodwind instrument from cardboard tubing, straws, and tape, punching finger holes to explore sound production, pitch, and breath control.


Step-by-step guide to make a simple woodwind instrument
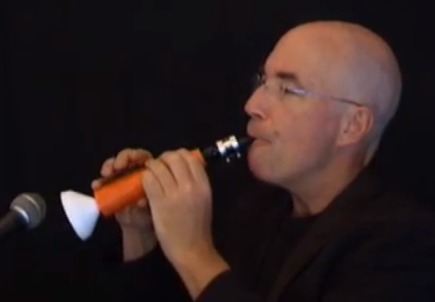
Woodwind Instruments for Children - Woodwind Instruments Sounds and Demonstration | Woodwind Family
Step 1
Gather all the materials on a clear table so everything is ready to use.
Step 2
Cut the cardboard tube down to about 25 centimeters long using scissors so it is easy to hold.
Step 3
Seal one end of the tube tightly with tape to make a closed end that will help the sound form.
Step 4
Cut one drinking straw to about 2 centimeters long to make a small mouthpiece piece.
Step 5
Push the small straw into the open end of the tube about 1 centimeter and wrap tape around it to hold it in place while leaving a little straw showing for your lips.
Step 6
Pinch the exposed straw tip flat with your fingers so it becomes a thin flap that can vibrate.
Step 7
Use scissors to make one tiny diagonal cut in the flattened straw tip to create a reed that will help make sound.
Step 8
Measure and mark six spots for finger holes along the tube starting about 4 centimeters from the taped end and spacing them evenly.
Step 9
Make the finger holes at your marks using a hole punch or push pin so you can open and close them with your fingers.
Step 10
Blow gently into the mouthpiece to hear the sound your woodwind makes and make sure air flows through the reed.
Step 11
Cover and uncover different combinations of the finger holes with your fingers to hear how the pitch changes.
Step 12
If a note needs tuning carefully widen its hole a tiny bit with the hole punch or push pin and test again until you like the notes.
Step 13
Take a photo or video of your finished woodwind and share your creation on DIY.org
Help!?
What can we use instead of the cardboard tube, drinking straw, or hole punch if we can't find them?
Use a paper towel roll or a length of rolled-up cardstock instead of the cardboard tube, a short piece cut from a thicker café straw or thin plastic tubing for the 2 cm mouthpiece, and a needle, awl, or small nail in place of a hole punch to make the finger holes.
I get no sound or a weak sound — what should I check and fix?
Check that the sealed end is taped tightly, the small straw is pushed in about 1 cm and taped with a little tip showing, the exposed straw tip is pinched flat and given a tiny diagonal cut to form a vibrating reed, and that any clogged holes are carefully widened so air flows through.
How can I adapt this activity for different age groups?
For preschoolers have an adult cut the tube to 25 cm, seal the end, and pre-mark or punch the six hole spots while the child pinches and flattens the 2 cm straw and blows gently, and for older kids let them measure and space the holes themselves, make the holes with a hole punch or push pin, and tune by widening holes.
How can we extend or personalize the woodwind once it's made?
Decorate the finished 25 cm tube with paint, stickers, or washi tape, try different straw thicknesses or move the mouthpiece position to change tone, add extra finger holes or taped keys to expand notes, and record a video to share on DIY.org.
Watch videos on how to make a simple woodwind instrument
Homemade Instruments Episode 4: Woodwinds
4 Videos
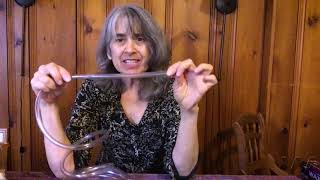
Homemade Instruments Episode 4: Woodwinds

How to make a wooden flute
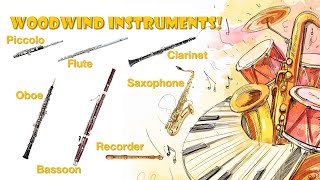
Woodwind instruments (An introduction)

Beginner's guide to WOODWIND instruments
Facts about wind instruments and sound production
🎵 Shorter tubes make higher pitches — halve the tube length and the note goes up about one octave!
🎶 Finger holes change the vibrating air column length, which is how woodwinds play different notes.
🌬️ Breath control changes loudness and pitch — blowing harder can make notes louder or cause 'overblowing' into a higher register.
📏 Moving a hole just a few millimeters can noticeably change the tuning of a simple homemade flute.
🧩 The recorder has been used in classrooms for centuries because it's easy to make sound with a simple blown pipe.
How do I make a cardboard tube woodwind instrument with finger holes?
What materials do I need to build a cardboard woodwind for kids?
What ages is this cardboard woodwind activity suitable for?
What are some fun variations and safety tips for this homemade woodwind activity?
