Make A Winter Sleigh Ride With LEGO
Build a LEGO winter sleigh and snowy scene, add mini figures and decorations, then test gliding and create a short festive stop motion story.


Step-by-step guide to make a winter sleigh ride with LEGO
How It's Made: Stop Motion Sleigh Ride ❄️🛷 | LEGO Winter Animation #Shorts #BTS
Step 1
Gather all the Materials Needed and bring them to a clear table or floor space.
Step 2
Place a baseplate down to be your snowy play area.
Step 3
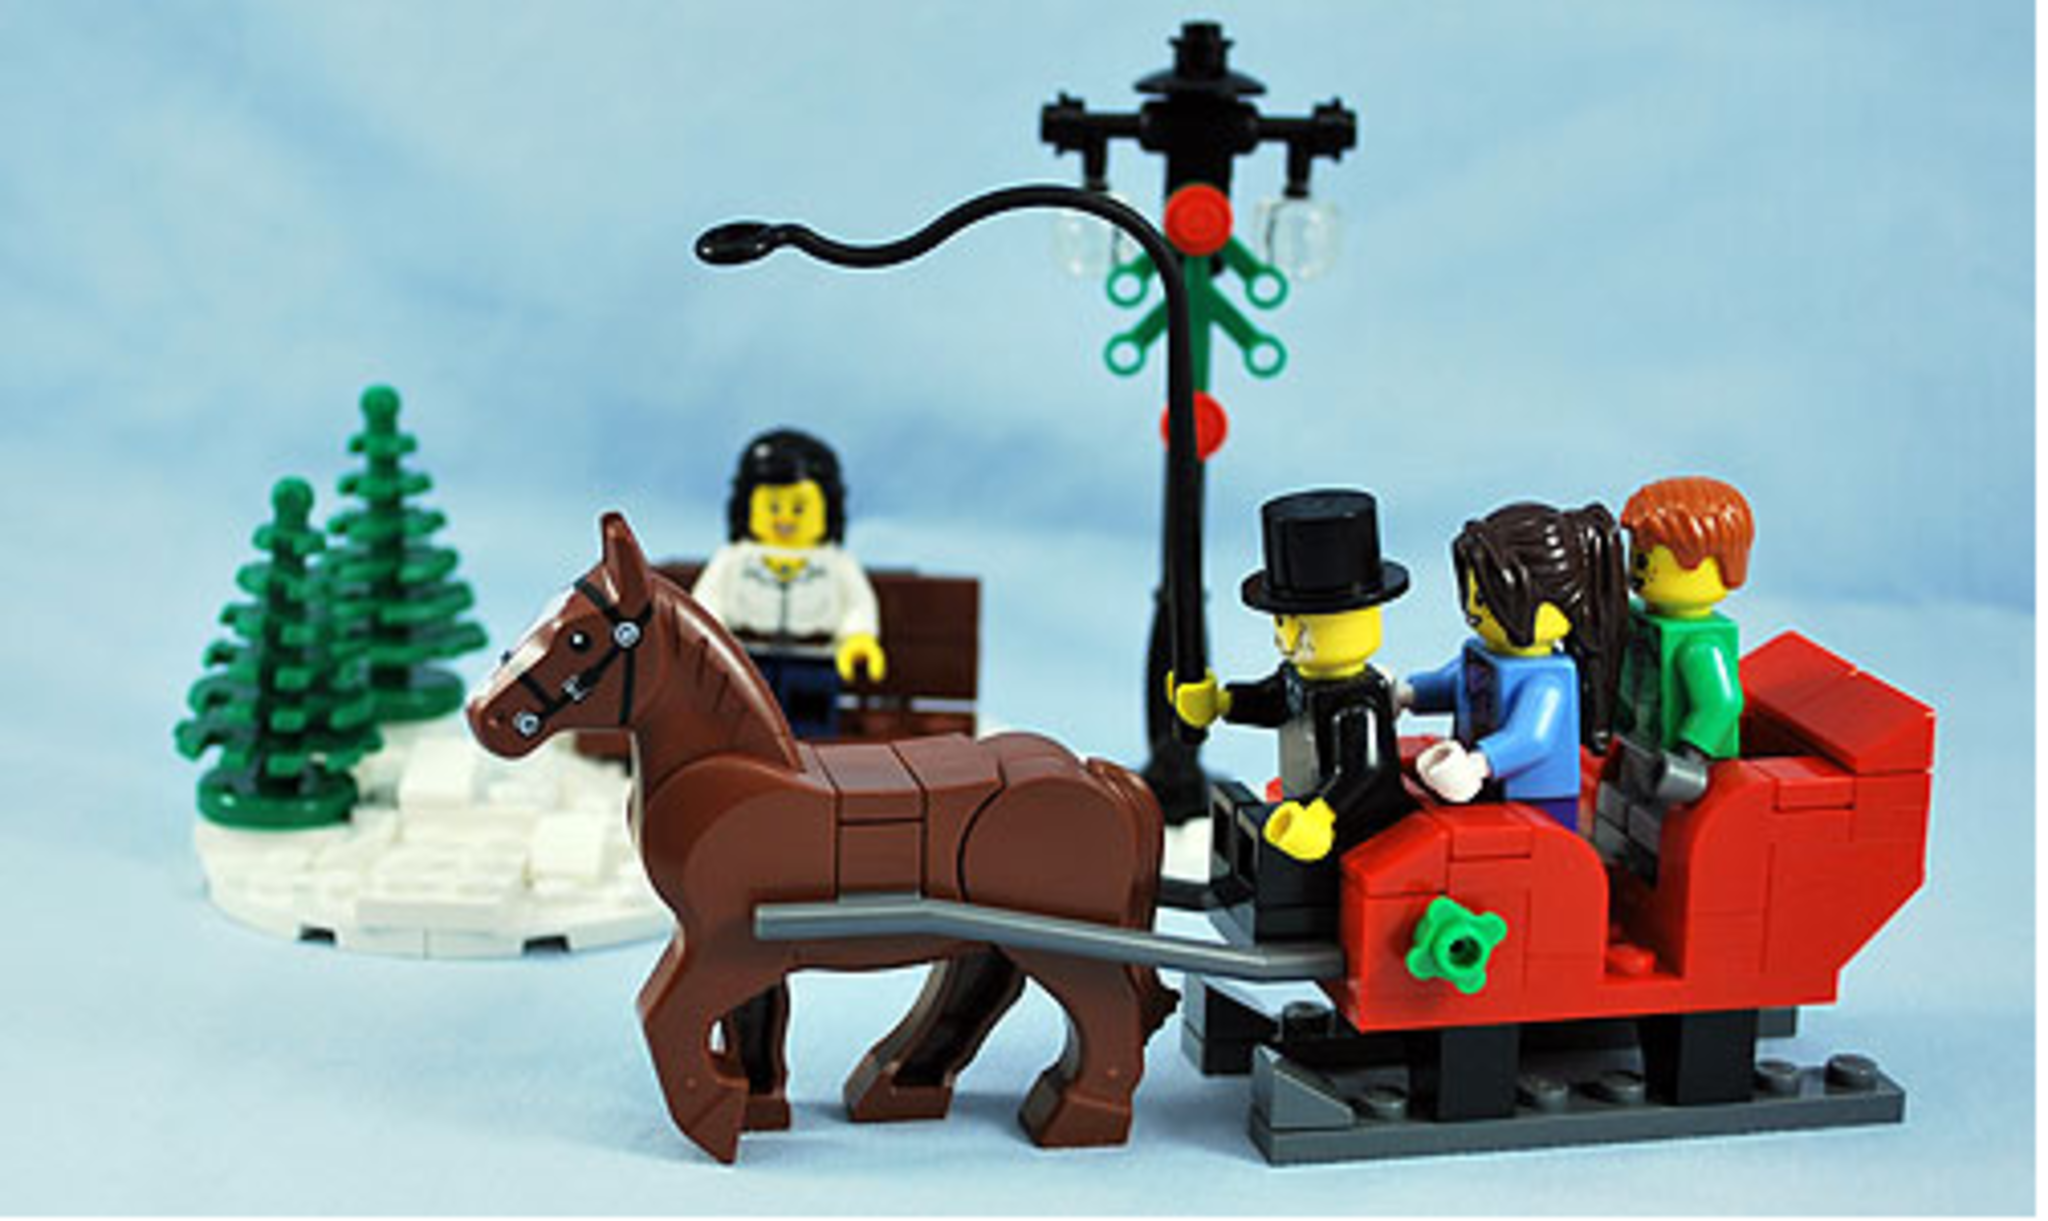
Build a sleigh body on a small plate using bricks to make a seat and sides.
Step 4
Attach long or curved LEGO pieces under the sleigh to make runners.
Step 5
Decorate the sleigh with festive pieces stickers or small accessories.
Step 6
Create a snowy ground on the baseplate by arranging white bricks and spreading cotton balls for snow.
Step 7
Add small trees houses and decorations into the scene to make a cozy winter village.
Step 8
Put minifigures into the sleigh and position a few around the scene for characters.
Step 9
Set up a smooth ramp with the cardboard so the sleigh can glide down into your scene.
Step 10
Test the sleigh glide by placing the sleigh at the top of the ramp and releasing it gently.
Step 11
Tweak the sleigh balance or runners with adhesive putty or by moving pieces until it glides smoothly.
Step 12
Plan a short stop-motion story in 3 to 6 simple beats (for example takeoff glide rescue cheer).
Step 13
Use a camera or tablet to take a photo then move the sleigh a tiny bit and repeat until your story is complete.
Step 14
Compile your photos into a short stop-motion video and add music or titles if you like then share your finished LEGO winter sleigh ride creation on DIY.org
Help!?
What can we use if we don't have a LEGO baseplate, long/curved pieces, or adhesive putty?
Use a sheet of sturdy cardboard as the snowy play area, slide thin cardboard strips or craft sticks under the sleigh as improvised runners, and swap adhesive putty for a small piece of masking tape or museum putty to steady pieces.
My sleigh won't glide smoothly or keeps tipping—what should I check and fix?
Smooth the cardboard ramp with clear tape, rebalance the sleigh by shifting or removing minifigures and bricks, and press a little adhesive putty under the runners or adjust their shape so they sit evenly for a better glide.
How can I adapt this activity for different ages or skill levels?
For younger kids, use larger bricks and pre-built sleighs with cotton-ball snow and adult help setting the cardboard ramp, while older kids can build a detailed sleigh on a small plate, craft curved runners, and plan a 3–6 beat stop-motion story using a tablet camera.
What are some fun ways to extend or personalize our winter sleigh ride?
Add LED tea-lights inside the mini houses, attach a thin fishing line to the sleigh for controlled movement down the cardboard ramp, and personalize decorations and music when you compile your stop-motion photos into a video.
Watch videos on how to make a winter sleigh ride with LEGO
LEGO WEDO2.0 | Winter Sleigh
4 Videos
LEGO WEDO2.0 | Winter Sleigh
LEGO Santa's Sleigh Build: Magical Holiday Fun with Santa & His Reindeer!

How to Build a Winter Sleigh - LEGO Creator
LEGO Tutorial On How To Build Santa's Sleigh With 9 Reindeer
Facts about LEGO building and stop-motion animation
🧩 The LEGO Group was founded in 1932 and began producing the interlocking plastic bricks we use today in 1949.
🧍 LEGO minifigures first appeared in 1978 and now there are thousands of different heads, torsos, and accessories to customize characters.
🎬 Stop-motion animation has been used since the late 1800s to bring toys and models to life—perfect for short festive LEGO movies.
🛷 Traditional sleighs glide on runners over snow, which is why testing how well your LEGO sleigh slides is a fun experiment.
❄️ Snow's texture changes with temperature and moisture: packable snow sticks together for tiny snowbanks, while powdery snow stays fluffy.
How do I build a LEGO winter sleigh ride and create a short stop-motion story?
What materials and LEGO pieces do I need to make a winter sleigh ride?
What ages is the LEGO winter sleigh activity suitable for?
What safety tips and fun variations can I try with this LEGO winter sleigh activity?
