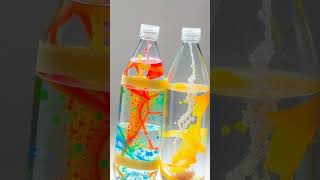
Make a vortex
Make a water vortex by connecting two plastic bottles with tape, filling one with water, then swirling to observe the spinning funnel and flow.

Step-by-step guide to make a water vortex
Whirlpool(vortex) experiment | Circular motion|Fun Science experiment|See description #science
Step 1
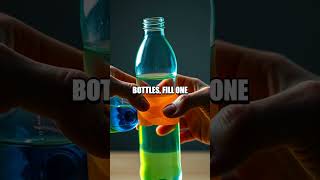
Remove the caps from both plastic bottles.
Step 2
Fill one bottle about two-thirds full with water.
Step 3
Add a few drops of food coloring or a pinch of glitter to the water and gently swirl to mix (optional).
Step 4
Stand the other empty bottle upright on a flat surface.
Step 5
Hold the filled bottle upside down and place its mouth directly onto the mouth of the upright empty bottle so the two mouths meet.
Step 6
Press the two bottle necks together firmly so they sit flush.
Step 7
Wrap strong tape tightly around the joined necks at least three times to make a snug seal.
Step 8
Hold the taped seam with both hands so your thumbs and fingers grip the bottles near the join.
Step 9
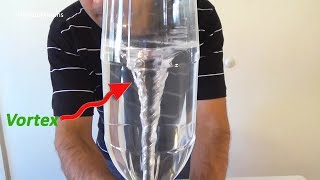
Give the top bottle a quick circular swirl for about five seconds to start the water spinning.
Step 10
Watch the spinning funnel form and see the water flow from the top bottle into the bottom bottle.
Step 11
Share your finished water vortex on DIY.org
Help!?
What can we use if we don't have the 'strong tape' or food coloring listed in the materials?
Use duct tape or packing tape wrapped tightly around the joined bottle necks instead of 'strong tape,' and substitute a few drops of washable paint or a small splash of colored juice for the optional food coloring.
My bottles leak or I don't see a vortex—what should I check and fix?
Ensure both caps are removed, the two mouths sit flush as in step 5, press the necks firmly together, rewrap the seam at least three times with tape, grip the seam with your thumbs, and give the top bottle a quick five-second circular swirl to start the funnel.
How can I adapt this activity for different age groups safely?
For toddlers have an adult do the taping and hold the bottles while the child watches and helps swirl, for school-age kids let them tape and perform the five-second swirl themselves, and for teens challenge them to make a longer-lasting vortex or improve the seal.
What are simple ways to enhance or personalize the vortex project?
Decorate the bottles before assembly, add glitter and different food-color combinations to change the funnel's look, tape a small LED to the base for light effects, or use a commercial 'tornado tube' connector and time your vortex to share on DIY.org.
Watch videos on how to make a water vortex
DIY Tornado in a Bottle: Understanding Vortex Formation
4 Videos
DIY Tornado in a Bottle: Understanding Vortex Formation
Twist and Swirl The Vortex Bottle Experiment
Create Vortex inside of a Bottle - Amazing Science Experiment!
Mesmerizing Water Vortex in a Bottle! #Shorts
Facts about water science
🌪️ Vortices show up at many sizes — from tiny bathtub whirlpools to huge tornadoes, all spinning around a center!
🔄 When you swirl the bottle, angular momentum makes the water spin faster as it moves inward — like a skater pulling in their arms.
✨ A few drops of dish soap and some glitter can help you see the funnel and sparkle as the vortex forms.
♻️ Using two empty plastic bottles for this experiment is a great little recycling project — science + reuse!
💧 The spinning water pushes outward so the center dips down, which helps the funnel form and water flow from one bottle to the other quickly.
How do you make a water vortex with two plastic bottles?
What materials do I need to make a bottle vortex?
What ages is the bottle vortex activity suitable for?
What safety tips should I follow when making a water vortex?
