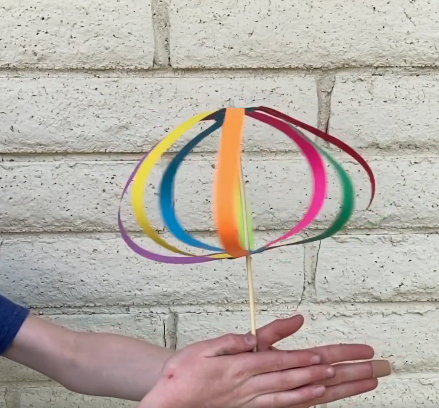
Make a Twirling Rainbow Toy
Make a twirling rainbow toy from cardstock, straw, and beads; decorate colors, balance the spinner, and explore motion and symmetry safely.


Step-by-step guide to Make a Twirling Rainbow Toy
Step 1
Clear a flat workspace and lay out all your materials where you can reach them.
Step 2
Place any round object on the cardstock and trace a circle with your pencil.
Step 3
Cut the circle out carefully with scissors.
Step 4
Fold the circle in half and press to make a crease.
Step 5
Fold the circle in half again and press to make a second crease.
Step 6
Unfold the circle and use a ruler to draw six slices from the center to the edge to make pie shapes.
Step 7
Color each slice in rainbow order red orange yellow green blue purple using your colouring materials.
Step 8
Make a small hole exactly at the center with a hole punch or with a sharp pencil using adult help.
Step 9
Push the straw through the center hole so the paper circle sits centered on the straw.
Step 10
Slide the same number of beads onto each side of the straw and move them until the circle sits balanced.
Step 11
Tape the beads in place on each side of the straw so they do not slide.
Step 12
Hold the straw near the circle and give the circle a gentle flick to make it twirl.
Step 13
If the circle wobbles adjust beads equally on both sides until it spins smoothly.
Step 14
Share your finished twirling rainbow toy on DIY.org.
Help!?
What can we use instead of cardstock, a straw, or a hole punch if we don't have them?
If you don't have cardstock use a flattened cereal box or thin cardboard for steps 2–3, swap in a sturdier stick or pencil for the straw in step 9, and make the center hole in step 8 with a sharp pencil (with adult help) instead of a hole punch.
My circle wobbles or slides on the straw—how can I fix it?
If the circle wobbles after step 12, slide the beads equally along the straw as in step 10 to rebalance, and if the hole in step 8 is too large reinforce the center with a small piece of tape or a paper washer before step 9 so it doesn't slide.
How can I adapt this activity for different ages?
For preschoolers, pre-cut and pre-punch the circle (steps 2–8) and use large wooden beads with close adult supervision, while older kids can design more detailed rainbow slices in step 7 and experiment with bead placement in step 10 to explore balance and rotation.
How can we extend or personalize the twirling rainbow toy to make it more fun or durable?
To personalize and strengthen the toy, glue a second decorated circle back-to-back before step 9, seal the coloring with clear tape or laminating sheets, add stickers or glitter to the slices from step 7, and time spins while varying bead positions in step 10 to create a mini spin experiment.
Watch videos on how to Make a Twirling Rainbow Toy
How To Make a Rainbow Paper Spinner | Crafts for Kids
4 Videos
How To Make a Rainbow Paper Spinner | Crafts for Kids
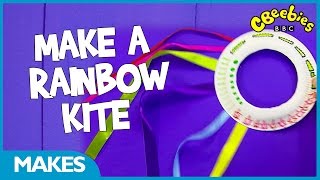
CBeebies Makes | How to make a rainbow kite
RAINBOW PARENTING HACKS | Fantastic DIY Crafts And Gadgets To Make Your Kids Happier
RAINBOW POP IT CRAFTS | Cool DIY Ideas With Fidget Toys That Will Satisfy You
Facts about crafts and simple physics for kids
🌈 Rainbows are actually full circles — we usually see only an arc because the ground gets in the way.
🌀 Whirligigs (spinning toys) have been played with for thousands of years — archaeologists have found ancient versions.
✂️ Card stock is thicker than regular paper so it keeps its shape better, perfect for making sturdy spinners.
⚖️ Tiny changes in weight or where you poke holes can make a spinner wobble — balancing beads helps it twirl smoothly.
🔁 Rotational symmetry means a shape looks the same after certain turns, and symmetric spinner blades usually spin more evenly.
How do you make a twirling rainbow toy from cardstock, straw, and beads?
What materials do I need to make a twirling rainbow toy?
What ages is this twirling rainbow toy activity suitable for?
What are the benefits and safety tips for making a twirling rainbow toy?
