Make a stop-motion video of a moving vehicle.
Create a stop-motion video of a toy vehicle moving across a simple track using a smartphone or camera, small position changes, and basic editing.


Step-by-step guide to make a stop-motion video of a moving vehicle
Step 1
Clear a stretch of flat table or floor so you have plenty of room for your track.
Step 2
Lay two parallel strips of masking tape on the surface to make a straight track for the vehicle.
Step 3
Place small props like blocks or toy trees along the sides of the track to make a fun scene.
Step 4
Put your toy vehicle at the starting end of the track so it's ready to move.
Step 5
Prop your camera or phone on the stack of books so the lens faces the track and will not move.
Step 6
Look at the camera screen and adjust it so the entire track and vehicle are inside the frame.
Step 7
Press the shutter button to take the first photo of the vehicle at the start position.
Step 8
Move the vehicle forward a very small amount (about 1 centimeter or the width of a coin).
Step 9
Press the shutter button to take the next photo of the new vehicle position.
Step 10
Repeat moving the vehicle a small step and taking a photo until the vehicle reaches the end of the track.
Step 11
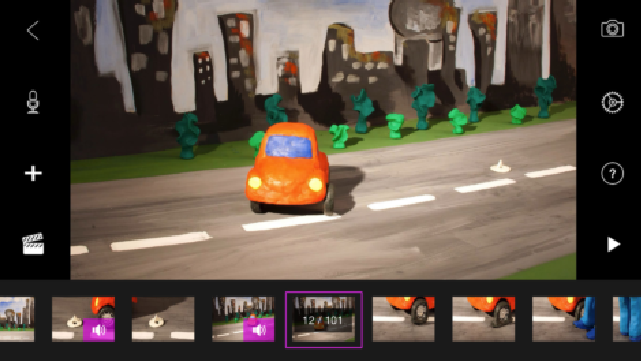
Transfer all the photos into your photo or video editing app on a computer or tablet.
Step 12
Put the photos in order from first to last so the movement will play correctly.
Step 13
Set the playback speed to about 10 to 15 frames per second so the motion looks smooth.
Step 14
Export the finished stop-motion as a video file from the app.
Step 15
Share your finished stop-motion video of the moving vehicle on DIY.org
Final steps
You're almost there! Complete all the steps, bring your creation to life, post it, and conquer the challenge!

Help!?
What can we use if we don't have masking tape or small toy props for the track and scenery?
If you don't have masking tape or toy props, substitute painter's tape or a ruler/string for the 'Lay two parallel strips of masking tape' track and use LEGO bricks, folded paper trees, or cardboard cutouts for the 'Place small props' step.
My camera moved or the motion looks jerky—what should I check or change so the stop-motion works?
To avoid a shifted camera or choppy motion, firmly secure the 'stack of books' or use a phone stand and timer/remote for the 'Press the shutter button' step, keep lighting steady, and move the vehicle in very small ~1 centimeter (coin-width) steps as instructed.
How can I adapt this stop-motion project for younger children or for older kids wanting more challenge?
For younger children, have an adult hold the phone or help with the 'Prop your camera or phone on the stack of books' step and use larger, fewer moves and photos, while older kids should use precise ~1 cm moves, add detailed props along the track, and set playback to 10–15 fps for smooth motion.
What are simple ways to enhance or personalize the finished stop-motion before exporting and sharing?
After you 'Transfer all the photos into your photo or video editing app,' enhance the video by adding sound effects or music, animating multiple vehicles or background paper scenery, fine-tuning the playback speed (10–15 fps), then 'Export the finished stop-motion' and share on DIY.org.
Watch videos on how to make a stop-motion video of a moving vehicle
How to MAKE a STOP-MOTION VIDEO with a PHONE
4 Videos
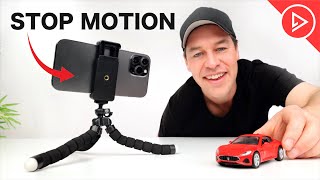
How to MAKE a STOP-MOTION VIDEO with a PHONE
How to make Stop Motions for Beginners Part 1 (Stop Motion Tutorial)
How to Make Stop Motion Videos SMOOTHER | A Beginner's Guide to Stop Motion | Episode 2

Animating a Toy Car Using Stop Motion | Tutorial
Facts about stop-motion animation
⏱️ Animators often shoot "on twos" (each position shown for two frames) to save time while keeping motion smooth.
📸 A 10-second stop-motion clip at 12 fps needs 120 photos, so even short videos can take lots of pictures!
🎬 Classic films like King Kong (1933) used stop-motion to bring monsters and models to life.
📱 Most smartphones can record at 30 or 60 fps — or take steady still photos you can stitch into stop-motion.
🚗 You can make a toy car look like it's driving smoothly with about 12 frames per second (fps).
How do you make a stop-motion video of a moving toy vehicle?
What materials do I need to make a toy vehicle stop-motion video?
What ages is making a stop-motion vehicle suitable for?
What are the benefits and creative variations for this stop-motion project?


One subscription, many ways to play and learn.
Only $6.99 after trial. No credit card required