Make a soda bottle rocket
Build a water-powered soda bottle rocket using a plastic bottle, water, and a pump; conduct safe launches and learn about thrust, pressure, and trajectory.


Step-by-step guide to make a soda bottle rocket
Learn How to Build Your Own Bottle Rocket
Step 1
Put on safety goggles.
Step 2
Lay out a clear 10-meter safety zone in front of your launch spot making sure no people animals or buildings are inside it.
Step 3
Pour water into the bottle with the measuring cup until it is about one-third full.
Step 4
Push the cork with the valve firmly into the bottle mouth to make a tight seal.
Step 5
Attach the pump hose tightly to the valve adapter so there are no leaks.
Step 6
Stand the bottle upside down on a flat stable surface so the cork faces down and the bottle points up.
Step 7
Ask everyone to move back at least 5 meters and have an adult stay by the pump.
Step 8
Slowly pump air into the bottle while watching the pressure gauge and stop pumping when it reaches about 40 psi or sooner if the cork starts to wiggle.
Step 9
Step back to at least 10 meters and get ready to count down.
Step 10
Have the adult press the valve release to launch the rocket.
Step 11
Watch the rocket fly and notice its height direction and how it spins.
Step 12
Wait until an adult says it is safe.
Step 13
Walk to the rocket and pick it up carefully after the adult checks it is not under pressure.
Step 14
Share your finished rocket and what you learned about thrust pressure and trajectory on DIY.org.
Help!?
What can we use if we don't have a cork with a valve or the valve adapter?
If you don't have a cork with a valve or adapter, use a sturdy rubber stopper drilled to accept a Schrader (bicycle) valve or insert a metal valve stem through a tight-fitting cork and seal around it with silicone or duct tape so you can attach the pump hose and still form a tight seal.
The cork starts to wiggle or water leaks when we pump—what should we check or fix?
If the cork wiggles or leaks while pumping, stop, re-seat the cork by pushing it firmly into the bottle mouth, tighten or reattach the pump hose to the valve adapter, add a layer of tape or silicone sealant around the cork, and only resume pumping while watching the pressure gauge so you stop if wiggling resumes.
How can we adapt this rocket activity for younger children or older kids?
For younger children have an adult do the pumping to about 20–30 psi, handle the valve release, and let the child pour the one-third bottle water and observe from the 5–10 meter safety zone, while older kids can measure water, pump under supervision to ~40 psi, vary angles, and record trajectory data themselves.
What are easy ways to improve performance or personalize the rocket after we build it?
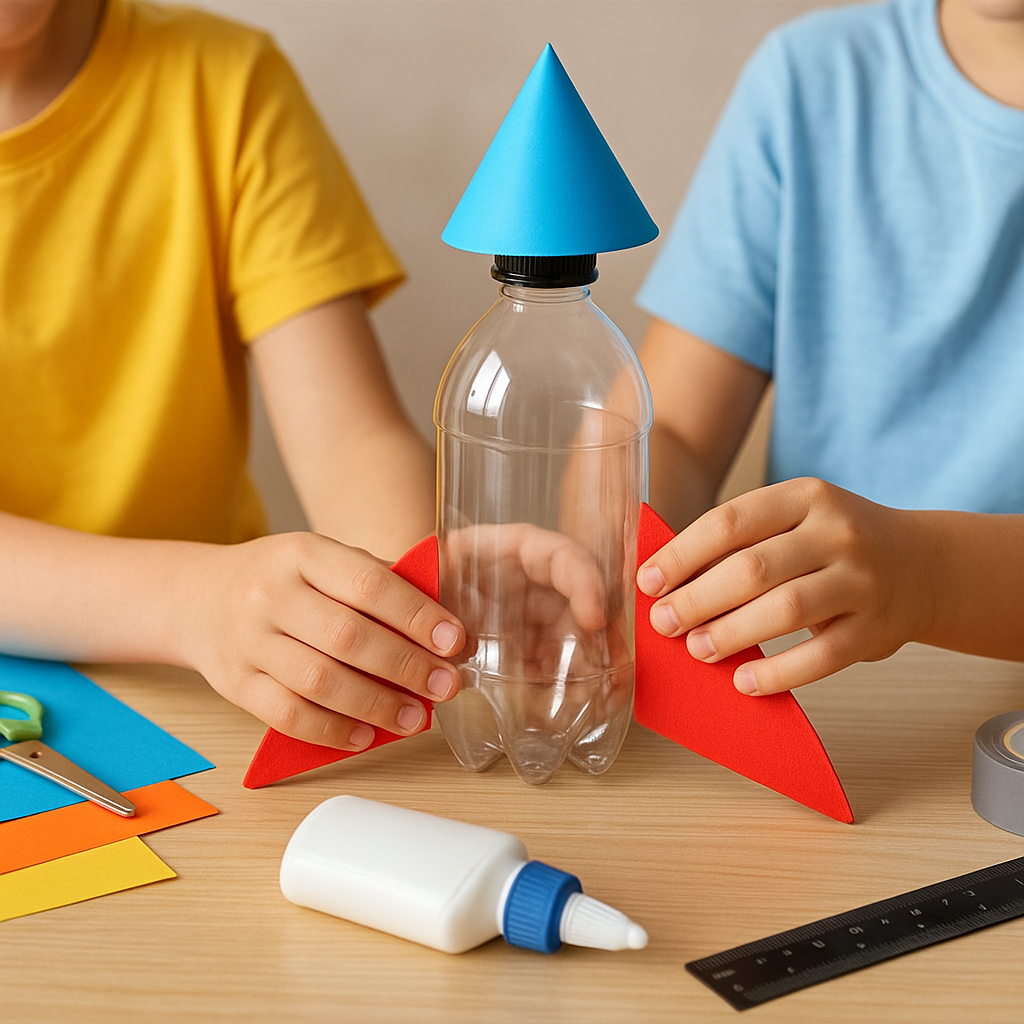
To improve flight and personalize the rocket, attach lightweight cardboard or plastic fins and a paper cone nose, experiment with different water volumes and launch angles while keeping the 10‑meter safety zone, add a colored streamer for recovery, and photograph or time flights to share your results on DIY.org.
Watch videos on how to make a soda bottle rocket
DIY Baking Soda Bottle Rocket
4 Videos
DIY Baking Soda Bottle Rocket
How to make a simple water rocket with soda bottles (have fun with your kids or students PART 2)
Student-Made Soda Bottle Rocket - DIY STEM Project #science

DIY STEM Project For Kids: How To Make A Bottle Rocket
Facts about rocketry and physics for kids
🚀 Water rockets fly because of Newton's third law — pushing water downward makes the bottle accelerate upward.
💧 You only fill part of the bottle with water; the right mix of air and water gives the best boost.
🎯 Changing the launch angle changes the rocket's trajectory just like any thrown projectile.
🛠️ Adding simple fins and a nose cone improves stability and often makes the rocket fly farther.
⛽ A pump increases the air pressure inside the bottle so the water is forced out faster, creating more thrust — always launch with adult supervision.
How do I build and launch a water-powered soda bottle rocket?
What materials do I need for a water-powered soda bottle rocket?
What ages is this soda bottle rocket activity suitable for?
What safety precautions should we follow when launching a water bottle rocket?
