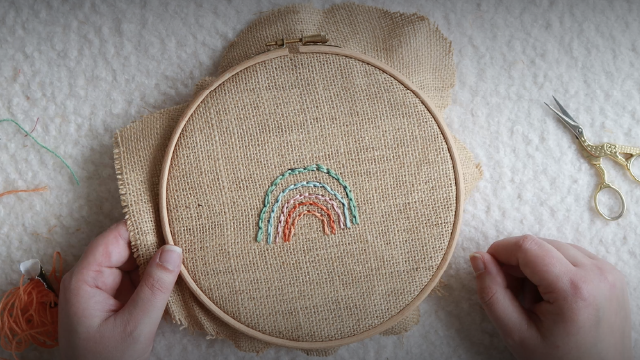
Make a rainbow with embroidery
Make a colorful embroidered rainbow using fabric, embroidery hoop, needles, and thread; practice simple stitches, color choices, and sewing skills with safe adult supervision.


Step-by-step guide to make a rainbow with embroidery
Step 1
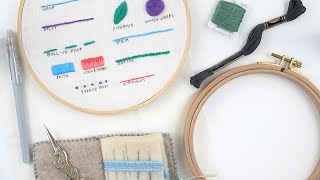
Gather all materials on a clean table so everything is ready to use.
Step 2
Loosen the hoop screw and separate the inner ring from the outer ring.
Step 3
Center the fabric square on the inner ring and press the outer ring down over it.
Step 4
Tighten the hoop screw until the fabric is held tightly and smooth.
Step 5
Use the pencil or washable marker and the ruler to draw three to five curved rainbow arcs on the fabric.
Step 6
Cut an 18-inch piece of embroidery floss in your first rainbow color.
Step 7
Pull the floss apart and separate three strands to use for stitching.
Step 8
Thread the three strands through the needle eye and tie a small knot at the end.
Step 9
Stitch the top arc by using backstitch along the drawn line from one end to the other.
Step 10
Repeat Steps 6 to 9 for each remaining colored arc until all arcs are stitched.
Step 11
Turn the hoop over and tie a small knot in each thread end on the back of the fabric to secure them.
Step 12
Trim the extra thread ends close to the knots with scissors.
Step 13
Share a photo of your finished embroidered rainbow on DIY.org
Help!?
What can we use if we don't have an embroidery hoop, embroidery floss, or a metal needle?
Use a wooden bangle or two cardboard rings clamped with clothespins in place of the inner and outer rings and hoop screw, swap embroidery floss for thick yarn or perle cotton (use fewer or more strands accordingly), and use a blunt plastic tapestry needle instead of a metal needle.
My fabric is puckering or the stitches look messy—what should I check or fix?
Re-center the fabric on the inner ring, press the outer ring down and tighten the hoop screw until the fabric is smooth, separate your floss into three even strands before threading, and gently re-stitch any uneven backstitch lines in the drawn arcs.
How can I adapt this rainbow embroidery for different age groups?
For younger kids pre-draw a single large arc and use a plastic needle with thick yarn while an adult tightens the hoop screw, and for older kids stitch all 3–5 arcs with three-strand floss and try adding satin stitch or finer detail.
What are simple ways to enhance or personalize our finished embroidered rainbow?
Add small seed beads along the arcs, stitch clouds or a name with metallic or variegated embroidery floss before tying the knots on the back, trim the fabric and finish the hoop as a wall hanging to photograph and share on DIY.org.
Watch videos on how to make a rainbow with embroidery
6 Easy Steps to Stunning Geometric Embroidery | Beginner Friendly Step by Step Tutorial
4 Videos
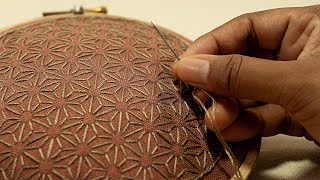
6 Easy Steps to Stunning Geometric Embroidery | Beginner Friendly Step by Step Tutorial
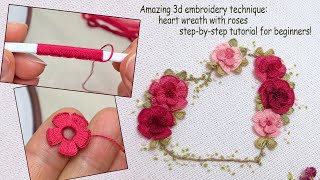
Easy 3D Flower Embroidery Anyone Can Do - New Technique! - step-by-step tutorial for beginners!
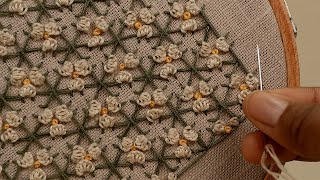
Easy Floral Grid Embroidery | Beginner DIY Tutorial
How to Embroider by Hand for Beginners
Facts about embroidery and sewing for kids
🌈 Rainbows are actually full circles — you usually see a semicircle because the ground gets in the way!
🧵 Embroidery has decorated clothes and fabrics for thousands of years across cultures like China, Egypt, and Peru.
🪡 Tapestry (blunt) needles are kid-friendly and can make learning to stitch safer and easier.
🎨 Mixing two thread colors close together is called shading and creates soft, blended transitions perfect for rainbows.
🧒 Practicing embroidery boosts fine motor skills, focus, and patience while kids make something colorful and proud of.
How do you make a rainbow with embroidery?
What materials do I need for an embroidered rainbow?
What ages is this embroidered rainbow activity suitable for?
What safety precautions should I take for kids doing embroidery?
