Make a pyramid using LEGO®
Build a stable pyramid using LEGO® bricks, plan layers, count and measure pieces, test stability, and decorate to explore symmetry and engineering.


Step-by-step guide to make a pyramid using LEGO®
Step 1
Gather your LEGO bricks and the tools listed.
Step 2
Decide how many layers your pyramid will have.
Step 3
Write the chosen number of layers at the top of your paper.
Step 4
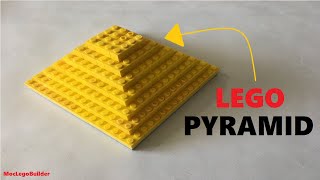
Draw a top-down square on the paper to show the base layer.
Step 5
Count how many bricks you want on one side of the base square and write that number on the drawing.
Step 6
Measure the length of one LEGO brick with the ruler and write the measurement next to your drawing.
Step 7
Use your drawing and the brick measurement to calculate and write how many bricks you need for the base layer.
Step 8
Gather the bricks for the base layer and lay them out on the baseplate in the square pattern.
Step 9
Snap the bricks together to build the base layer firmly.
Step 10
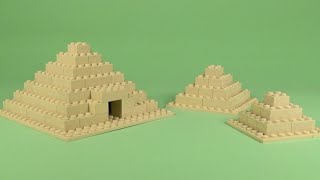
Build the next smaller square layer centered on the base layer.
Step 11
Repeat building smaller centered layers until you reach the top of the pyramid.
Step 12
Gently press down on the top and give tiny pushes from different sides to check for wobble.
Step 13
Add or reposition bricks to strengthen any wobbly spots.
Step 14
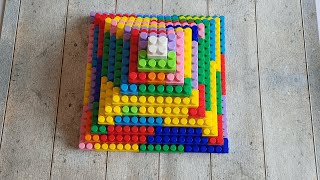
Decorate each side symmetrically using colored bricks or stickers.
Step 15
Share your finished pyramid on DIY.org.
Help!?
What can we use if we don't have a LEGO baseplate, ruler, or enough LEGO bricks?
Use a large flat piece of cardboard or a baking tray as the baseplate, a school ruler or a printed LEGO brick template for the 'Measure the length of one LEGO brick' step, and compatible building bricks or small wooden blocks in place of official LEGO bricks when counting and snapping the base layer.
My pyramid wobbles—what should we check and how do we fix it?
When the pyramid wobbles during the 'Gently press down and give tiny pushes' check, re-center each smaller layer over the one below, add overlapping longer plates across seams, and follow the 'Add or reposition bricks to strengthen any wobbly spots' step until stable.
How can we adapt this activity for different ages?
For younger kids choose 2–3 layers and pre-draw the base square and count bricks with help, for school-age kids have them measure with the ruler and calculate bricks for the base layer themselves, and for older kids challenge them to design taller multi-layer pyramids with symmetric decoration and share on DIY.org.
How can we extend or personalize our LEGO pyramid once it's built?
Extend the activity by adding internal supports (long plates) as you build layers, creating colored symmetrical patterns or sticker motifs on each side, writing the layer count and brick measurements on the paper as a plaque, and photographing the finished pyramid to post on DIY.org.
Watch videos on how to make a pyramid using LEGO®
I Built the Pyramids in LEGO!
4 Videos

I Built the Pyramids in LEGO!
LEGO Pyramid 001 Building Instructions - Basic MOC "How To"
Building a Pyramid with Bricks: Inspired by the Great Pyramid - Use Lego or Other Brands!
BUILDING A PYRAMID OUT OF LEGO | Build Tutorial | MOC
Facts about building and engineering with LEGO
🧱 Sum of squares: a square-layer pyramid with n layers needs 1^2 + 2^2 + ... + n^2 = n(n+1)(2n+1)/6 bricks total.
🏗️ Wider bases lower a structure's center of mass, making pyramids much harder to tip — a simple stability trick engineers use.
🧩 Fun fact: six 2x4 LEGO bricks can be combined in 915,103,765 different ways!
🔺 Symmetry surprise: a regular square pyramid has four planes of symmetry that pass through the apex and opposite sides.
📏 LEGO studs are spaced 8 mm apart — great for planning layer sizes and counting how many bricks you'll need.
How do you build a LEGO® pyramid?
What materials do I need for a LEGO® pyramid?
What ages is building a LEGO® pyramid suitable for?
What are the benefits of making a LEGO® pyramid?
