Make a parafoil
Make a simple parafoil kite using plastic bags, straws, tape, and string; test flight stability and learn about lift, drag, and air pressure.


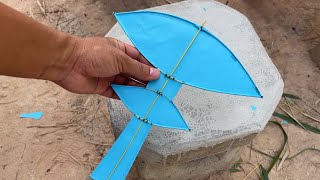
Step-by-step guide to make a parafoil kite
🪁Make Your Own FLYING Kite in Minutes for Kids!🪁@sknurul4766SNKidsArtsandCarfts
Step 1
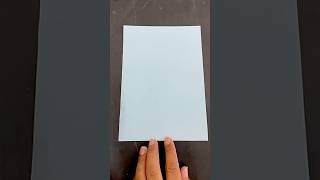
Lay out all materials on a clean table so you can see everything.
Step 2
Cut one rectangle from the plastic bag about 60 cm long and 30 cm wide using scissors.
Step 3
Fold the rectangle in half lengthwise so the short edges meet and you have two plastic layers.
Step 4
Slide three drinking straws across the width between the two layers and space them evenly from front to back.
Step 5
Tape along both sides of each straw to seal the straw between the two plastic layers while leaving the folded front edge open for air to enter.
Step 6
Tape the straw ends at the left and right edges of the kite so the straws cannot slide out.
Step 7
Make two small reinforced holes at the two bottom corners of the kite using scissors or by twisting a small piece of tape over each hole.
Step 8
Tie a 30 cm length of string to each bottom corner hole and pull the knots tight.
Step 9
Tie the two corner strings together with a knot and attach a 1 m main flying line to that knot to form the bridle.
Step 10
Cut a 60 cm tail from extra plastic and tape it to the rear center of the kite for stability.
Step 11
Go outside with an adult to a wide open area on a calm day away from trees and power lines.
Step 12
Have the adult hold the kite facing into the wind at arm’s length so the open front can fill with air.
Step 13
Walk backwards slowly while letting the main line out until the kite catches air and lifts.
Step 14
Gently move the bridle knot a little forward or back to see how lift and stability change and make one small adjustment at a time.
Step 15
Take a photo of your flying parafoil and share your finished creation on DIY.org.
Help!?
What can we use if we don't have drinking straws or a large plastic bag?
If you don't have drinking straws, substitute thin wooden skewers or cut-up plastic tubing, and if you can't find a large plastic bag use a clean garbage bag or a shower curtain sheet and follow the same folding and taping steps to seal the supports.
My parafoil won't lift or keeps collapsing — what should I check?
Check that the folded front edge is left open to let air in, confirm each straw is taped along both sides and its ends are taped at the left and right edges so they can't slide out, make sure the 60 cm tail is taped to the rear center, and try moving the bridle knot a little forward or back as described to improve lift and stability.
How can we adapt the activity for different ages?
For preschoolers (3–5) have an adult handle the scissors and make the reinforced holes while the child helps slide and decorate the straws and tail, for 6–9 year olds let them cut the 60 cm x 30 cm rectangle and tape the straws with supervision, and for 10+ let kids measure, tie the 30 cm corner strings and 1 m flying line themselves and experiment with bridle position and tail length during the 'walk backwards' test.
How can we improve or personalize the parafoil after the basic build?
Decorate the plastic before folding, try different straw spacing from front to back in step 3, add extra or longer tails taped to the rear center for more stability, and take the photo at the end to compare versions when you share on DIY.org.
Watch videos on how to make a parafoil kite
How to Make a Simple Kite for Kids |Fun and Easy Tutorial #diy #origami #papertoys #flyingfun #short
4 Videos
How to Make a Simple Kite for Kids |Fun and Easy Tutorial #diy #origami #papertoys #flyingfun #short
How to make a mini kite - Kite for kids - Diy kite
Colourfull paper kite , how to make kite at home , easy paper flying kite

How to Make a Simple Kite - Easy DIY Guide for Beginners! #mrworldlover #kite
Facts about aerodynamics and kite making
🪁 Kites have been flown for more than 2,000 years—early records come from ancient China.
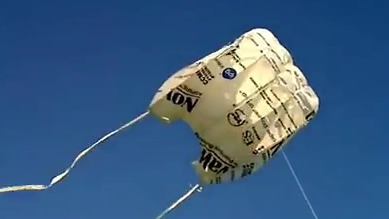
🌬️ A parafoil has no rigid frame; it inflates with wind and acts like an inflatable wing to create lift.
✈️ Lift happens because air moves faster over the top surface than underneath—this pressure difference helps kites and airplanes rise.
🧰 Adding a tail or small weights changes drag and balance, which can make a kite much more stable in gusty winds.
♻️ You can upcycle plastic bags and straws into a light, wind-catching parafoil—lightweight materials are key for flight.
How do you make a simple parafoil kite using plastic bags and straws?
What materials do I need to build a parafoil kite from plastic bags?
What ages is making a parafoil kite suitable for?
What are the benefits of building and flying a parafoil kite?
