Make a model of metamorphosis
Make a 3D model showing insect metamorphosis stages using clay, paper, and paint; label and explain each stage to learn life cycles.


Step-by-step guide to make a 3D model of insect metamorphosis
Metamorphosis for Kids | Learn about the life cycle of insects and amphibians
Step 1
Find a clean flat workspace and put all your materials within reach.
Step 2
Pick an insect to model (like a butterfly) and draw four boxes labeled Egg Larva Pupa Adult on a sheet of paper to plan where each stage will go.
Step 3
Cut the cardboard or shoebox lid to the size you want for your display base.
Step 4
Cover the top of the base with plain paper or paint it a background color.
Step 5
Roll tiny balls of clay to make the eggs.
Step 6
Gently press the clay eggs onto the base inside the box labeled Egg.
Step 7
Roll and shape clay into a worm-like larva.
Step 8
Use a pencil to press lines or tiny marks into the larva for texture.
Step 9
Shape an oval clay pupa (chrysalis) on its own.
Step 10
Shape a small clay body for the adult insect.
Step 11
Cut wing shapes from paper and glue them to the clay body to make the adult insect.
Step 12
Paint each model stage with colours you like and let the paint dry completely.
Step 13
Write a short label for each stage that explains what happens there.
Step 14
Cut out the labels and glue each one beside its matching model on the base.
Step 15
Take a photo of your finished metamorphosis model and share your creation on DIY.org.
Help!?
What can we use instead of modeling clay or a shoebox lid if we don’t have them?
Use play-dough, salt-dough, or air-dry clay in place of modeling clay and substitute a cereal box panel or sturdy cardboard for the shoebox lid display base.
My clay eggs won’t stick to the base or the paper wings fall off the adult — how can I fix that?
Lightly score the cardboard where you press the clay eggs and secure them with a dab of white glue, and for wings insert a toothpick into the clay body or use craft glue pressed under the paper wing fold to hold them in place.
How can I adapt this metamorphosis model for younger or older children?
For younger children, pre-cut the four labeled boxes, provide soft play-dough and stickers and skip painting, while older kids can use polymer clay, wire armatures for the adult, add fine texture with tools, and write more detailed scientific labels.
How can we extend or personalize the finished project beyond the basic model?
Add movable flaps or a sliding strip to reveal stages in order, glue real leaves or fabric to create a habitat background on the painted base, and include short fact labels beside each stage before photographing to share on DIY.org.
Watch videos on how to make a 3D model of insect metamorphosis
🦋 METAMORPHOSIS of the BUTTERFLY for Kids 🌿 🔄 Egg → Caterpillar → Chrysalis → Butterfly
4 Videos
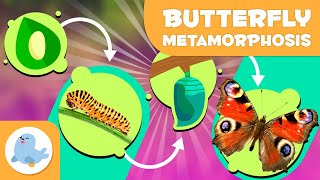
🦋 METAMORPHOSIS of the BUTTERFLY for Kids 🌿 🔄 Egg → Caterpillar → Chrysalis → Butterfly
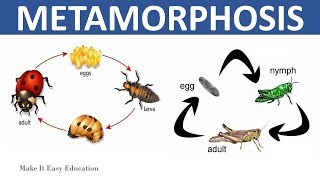
METAMORPHOSIS || COMPLETE AND INCOMPLETE METAMORPHOSIS || SCIENCE EDUCATIONAL VIDEO FOR KIDS
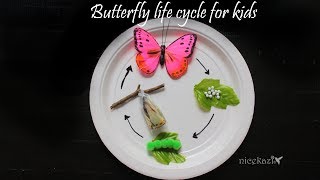
How to make 3D Butterfly life cycle for kids :Metamorphosis, science project, STEM project
The Life Cycle Of A Honey Bee Video For Kids - Complete Metamorphosis of a Bee
Facts about insect life cycles
🐛 Many insects with complete metamorphosis go through four stages: egg, larva, pupa, and adult.
🦋 Some caterpillars can increase their body mass by more than a thousand times before becoming pupae.
🐞 Beetles are the largest order of animals—scientists have described hundreds of thousands of beetle species.
🧪 Hormones like ecdysone and juvenile hormone help time molts and trigger the dramatic changes of metamorphosis.
🎨 You can recreate each stage in a 3D model using clay for bodies, paper for wings, and paint for tiny details.
How do you make a 3D model of insect metamorphosis?
What materials do I need for this metamorphosis model?
What ages is this activity suitable for?
What safety tips should I follow for this craft?
