Make a hardcover book
Make a small hardcover book using paper, cardboard, glue, and fabric; measure, fold, bind pages, and design a personalized cover.

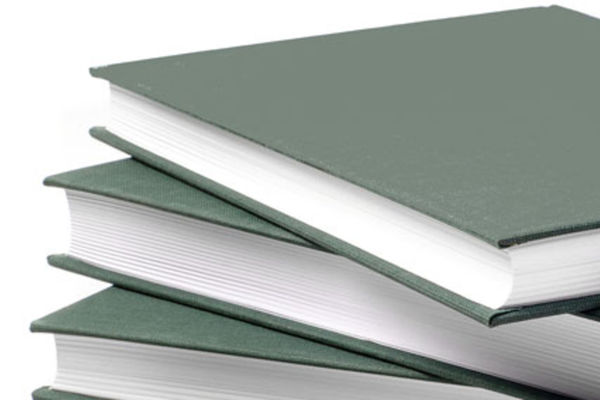

Step-by-step guide to make a small hardcover book
CREATE Your Own HARD COVER Book from Scratch! - BACK TO SCHOOL SERIES
Step 1
Pick 8 to 16 sheets of paper to be your book pages.
Step 2
Stack the sheets neatly and fold the entire stack in half to make the book block.
Step 3
Run a ruler along the folded edge to make a sharp crease.
Step 4
Use binder clips to clamp the folded book block along the spine so the pages stay aligned.
Step 5
Use a brush or popsicle stick to spread a thin even layer of glue along the clamped spine.
Step 6
Apply a second thin coat of glue along the spine and leave the book clamped until the glue is dry.
Step 7
Measure the height and width of the closed book block and add 5 millimetres to each side for the cover size.
Step 8
Cut two rectangles from the thin cardboard for the front and back covers using your measurements.
Step 9
Cut a cardboard strip for the spine that matches the height of the covers and the thickness of the book block.
Step 10
Lay your fabric face down and place the two covers and the spine on it with a small gap between spine and covers.
Step 11
Trace around the cardboard pieces leaving a 1 centimetre fabric border and cut the fabric roughly to size.
Step 12
Spread glue on the top side of the cardboard pieces and press them onto the fabric in the traced positions.
Step 13
Fold the fabric edges over the cardboard and glue them on the inside so the cover is neatly wrapped.
Step 14
Glue the inside of the fabric-covered cover where the spine will sit and press the dried book block into place aligning the spine; clamp until secure.
Step 15
Decorate your cover with colouring materials and share a photo of your finished hardcover book on DIY.org
Help!?
What can I use instead of thin cardboard or fabric if I can't find them?
Use flattened cereal or shipping boxes cut to the cover measurements instead of thin cardboard, and replace fabric with an old T‑shirt or sturdy wrapping paper when following the step to lay your fabric face down and press the cardboard pieces onto it.
My pages are coming loose or the glue is clumping on the spine — how can I fix that?
Make sure the pages are tightly clamped with binder clips, spread a thin even layer of glue using the brush or popsicle stick as instructed, apply the second thin coat only after the first tack dries, and wipe any excess glue off the spine before clamping until fully dry.
How can I adapt this hardcover book project for different age groups?
For younger children (4–6) use 8 sheets, pre-cut the cardboard and fabric and have an adult handle the glue and clamping steps, while older kids (10+) can use 12–16 sheets, measure and cut their own spine strip, or sew simple signatures before gluing for a stronger book block.
What are some ways to enhance or personalize our finished hardcover book?
After cutting the cover to size and wrapping the fabric as directed, glue a small pocket to the inside cover for keepsakes, add coloured endpapers to the first and last pages, and decorate the front and spine with embossed letters, stickers, or fabric paint before sharing a photo on DIY.org.
Watch videos on how to make a small hardcover book
Step-by-step case binding tutorial
4 Videos
Step-by-step case binding tutorial
![📚 Easy LOOSE SHEET BOOKBINDING 👉 Make Your Own DIY Hardcover Book [Step by Step] 📖✂️](https://img.youtube.com/vi/ShcYQv0l27Q/mqdefault.jpg)
📚 Easy LOOSE SHEET BOOKBINDING 👉 Make Your Own DIY Hardcover Book [Step by Step] 📖✂️

Bookbinding 101 - Make your hardcover
Bookbinding Basics: Chapter 6 - Making a Hardcover Book: The Sewn Boards Binding
Facts about bookbinding for kids
📚 Bookbinding began over 2,000 years ago when the codex replaced scrolls, making books easier to open and read.
✂️ Folding a single sheet into folios or signatures is how many handmade books get their pages—one sheet can become 4, 8, or more pages depending on the fold.
🧵 Case binding (hardcover) usually combines glued boards with a cloth or paper cover and sometimes sewn signatures for extra strength.
🧮 Even a 1 mm measuring mistake can cause a cover or spine to not fit right—careful measuring makes a book look neat and professional.
🎨 Endpapers are the sheets glued to the inside covers; artists often decorate them with patterns, maps, or secret drawings.
How do you make a small hardcover book?
What materials do I need to make a hardcover book?
What ages is making a hardcover book suitable for?
What are the benefits and safe variations of making a hardcover book?
