Make a giant puppet
Make a giant puppet from cardboard, fabric, sticks, and string; create movable limbs, decorate its face, and put on a short puppet show.


Step-by-step guide to make a giant puppet
No Sew Puppet Build - Easy to Follow - Make a Puppet Easy
Step 1
Gather all materials on a clear table and make a clean workspace to craft on.
Step 2
Draw a big puppet body and separate arm and leg shapes on the cardboard.
Step 3
Cut out the puppet body and the separate limb pieces from the cardboard.
Step 4
Tape each limb to the body at the shoulder or hip so the limb can swing freely as a hinge.
Step 5
With adult help make a small hole near the top of each cardboard limb.
Step 6
Thread a length of string through each hole and tie a knot so the string is secure on the limb.
Step 7
Tie the other ends of the strings to a horizontal control stick and space the strings so each limb moves when you pull its string.
Step 8
Tape a longer stick to the back of the puppet to use as a handle for holding it upright.
Step 9
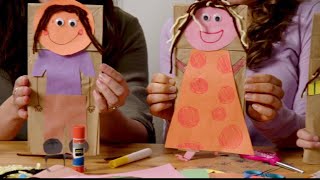
Cut fabric pieces to make clothes and glue them onto the puppet body.
Step 10
Decorate the puppet’s face and details using colouring materials and glue-on decorations.
Step 11
Hold the handle and practice pulling individual strings to move the limbs and put on a short puppet show.
Step 12
Share your finished giant puppet and a photo or video of your puppet show on DIY.org.
Help!?
What can I use if I don't have cardboard, string, or a control stick?
Use poster board or flattened cereal boxes for the puppet body and limbs, replace string with yarn or ribbon for threading through the limb holes, and use a dowel, ruler, or broom handle as the horizontal control stick or back handle.
My puppet's limbs won't swing freely or the hole rips—how do I fix that?
Loosen the tape hinge by using a narrow tape tab or swap to a brad fastener at the shoulder/hip, and reinforce small holes with a punched washer or a bit of tape before threading and tying the string so the hole doesn't tear.
How can I adapt this project for different ages?
For younger kids have an adult pre-draw and pre-cut the body and limbs and help make the holes and tie the strings, while older kids can design jointed elbows, space multiple strings on separate control sticks, and sew or paint more detailed clothes and decorations.
How can we make the puppet show more impressive or personal?
Add brad-jointed fingers or elbows, glue-on LED tea lights to the costume, build a cardboard stage backdrop, record and edit the performance, and then share the photo or video on DIY.org as the final step.
Watch videos on how to make a giant puppet
How to Make a Muppet from Scratch! - Puppet Nerd - DIY
4 Videos

How to Make a Muppet from Scratch! - Puppet Nerd - DIY
How to Create a Puppet | Come Learn with Me

How To Make A Puppet! - Puppet Building 101 - How to Make a Snoof

Kids Activity: Introduction to Shadow Puppetry
Facts about puppetry for kids
🎭 Puppetry has been practiced for thousands of years — shadow and string puppets appear in ancient cultures across Asia and Europe.
🪆 Jim Henson, creator of the Muppets, began performing simple puppets on local TV in the 1950s and helped make puppetry a pop-culture staple.
🪢 A marionette is a puppet controlled from above by strings attached to a wooden control bar (often called a controller).
📦 Corrugated cardboard, developed in the 19th century, is lightweight, strong, and perfect for building big puppet bodies.
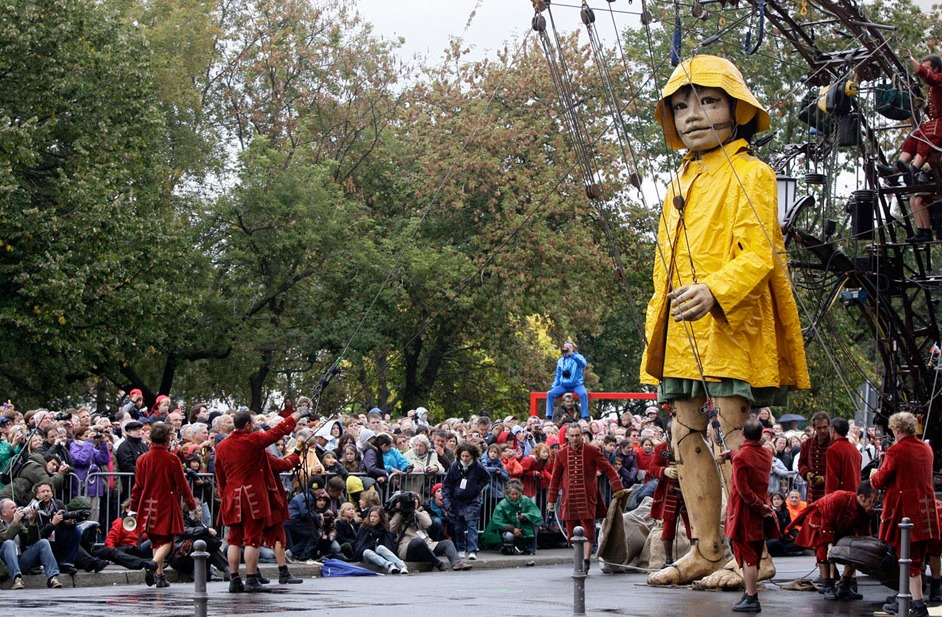
🎪 Giant puppets are popular in parades and street theatre because their size makes characters visible and exciting from far away.
How do you make a giant puppet and put on a short puppet show?
What materials do I need to make a giant puppet?
What ages is making a giant puppet suitable for?
What safety tips should I follow when making a giant puppet?
