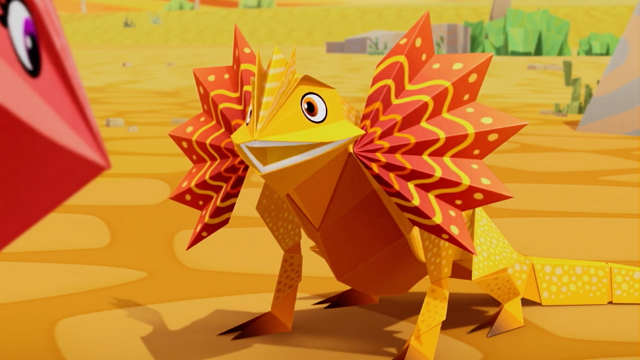
Make A Fun Lizzy Neck Frill
Make a colorful lizard-style neck frill using paper, cardboard, and elastic. Decorate with paints and learn about reptile defense displays.


Step-by-step guide to Make A Fun Lizzy Neck Frill
Step 1
Wrap a strip of construction paper gently around your neck and use a pencil to mark where the ends meet.
Step 2
Cut the paper strip at the mark so the band fits comfortably around your neck.
Step 3
Fold the paper band in half lengthwise to make it stronger.
Step 4
Draw a scalloped lizard-frill shape along the long open edge of the folded band with your pencil.
Step 5
Cut along the scalloped line to create the frill edge while keeping the fold intact.
Step 6
Place the paper frill on the cardboard and trace its exact outline with a pencil.
Step 7
Cut out the cardboard frill shape to make a firm backing for your paper frill.
Step 8
Glue the paper frill onto the cardboard backing with a glue stick and press it flat to stick.
Step 9
Decorate the frill with bright paints or markers to make reptile patterns and let your creativity shine.
Step 10
Allow the paint and glue to dry completely before you move on.
Step 11
Punch a hole through each end of the frill band using the hole punch.
Step 12
Thread the elastic through the holes and tie secure knots so the elastic fits comfortably behind your head or neck.
Step 13
Put on your lizard neck frill to check the fit and comfort.
Step 14
Ask an adult to tell you a short fact about how some lizards flare frills to scare predators so you learn about reptile defense displays.
Step 15
Share a photo or video of your finished lizard neck frill and what you learned on DIY.org
Help!?
What can we use instead of elastic or a hole punch if we don't have them?
If you don't have elastic or a hole punch, use ribbon or yarn threaded through holes you carefully pierce with a sharp pencil or paperclip in the final threading step, or tape the band ends together instead of punching and knotting elastic.
My paper frill keeps tearing or the scallops look messy—how can I fix that?
If the paper tears or scallops get messy, glue the paper frill onto the cardboard backing before punching holes and reinforce the folded band edge with clear tape or an extra cardboard strip so cutting and hole-punching are sturdier.
How can I change the activity for younger kids or make it more advanced for older kids?
For younger children, have an adult pre-measure, cut the band, and pre-punch holes so they can focus on drawing and coloring, while older kids can fold and cut the scallops themselves, glue the frill to cardboard, and add layered details or wire for structure.
What are some fun ways to extend or personalize the lizard neck frill?
To personalize and make the frill more dramatic, paint reptile patterns as instructed, then glue on sequins, feathers, googly eyes, or slip a thin craft wire between the paper and cardboard backing before gluing so the frill can be posed upright.
Watch videos on how to Make A Fun Lizzy Neck Frill
Origami Frilled Lizard | Origami animals | Origami tutorial | Paper craft
4 Videos
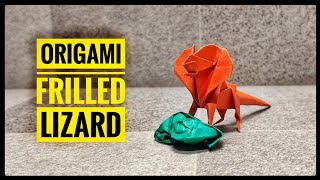
Origami Frilled Lizard | Origami animals | Origami tutorial | Paper craft
Neck Frill Straps Baby Frock Cutting and Stitching Tutorial #shorts 2

Easy Clown Neck Frill - DIY
Double Frill Designer Neck Full-Flare Baby Frock Easy Cutting & Stitching Tutorial #shorts 3
Facts about reptile defense displays
🦎 The frilled lizard can flare its neck frill to look much bigger and startle predators — a dramatic living cape!
🐯 Deimatic (startle) displays are used by many animals to scare predators without fighting — bluffing can save lives!
🌈 Some lizards, like anoles, display bright throat fans called dewlaps to attract mates and warn rivals.
🎨 Layering and folding paper or cardboard can make a lightweight but sturdy prop — perfect for kid-friendly costumes.
✂️ The rubber band (elastic) was first patented in the 1840s and is super handy for making wearable, stretchy attachments.
How do you make a Lizzy Neck Frill?
What materials do I need for a Lizzy Neck Frill?
What ages is this activity suitable for?
What are the benefits of making a Lizzy Neck Frill?
