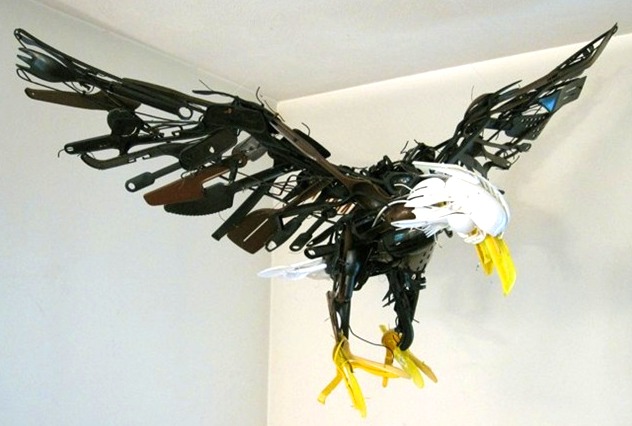
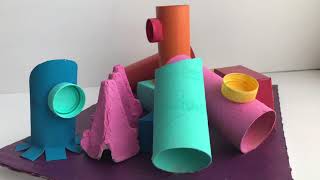
Make a found object sculpture
Collect safe found objects and recycled materials, arrange and attach them with glue or tape to build a balanced sculpture that tells a small story.


Step-by-step guide to make a found object sculpture
Found Object Art Lesson | Assemblage Art Tutorial
Step 1
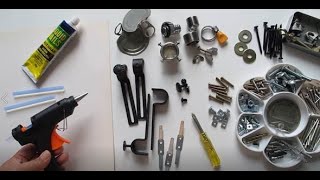
Gather all the small safe found objects and recycled materials and put them on your workspace or tray.
Step 2
Pick a simple story idea or feeling your sculpture will show and say it out loud in one sentence.
Step 3
Sort your objects into groups by size color or shape to match parts of your story.
Step 4
Choose a sturdy base to build your sculpture on.
Step 5
Place the largest objects on the base to plan where the main pieces will go.
Step 6
Stack or arrange pieces without glue to test how they balance and move them until they sit steady.
Step 7
Use scissors to cut fold or shape any recycled pieces so they fit your design.
Step 8
Attach the first large pieces to the base using glue or tape.
Step 9
Attach additional objects one at a time using glue or tape.
Step 10
Gently nudge the sculpture to test its balance and see if anything wobbles.
Step 11
Use a marker or labels to add names or small details that help tell your story.
Step 12
Let all glue or tape dry completely before you touch the sculpture again.
Step 13
Share a photo and one-sentence story about your finished sculpture on DIY.org
Help!?
What can we use instead of glue or special scissors if we don't have them?
If you don't have glue use strong tape (masking, packing, or double-sided) or reusable sticky tack to 'Attach the first large pieces to the base using glue or tape', and if you lack scissors tear soft paper by hand or have an adult pre-cut cardboard and recycled pieces for the 'Use scissors to cut, fold or shape' step.
My sculpture keeps toppling over when I test it—what should I try?
Follow 'Place the largest objects on the base to plan where the main pieces will go' and then lower the center of gravity by moving heavier pieces to the base, flattening bottoms with tape or folded cardboard, and retesting the 'Stack or arrange pieces without glue' step until nothing wobbles.
How can I adapt this project for younger or older kids?
For younger children simplify the 'Pick a simple story idea' to one-word prompts, provide large safe objects and pre-cut recycled pieces and adult help for 'Use scissors' and 'Attach... using glue or tape', while older kids can add fine details, mechanical moving parts, or stronger adhesives under supervision.
How can we extend or personalize the sculpture after it's built?
After the 'Let all glue or tape dry completely' step, personalize by painting pieces, adding battery fairy lights, creating hinged parts for movement, and using a marker or labels to add names or small story details before you 'Share a photo and one-sentence story'.
Watch videos on how to make a found object sculpture
Make a Sculpture Using Recycled Materials - Art with Ms. Natasha - Art for Kids
4 Videos
Make a Sculpture Using Recycled Materials - Art with Ms. Natasha - Art for Kids
Found Object Art - Art and craft for kids - Learn Super Easy Ideas - Art projects for students
Found Object Assemblage Tutorial
Art Tutorial | Fun with Found Objects
Facts about recycled crafts and sculpture for kids
🧩 Assemblage art is made by combining everyday objects into a new sculpture—artists glue, nail, or tie items together to create something unexpected.
♻️ Upcycling gives trash a second life; community art projects often turn bottles, cardboard, and fabric into giant public sculptures.
🔧 Alexander Calder popularized the mobile, a balanced hanging sculpture that uses counterweights so pieces float and gently move.
🚽 In 1917 Marcel Duchamp challenged art traditions with 'Fountain,' a readymade urinal that helped start conversations about found-object art.
🧼 Safety first: artists clean, sand, and remove sharp bits from found objects and firmly secure loose pieces with glue or tape before displaying work.
How do I make a found object sculpture with my child?
What materials do I need to make a found object sculpture?
What ages is a found object sculpture suitable for?
What are the benefits of making found object sculptures?
