Make a ceramic clay sculpture
Make a small ceramic-style clay sculpture using oven-bake or air-dry clay, shape with safe tools, smooth details, sand gently, and paint when dry.


Step-by-step guide to make a small ceramic-style clay sculpture
How to Make a Hand Built Ceramic Sculpture: Step by Step Tutorial for Beginners
Step 1
Cover your work surface with wax paper or an old sheet to keep it clean.
Step 2
Wash and dry your hands so your clay stays neat and free of dirt.
Step 3
Tear off a piece of clay about the size of a small egg.
Step 4
Knead the clay until it feels soft and warm to make it easy to shape.
Step 5
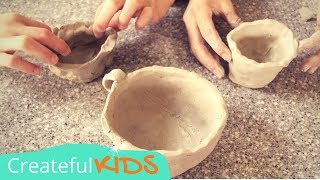
Shape the clay with your fingers into the basic form of your sculpture.
Step 6
Score the clay where you want to add extra parts using a toothpick.
Step 7
Press new clay pieces onto the scored areas to attach them firmly.
Step 8
Use plastic sculpting tools or a butter knife to add small details like eyes or lines.
Step 9
Smooth the surface using a damp fingertip and blot excess water on a paper towel.
Step 10
Dry or bake your sculpture according to your clay type: if oven-bake clay ask an adult to preheat the oven to 265°F (130°C) and bake on a tray for about 15 minutes per 1/4 inch (6 mm) of thickness; if air-dry clay leave your piece on a flat surface to dry for about 24 hours and turn it over once after 12 hours.
Step 11
Sand your sculpture gently with fine 220 grit sandpaper once it is completely cool or fully dry.
Step 12
Paint your sculpture with acrylic paints using clean brushes for each color.
Step 13
Let the paint dry completely before touching your sculpture again.
Step 14
Share your finished sculpture on DIY.org.
Help!?
What can I use if I don't have wax paper, plastic sculpting tools, or 220-grit sandpaper?
Use a silicone baking mat or an old sheet to cover the work surface, a clean plastic spoon, butter knife, or toothpick for shaping and detailing, and a very fine emery board or fine-grit sanding sponge instead of 220-grit sandpaper.
What should I do if parts of my sculpture keep falling off or cracking during drying or baking?
Re-score both surfaces with a toothpick, press a thin layer of fresh soft clay onto the joint, smooth the seam with a damp fingertip, and let the piece fully dry before baking or painting.
How can I adapt this clay project for different age groups like toddlers, school-age kids, and teens?
For toddlers give larger pre-kneaded egg-sized clay and simple pinch shapes with close supervision and use air-dry clay, for school-age kids have them knead, score, and add parts with toothpicks and simple sculpting tools, and for teens let them bake at 265°F (130°C), sand with 220 grit, and paint fine details with acrylics.
How can we extend or personalize the sculpture after following the basic steps?
Press leaves, stamps, or small found objects into the clay when adding details, embed a tiny magnet or loop at the scored attachment point for function, then sand, paint with acrylics, seal with clear varnish, and share on DIY.org.
Watch videos on how to make a small ceramic-style clay sculpture
Step by step ceramic sculpture: hand building a clay figure
4 Videos
Step by step ceramic sculpture: hand building a clay figure
How I make a ceramic sculpture: step by step tutorial
How to sculpt ceramic sculpture: step by step clay sculpture
How to Make Pottery | Kids Pottery Term Lesson
Facts about clay sculpting for kids
🏺 Pottery is one of the world’s oldest crafts — people have made useful and decorative clay items for thousands of years.
🔥 Firing clay turns it into ceramic, making it much harder and more durable than unfired clay.
🍪 Polymer clay cures in a regular household oven, so you can bake small sculptures without needing a kiln.
💧Air-dry clay hardens as water evaporates — covering pieces while they dry can help prevent cracks.
🪥 Gentle sanding after the clay is fully dry, then painting, makes little sculptures look super smooth and colorful.
How do I make a small ceramic-style clay sculpture at home?
What materials and tools do I need to make a clay sculpture?
What ages is making small clay sculptures suitable for?
What are the benefits, safety tips, and variations for clay sculpture projects?
